• Skip to primary navigation
  • Skip to main content
  • Skip to primary sidebar
  • Skip to footer
  • Home
  • About Me
  • Advertise
  • Contact

I Dig Pinterest

Creative "Pin"-spiration

  • Bloglovin
  • Email
  • Facebook
  • Instagram
  • Pinterest
  • RSS
  • Twitter
  • Recipes
  • Crafts
  • Parties
  • Printables
  • Home Improvement
  • Shop My Style

March 2, 2013

Candy Jar Pedestals

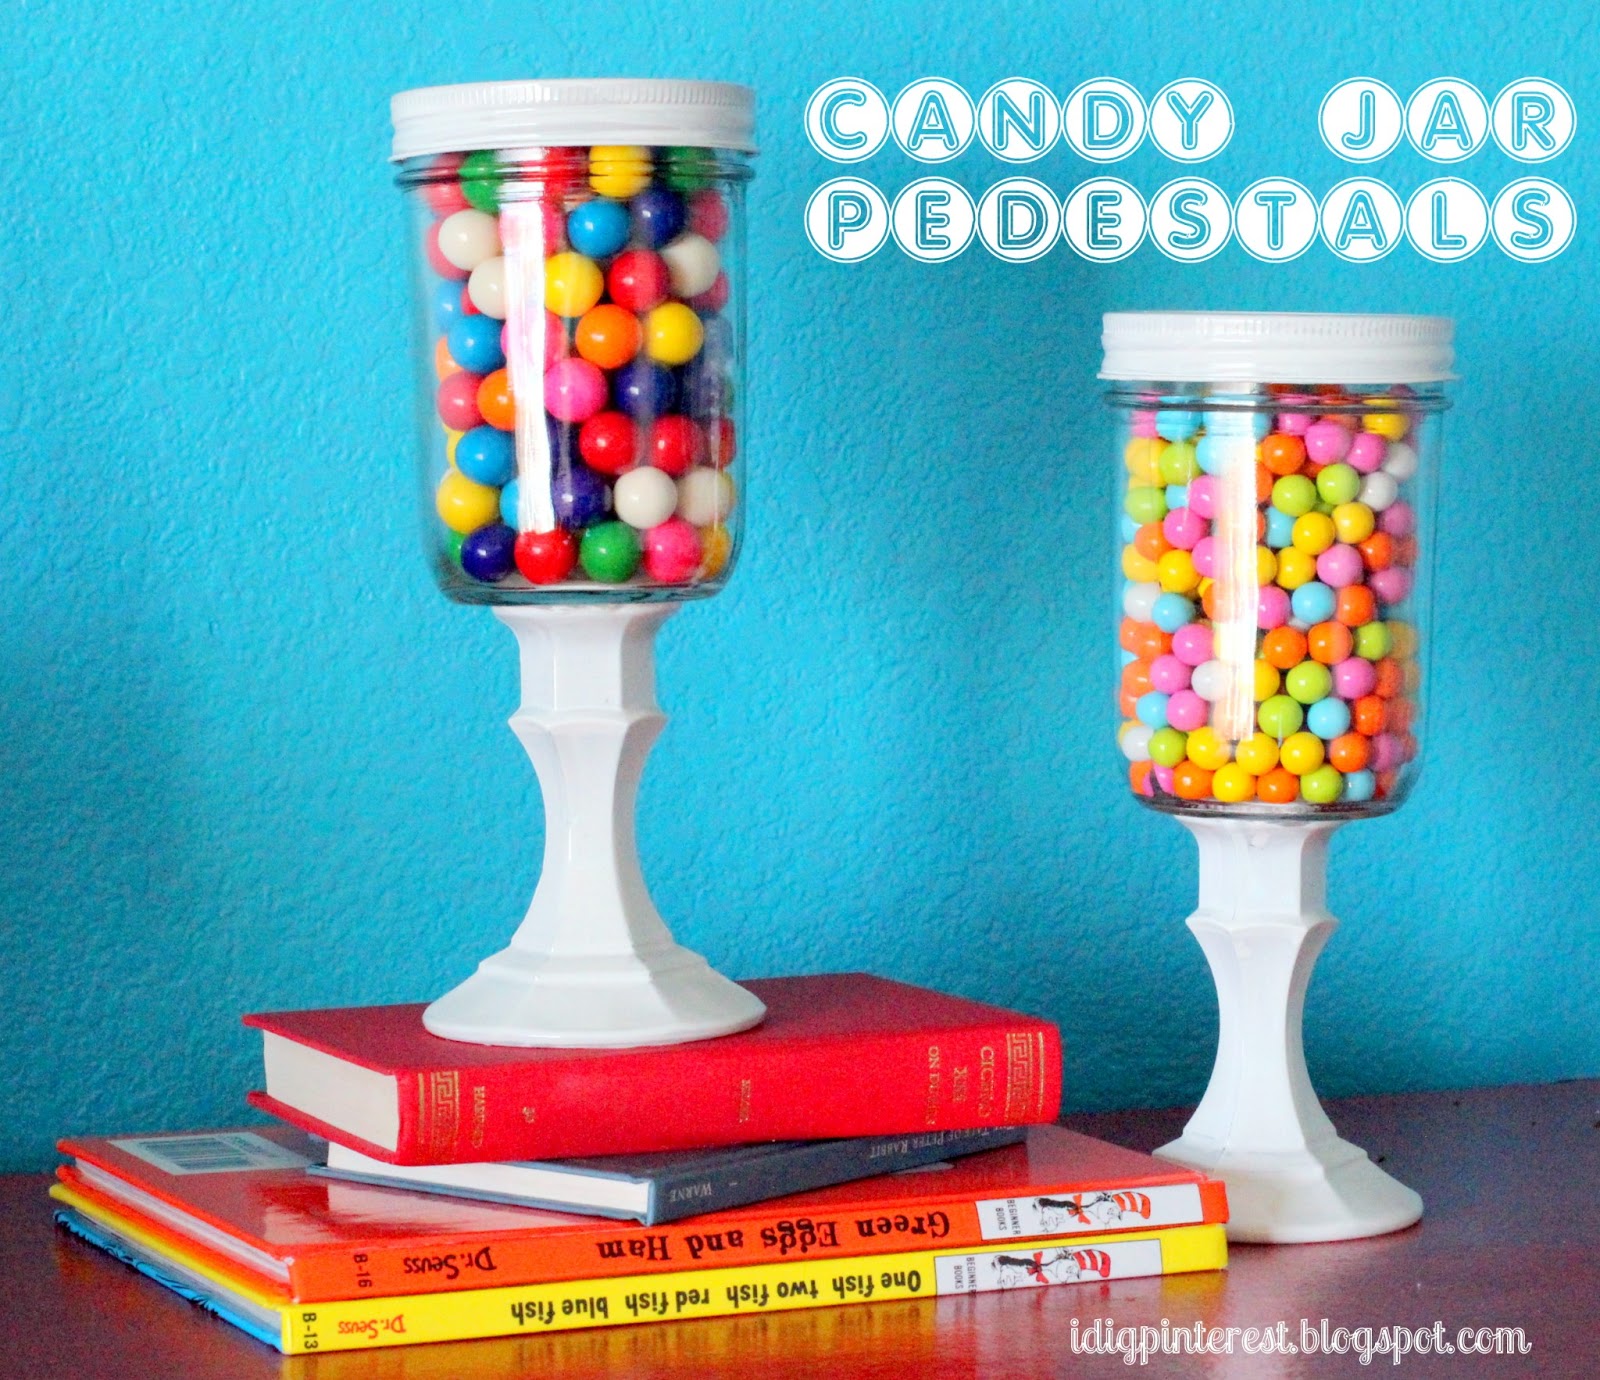
In honor of Dr. Seuss’s birthday today, I wanted to share how to make these fun, colorful candy jar pedestals that are perfect for any party or holiday.

The part that I love most about them is that they’re both decorative and functional!  Use them as a centerpiece for a party table, to add some color to a holiday mantel or shelf, or set them on your dining room table or kitchen counter so the (big) kids can grab a sweet snack when they come through.

I painted them white so I can fill them with different treats according to the holiday or party…and they work for every one!

I found this brilliant idea on eighteen25, and they are SO…easy to make!!


{MATERIALS}
Pint-Sized Mason Jars, Pickle Jars, or whatever other jars you’ve been saving
Glass Candlesticks (I found mine at the Dollar Tree)
Spray Paint
E6000 Glue
Candy  (I found some gumballs and sixlets at the Dollar Tree)
  1. Grab your jars, remove the lids, and spray paint them whatever color you choose.
  2. Spray paint the candlesticks also.
  3. Put a ring of glue around the tops of the candlesticks and center a jar on top of each.  Let set overnight for best results.
  4. Fill with sweet treats, put the lids on and use as a colorful, tasty decoration!
Don’t these just make you want to go read “Green Eggs and Ham” or “One Fish, Two Fish…”?  It must be the bright colors. :)These would be perfect for a Dr. Seuss themed party!

Filed Under: Crafts, Easter, Party Ideas, Uncategorized

Reader Interactions

Comments

  1. Diana - FreeStyleMama says

    March 2, 2013 at 4:11 pm

    Adorable! Love it!
  2. Ruthie Armstrong says

    March 4, 2013 at 2:35 am

    Gosh... I love this project! How totally fun :) I'm so glad you came to share at Super Saturday Show & Tell... come back again next week to party with me again :) xoxo~ Ruthie
  3. Selene @ Restoration Beauty says

    March 4, 2013 at 7:34 am

    Love love love this! I will try this diy project very soon!
  4. jamie@eighteen25 says

    March 4, 2013 at 6:36 pm

    They turned out super cute. Thanks for sharing.
  5. ms.composure says

    March 4, 2013 at 7:32 pm

    stopping by from the blog hop at:
    http://www.sumossweetstuff.com

    that turned out amazing! SO cute!!


    http://mscomposure.blogspot.com
    http://www.infinitelifefitness.com
  6. Chandra@The Plaid and Paisley Kitchen says

    March 5, 2013 at 12:29 am

    Oh I dig Pinterest too! These are really cute! Thank you so much for linking up at Show Me Your Plaid Monday's! You have been pinned I hope that you come back each week!
  7. Lauren says

    March 6, 2013 at 12:10 am

    Wow. These are really cool. So creative. I am not on pinterest. I guess I am missing out. I would love it if you would share this on my Tuesday link party.

    http://www.ifitsnotbaroquedesignblog.blogspot.com/2013/03/tuesday-link-party-9.html
  8. Jessica @ My World - Made By Hand says

    March 6, 2013 at 10:15 pm

    So cute! Thanks for linking up :)

    Jessica
    myworldmadebyhand.blogspot.com
  9. Amy Nordgren-Ditz says

    March 6, 2013 at 10:43 pm

    Super Cute!! I'm also a pinterest addicted but I haven't tried this project yet! I'm might have to try it soon!! Stopping by from Lil' Luna! .. I'm a new follower ;)
  10. Shannon says

    March 7, 2013 at 3:53 pm

    Darling!! These have been on my list of things to make for awhile! I may have to try and get some done before Easter!

    http://ikneadtobake.blogspot.com
  11. Julie @ Being Home says

    March 9, 2013 at 8:24 pm

    Too cute! I really need to try this.
  12. Shauna {The Best Blog Recipes} says

    March 17, 2013 at 5:40 pm

    Love these! They look so cute and easy :)
    Thanks for linking up to The Best Blog Recipe’s Weekend re-Treat #6!

    Wanted to stop by and pin your image to My Link Parties Craft/DIY & Recipe Boards while I was here.

    Shauna
    http://thebestblogrecipes.blogspot.com/
    http://ready2loseweight.blogspot.com/
  13. Jessica Anderson says

    March 20, 2013 at 4:10 am

    These turned out great! I'd love for you to come link up to our party, An Oldie but a Goodie where we like to show off all of our old projects. http://www.cutesycrafts.com/2013/03/an-oldie-but-goodie-10.html - Jessica
  14. Gluten Free Flour says

    March 28, 2013 at 10:45 am

    Wherever you plan to place your candy jar display, consider the area’s traffic. If you want to create a countertop display, but your countertop and register areas tend to stay crowded, plastic candy containers are your best bet.
  15. Micheal Hussey says

    March 22, 2014 at 9:46 am

    Hi I was searching for the blogs for many times, now I have reached at the right place.
    bubblegum casting
  16. david zeck says

    April 19, 2014 at 12:59 pm

    These blogs are quite incredible that have provided the best knowledge. bubblegum casting reviews

Primary Sidebar

Hi! I'm Christine, and I'm addicted to Pinterest! I love sharing creative "pin"-spiration by way of delicious recipes, fun crafts, party ideas, and DIY projects. I hope you'll stop by often!

Follow by email…

Popular Posts

  • Cake Mix Cherry Chip Cookies
  • Strawberry Cake Mix Cookies
  • Peanut Butter Mallow Bars
  • DIY Firecracker Table Centerpiece
  • Simple DIY Spring Decor Ideas
  • 20 Teacher Appreciation Gifts To Love

Footer

Mom It Forward: Blogger Network
Privacy Policy

Copyright © 2025 I Dig Pinterest · Implemented by WPopt

MENU
  • Home
  • About Me
  • Advertise
  • Contact
  • Recipes
  • Crafts
  • Parties
  • Printables
  • Privacy Policy