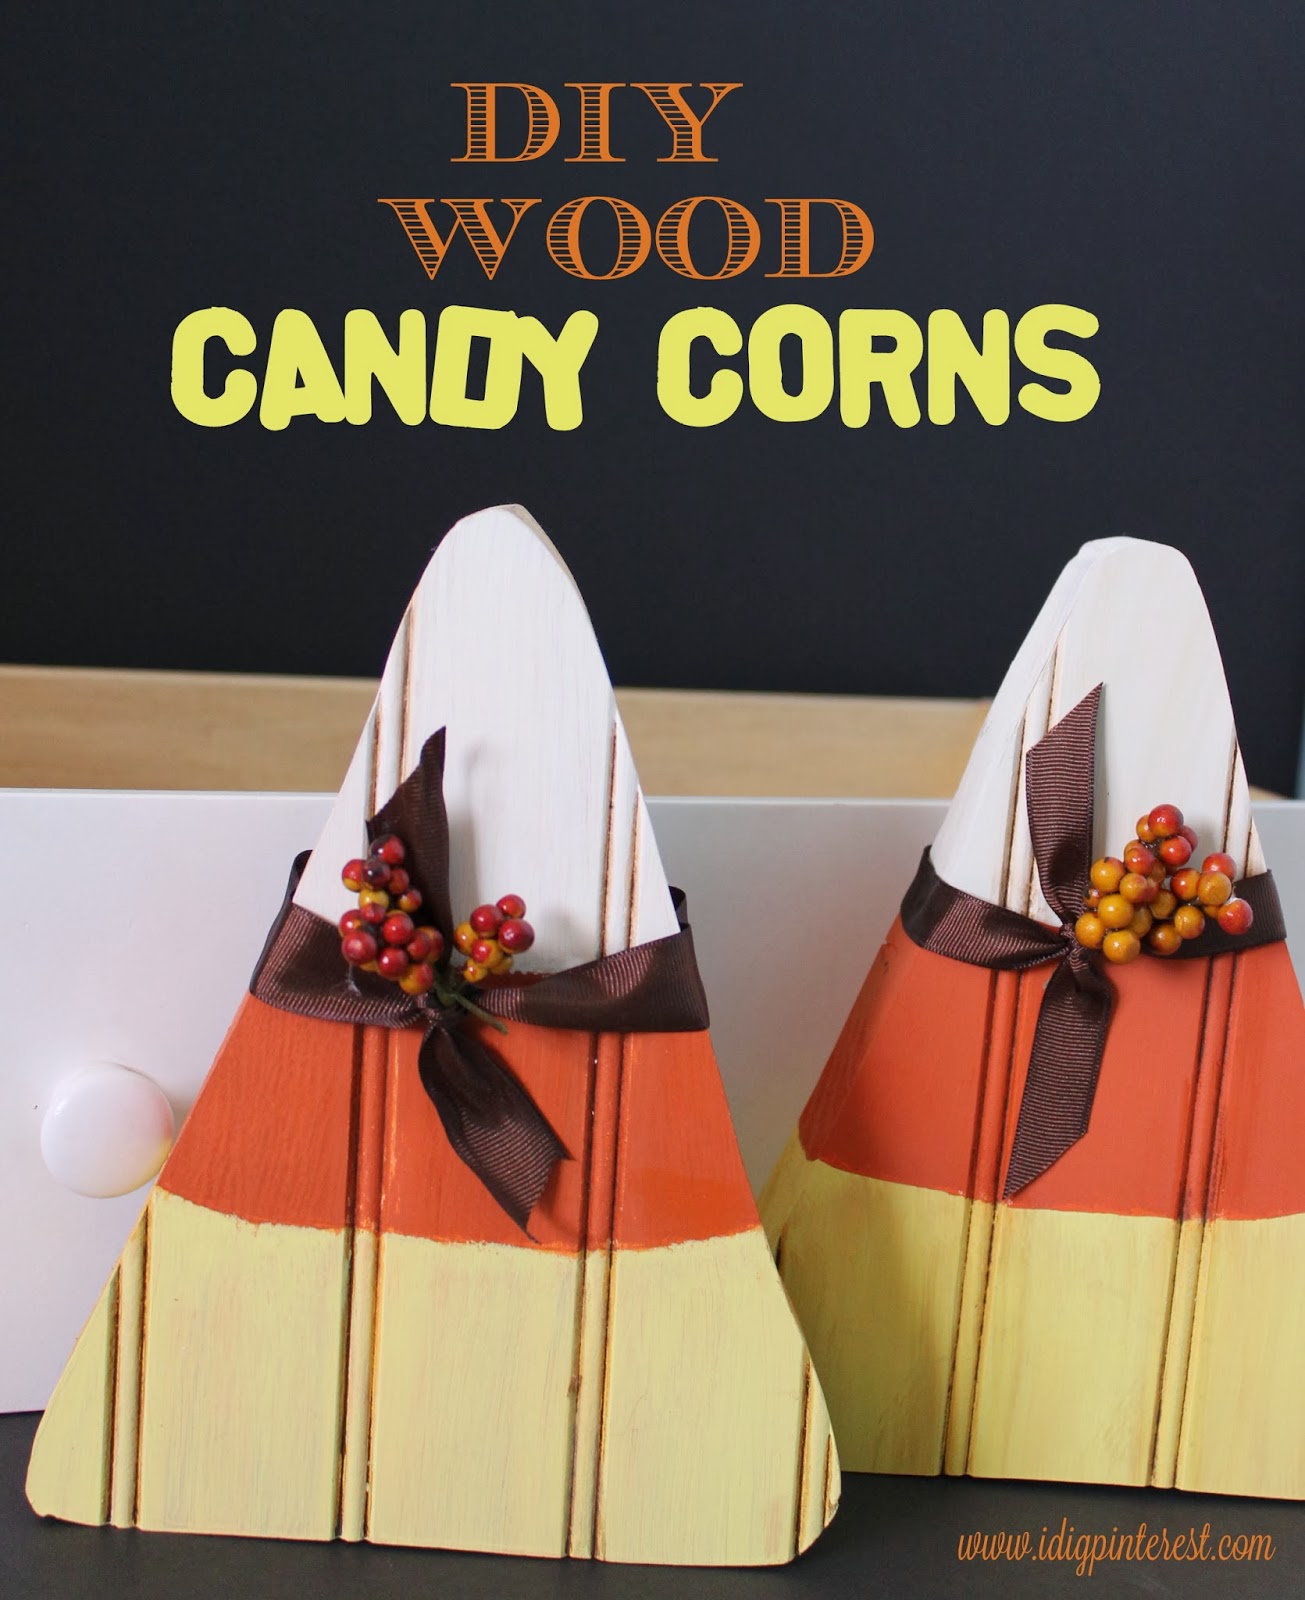
Candy corns are such a festive treat. When the white, orange and yellow striped confections pop up on store shelves, it’s a signal to me that fall is in the air.
So last year I wanted to bring a bit of that nostalgia into my home in a non-edible form. These stand-alone wood candy corns are a perfect autumn decor piece. I love that they give a huge pop of color to wherever you choose to put them and they can be left up for all of the autumn months-not just for October. They also make a great dining table centerpiece!
My friend and I got together last year and made some of these. They make a big statement with the stained beadboard-paneled top…down to the last detail of the cute berry picks tucked into brown grosgrain ribbon. It’s total eye candy (pun intended). 🙂
These do require the use of power tools, but it’s worth the extra effort-I promise.
{MATERIALS}
-A power saw to cut around the candy corns (We just used a small power hand-saw)
-Wood glue
-Wood Clamps (for best results, but I’ll tell you below how to do it if you don’t have any)
-Thick wood scraps or a 2×10-you want them to be able to stand on their own (each candy corn measures 7 1/2″ at the base and is 9″ tall)
-Sandpaper
-Beadboard/wainscoting-we had leftovers from the paneling that we put up in my son’s room
-White, orange and yellow craft paint
-Brown ribbon
-Two small berry picks
-Dark brown decorative glaze (mine is by Rust-Oleum from Home Depot)
- Begin by making a pattern for your candy corns. It’s basically a triangle shape with rounded corners. As I said above, mine measure 7 1/2″ at the base and are 9″ tall, but you can make them whatever size you’d like.
- Glue your beadboard to the top of your wood. Recommended: Use clamps on all the corners to ensure a tight bond. Not recommended, but can work: Stack lots of heavy books on top, ensuring that the beadboard is laying flat and tight against the other wood everywhere. Let dry completely.
- Turn the wood so the beadboard portion is facing down and trace your candy corn pattern twice onto the wood.
- Carefully cut around your design. If using a small power handsaw (not a machine saw), this is much easier with two people-one to hold the wood down and the other to cut around. Just be so, so careful please!
- Sand around the edges well
- Paint the top half white. Next, starting at the bottom, paint your curved candy corn stripes. You can draw them on lightly with a pencil first if you need. Make sure yellow is on bottom, orange in the middle and leave the white space on top.
- Let the paint dry completely
- Apply the decorative glaze by dipping part of an old cloth into it, then rubbing it all over the top of the candy corns. Then wipe it down with the clean part of your cloth. Repeat this process until you achieve the desired look. The glaze should linger in the grooves and knots, giving it a distressed look. Let the glaze dry completely.
- Tie with brown ribbon and stick a berry pick into the knot.
You’re done! Aren’t they fun?
This is another fun craft to make with a group, just like the Trick-or-Treat Wood Blocks that I shared not too long ago.


Blessings,
Nici
Katie
Navy Wifey Peters @ Submarine Sunday Link Party
Thank you for sharing at Marvelous Mondays this week!
Kristy @ Cup Of Jo