Get kids excited for summer with this easy tissue paper and burlap ice cream cone craft! It’s colorful and so fun to make!
![]()
Since the kids have been on spring break this past week, I got to thinking how close we are to summer! I can’t believe how fast time passes. Before you know it, another school year will be over and we’ll be experiencing heat waves, vacations, cool treats, and campouts under the stars.

One of the things we most look forward to when the weather is unbearably hot outside is ice cream! It’s so refreshing!
I remember, growing up, when we got to request the ice cream flavor for our birthdays, it was always bubble gum. 🙂 Having tried it since becoming an adult, I can’t see why I would ever have wanted that above chocolate (the gum is totally disgusting), but the explanation simply lies in the fact that I was young and bubble gum sounded fun. 🙂 Thankfully, my kids don’t know about bubble gum ice cream and I hope they never will. Ha!

I thought it would be fun to put together a simple summer time craft with a tribute to a favorite summer time treat-ice cream. This bright, colorful project looks good enough to eat!
You’ll just need a few supplies that you probably already have on-hand.
Burlap
Pencil
Scissors
Tissue paper in a variety of colors
Elmer’s glue
Heavy paper to mount it to
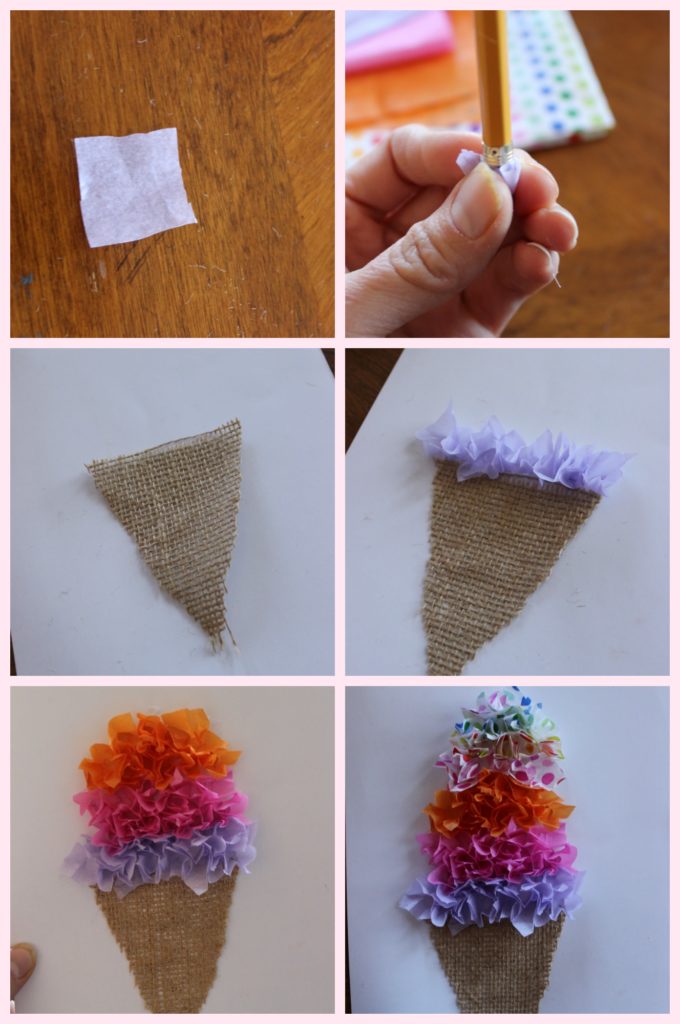
Cut a bunch of 1″ squares of tissue paper. Cut a cone shape out of burlap and use Elmer’s glue to adhere it to the heavy paper. Pinch the tissue paper square around the eraser of a pencil, dip the end in Elmer’s glue and use the pencil to place it on the paper above the cone. Repeat in sections for each color. You’ll want to place them close together so there aren’t any holes or bare spots.
We glued 2-3 rows for each color. Form the top section so it’s rounded on top. That’s it!

The kids will get a kick out of this easy craft! It’s a great way to beat the spring break or summer time boredom!


Comments