This No-Bake Cherry Cheesecake is a winner of a dessert! It’s so easy to make and it’s absolutely delightful! Three layers of total bliss!
![]()
I love cheesecake so much! Don’t you? Especially when I don’t have to fuss over baking it and waiting for that long process! This cheesecake is so incredible for so many reasons, but one being that you throw it together in the morning and then refrigerate it for a few hours to chill the layers. Then it’s ready to eat when you are!
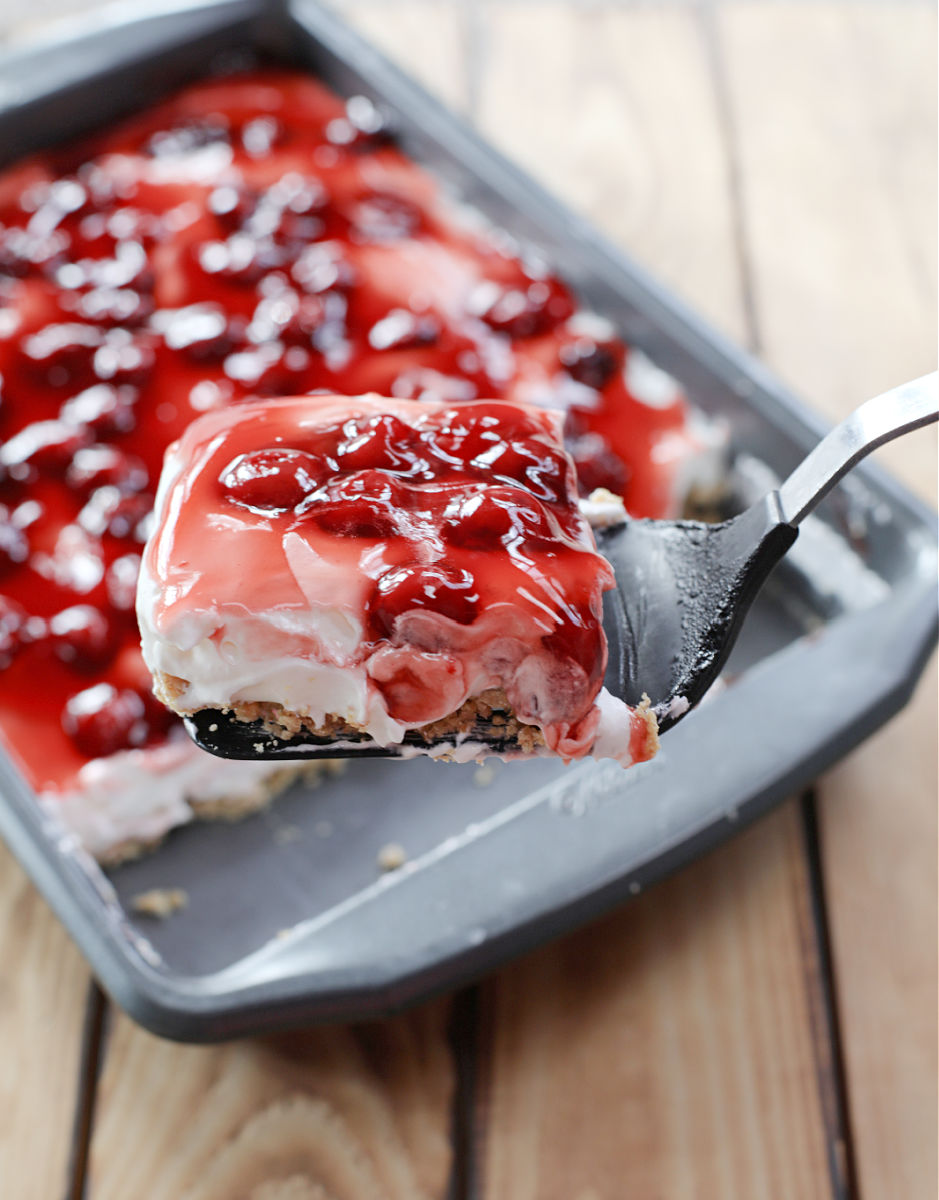
The homemade graham cracker crust, followed by silky-smooth cream cheese layer, then a cherry pie filling topping are just too amazing! Your taste buds will be dancing in delight! My mom made this recipe often, growing up, and I couldn’t believe that, in all my dessert-making, that I hadn’t ever made this for my family! That’s just a crime, really!
I mean, what reason did I have for not making it? It’s so simple to put together and, when I’m craving cheesecake, it’s the fastest way to get it. I have no valid excuses other than that I totally forgot about this gem of a recipe! And I’m sad that I missed out on enjoying it for all those years. Well, that changes today! This no-bake cheesecake will have its glory in my kitchen often from here on out!

It’s so versatile too! You can switch out the cherry topping for strawberries, blueberries, raspberries, mixed berries, or what have you. Switch it up each time you make it, and it will be delicious, no doubt! It is better to use the canned pie berries because then you get the yummy syrup that comes with them. 🙂
Here’s how to make this cheesecake:
- Put together the crust by stirring together the graham cracker crumbs, sugar, and melted butter until all the crumbs are evenly moistened. Press and pack the crust into the pan. Place the crust in the freezer to set while you make the filling.
- Next, prepare the cheesecake layer by creaming together softened cream cheese, sugar, vanilla and lemon juice until smooth. Then add milk and mix until completely smooth.
- Next, fold in the whipping topping and spread over the crust.
- Lastly, spread the pie filling over the cream cheese layer and let it refrigerate until chilled and set, about a few hours.
You’re going to love this dessert! It’s one of those that you’ll want to take to every gathering, party and function, because everyone will devour it and ask for the recipe. This is the easiest cheesecake you’ll ever make! Talk about scrumptious, too!

If you are a cheesecake fan, then you won’t want to miss out on some of my other most favorite cheesecake recipes, like this Turtle Cheesecake, this No-Bake Lemon Raspberry Cheesecake, or these Chocolate Cheesecake Bars. I think cheesecake is one of my most favorite desserts! I prefer it to regular cake, any day! In fact, for my birthday, I always request cheesecake in the chocolate variety. : )
But of course you know that I just really love dessert, no matter how it comes…cookies, brownies, cheesecake, pie…you name it and I most likely can’t say no to it, haha. I know you’re going to be crazy about this recipe! There’s a reason it’s been in the family for many decades! It’s just that good.
Ingredients
Method
- To make the crust, in a medium bowl, stir together the graham cracker crumbs, 1/4 c. granulated sugar, and melted butter until all the crumbs are evenly moistened.
- Press the mixture into a 9"x13" pan with your hands. Then, use the bottom of a flat cup to press and pack the crumbs down.
- Place the crust in the freezer while you prepare the filling mixture.
- For the filling mixture, in the bowl of an electric mixer, cream together softened cream cheese, 1/2 c. granulated sugar, vanilla extract, and lemon juice until completely smooth and no lumps remain.
- Add milk and mix, scraping down the sides in between with a spatula, until completely smooth.
- Fold in the whipped topping until fluffy and until you don't see any more of the whipped topping.
- Spread the cream cheese mixture over the crust.
- Use a large spoon to place spoonfuls of the pie filling all over the top of the cream cheese layer and then carefully spread it evenly over the top.
- Place it in the refrigerator to chill for at least 3 hours. Slice and enjoy!
![]()


