• Skip to primary navigation
  • Skip to main content
  • Skip to primary sidebar
  • Skip to footer
  • Home
  • About Me
  • Advertise
  • Contact

I Dig Pinterest

Creative "Pin"-spiration

  • Bloglovin
  • Email
  • Facebook
  • Instagram
  • Pinterest
  • RSS
  • Twitter
  • Recipes
  • Crafts
  • Parties
  • Printables
  • Home Improvement
  • Shop My Style

April 8, 2013

World’s Best Paper Airplane

I can do “girly”…you know…hair, makeup, clothes, nails…all that fun stuff, but when it comes to my boy so many times, I’m stumped!  So, the other day my husband taught me how to make the “World’s Best Paper Airplane”, as he calls it.  And I believe him now.

Apparently he was in a state-wide science competition back in his middle school days where everyone was given various supplies (heavyweight paper, copy paper, glue, tape, wire, cardboard, etc.) and told to build the airplane that would stay airborne the longest.  In the end, my husband grabbed a plain piece of paper, folded it with the simple steps that I’ll show below, and it flew like a champ and won a medal!!

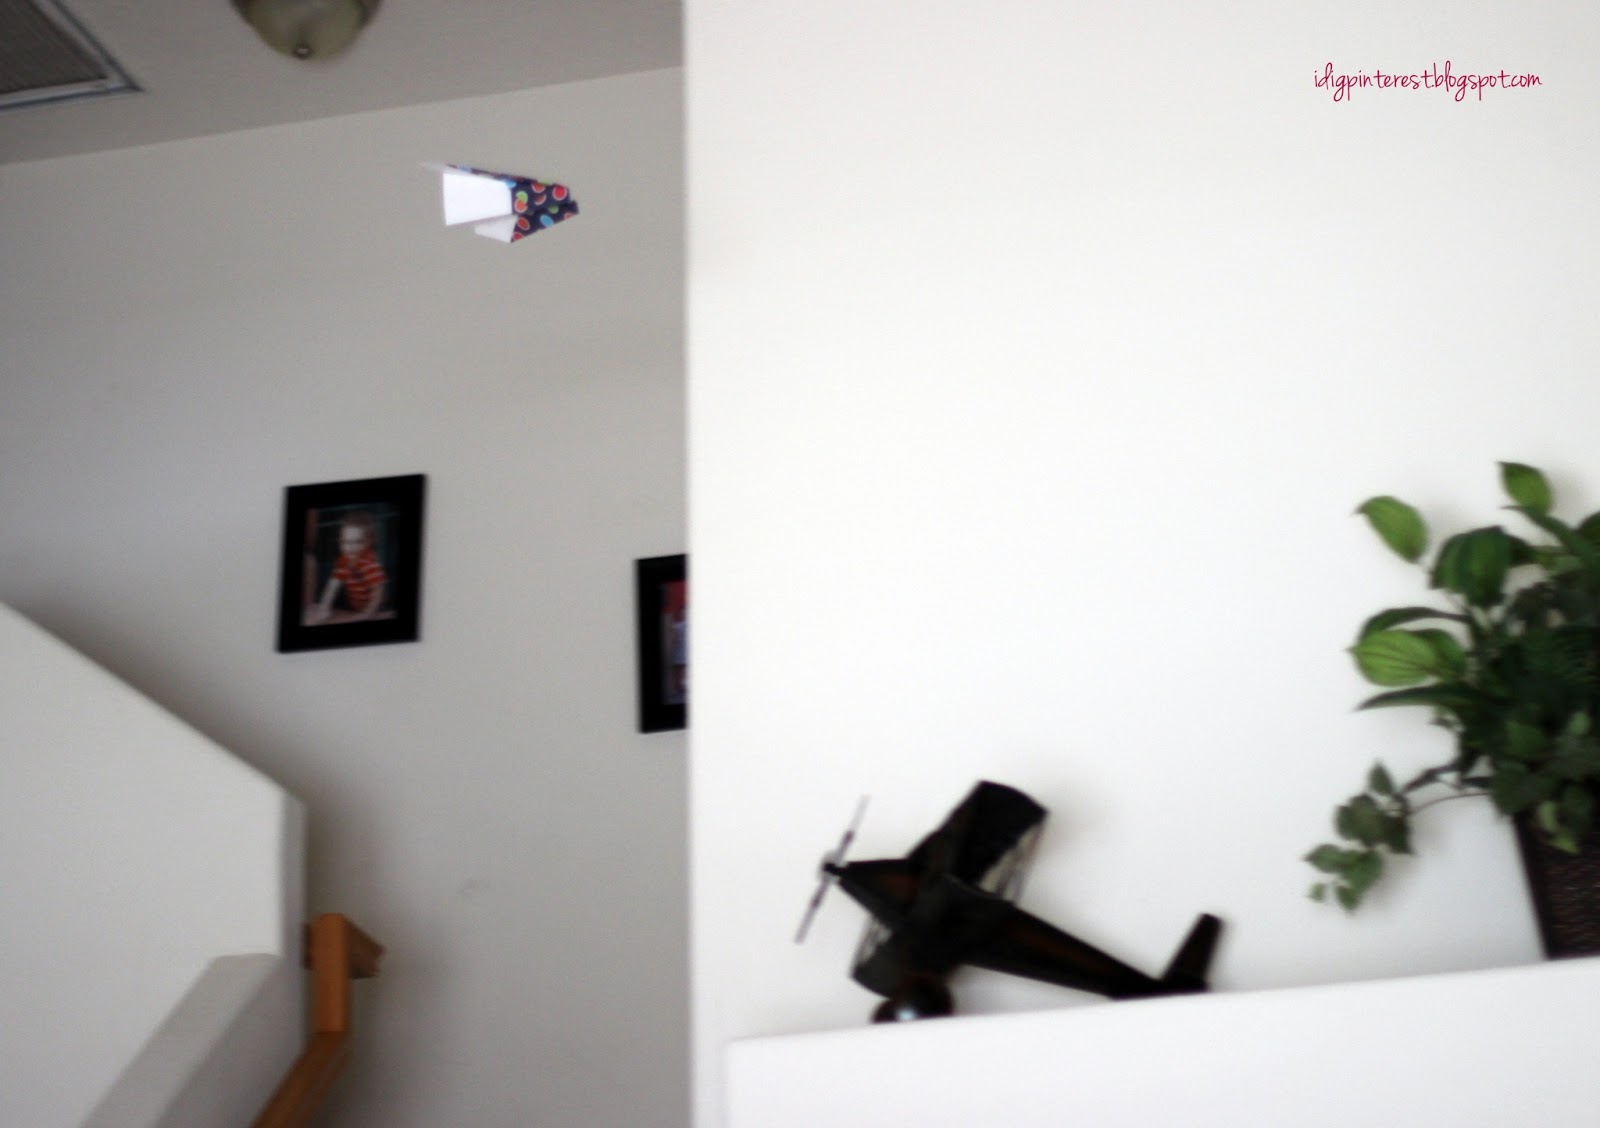
My kids have had a blast flying these from the top of our stairs into our open living room below.


They soar incredibly and go unbelievably far.  I’m an official paper airplane maker now!  My son is proud.  🙂
Here’s how to make your own awesome paper airplane:

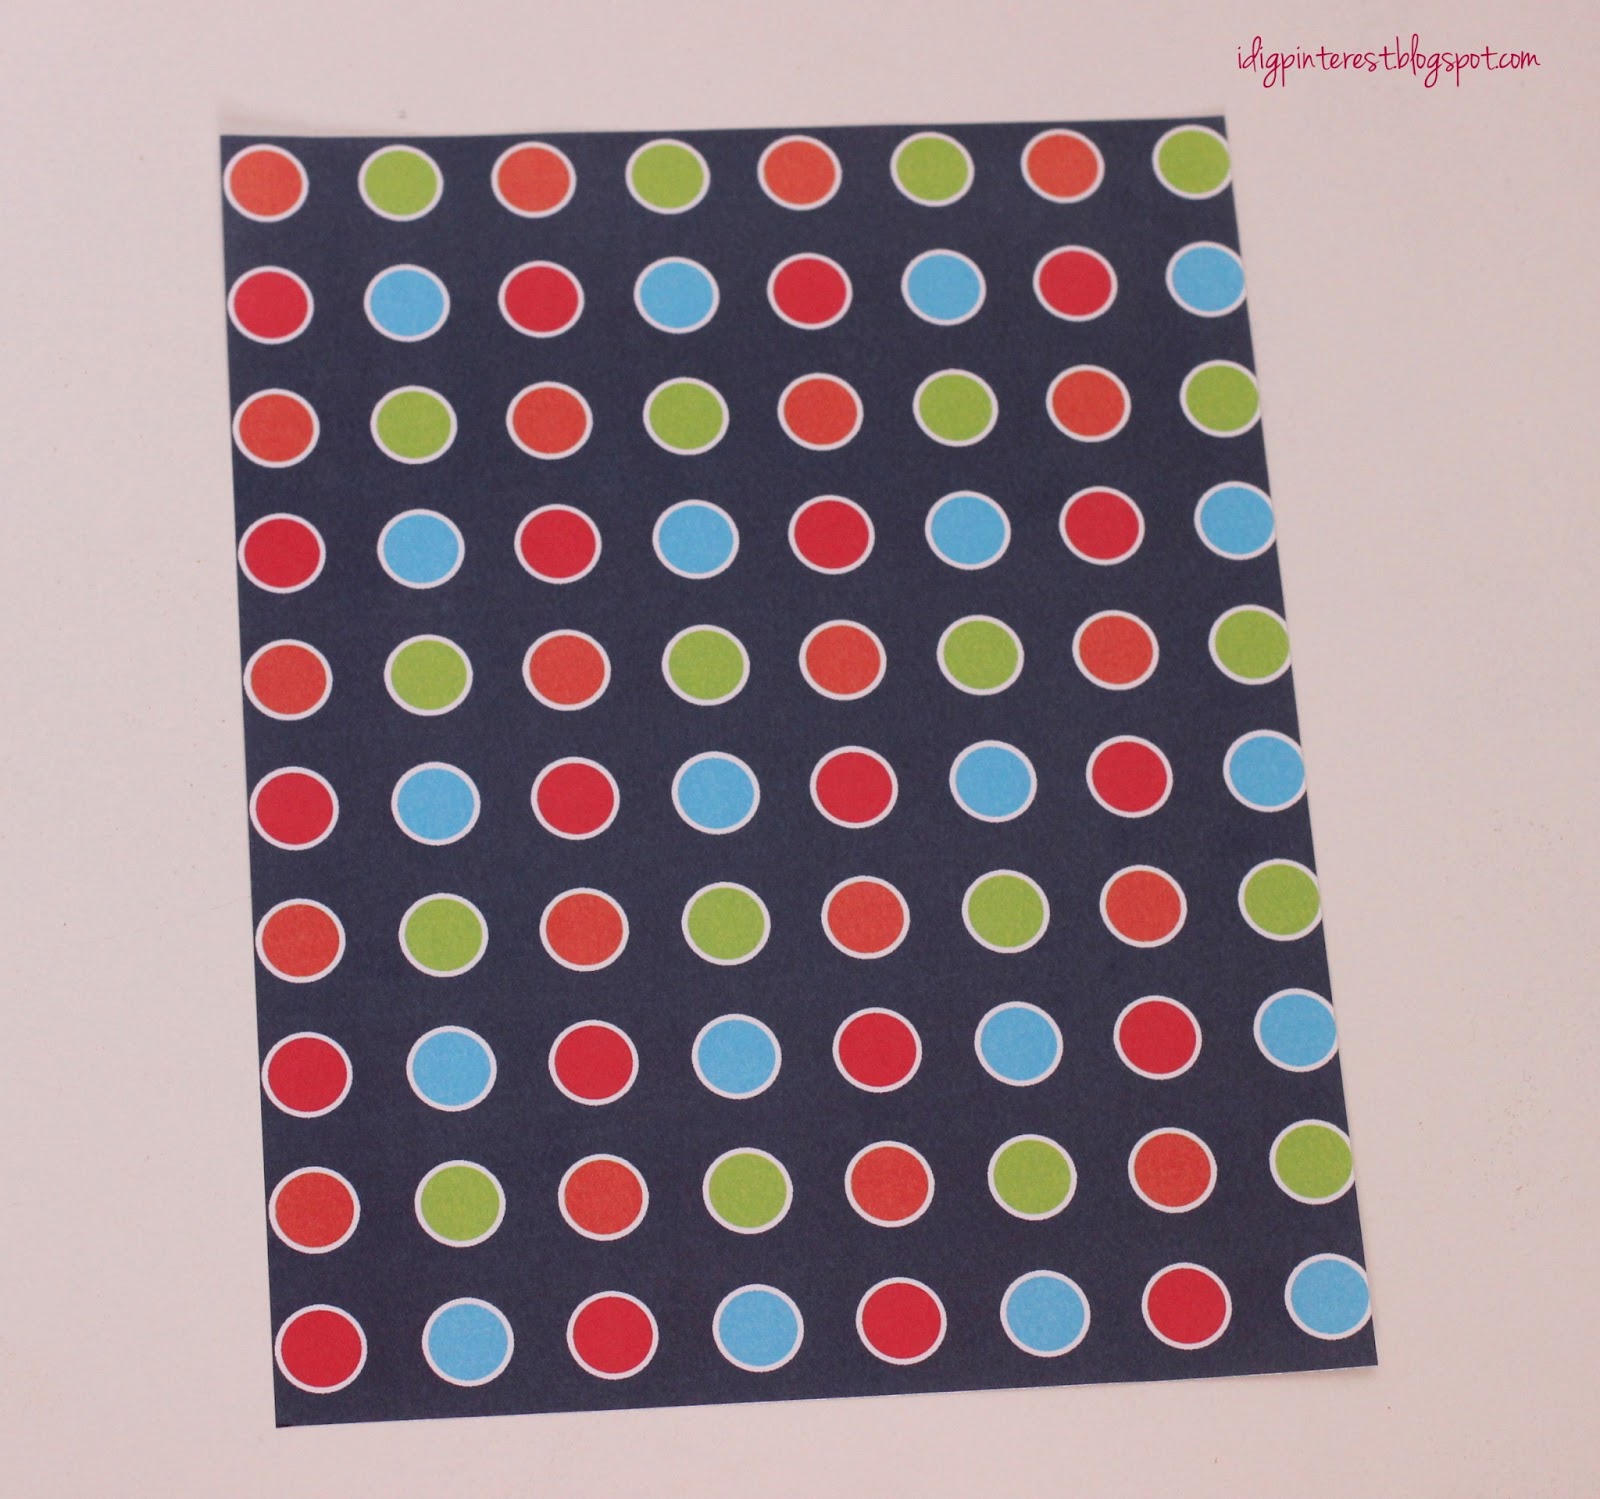
      Grab an 8 1/2″ by 11″ sheet of paper (plain or decorative).  I liked this fun, colorful pattern.

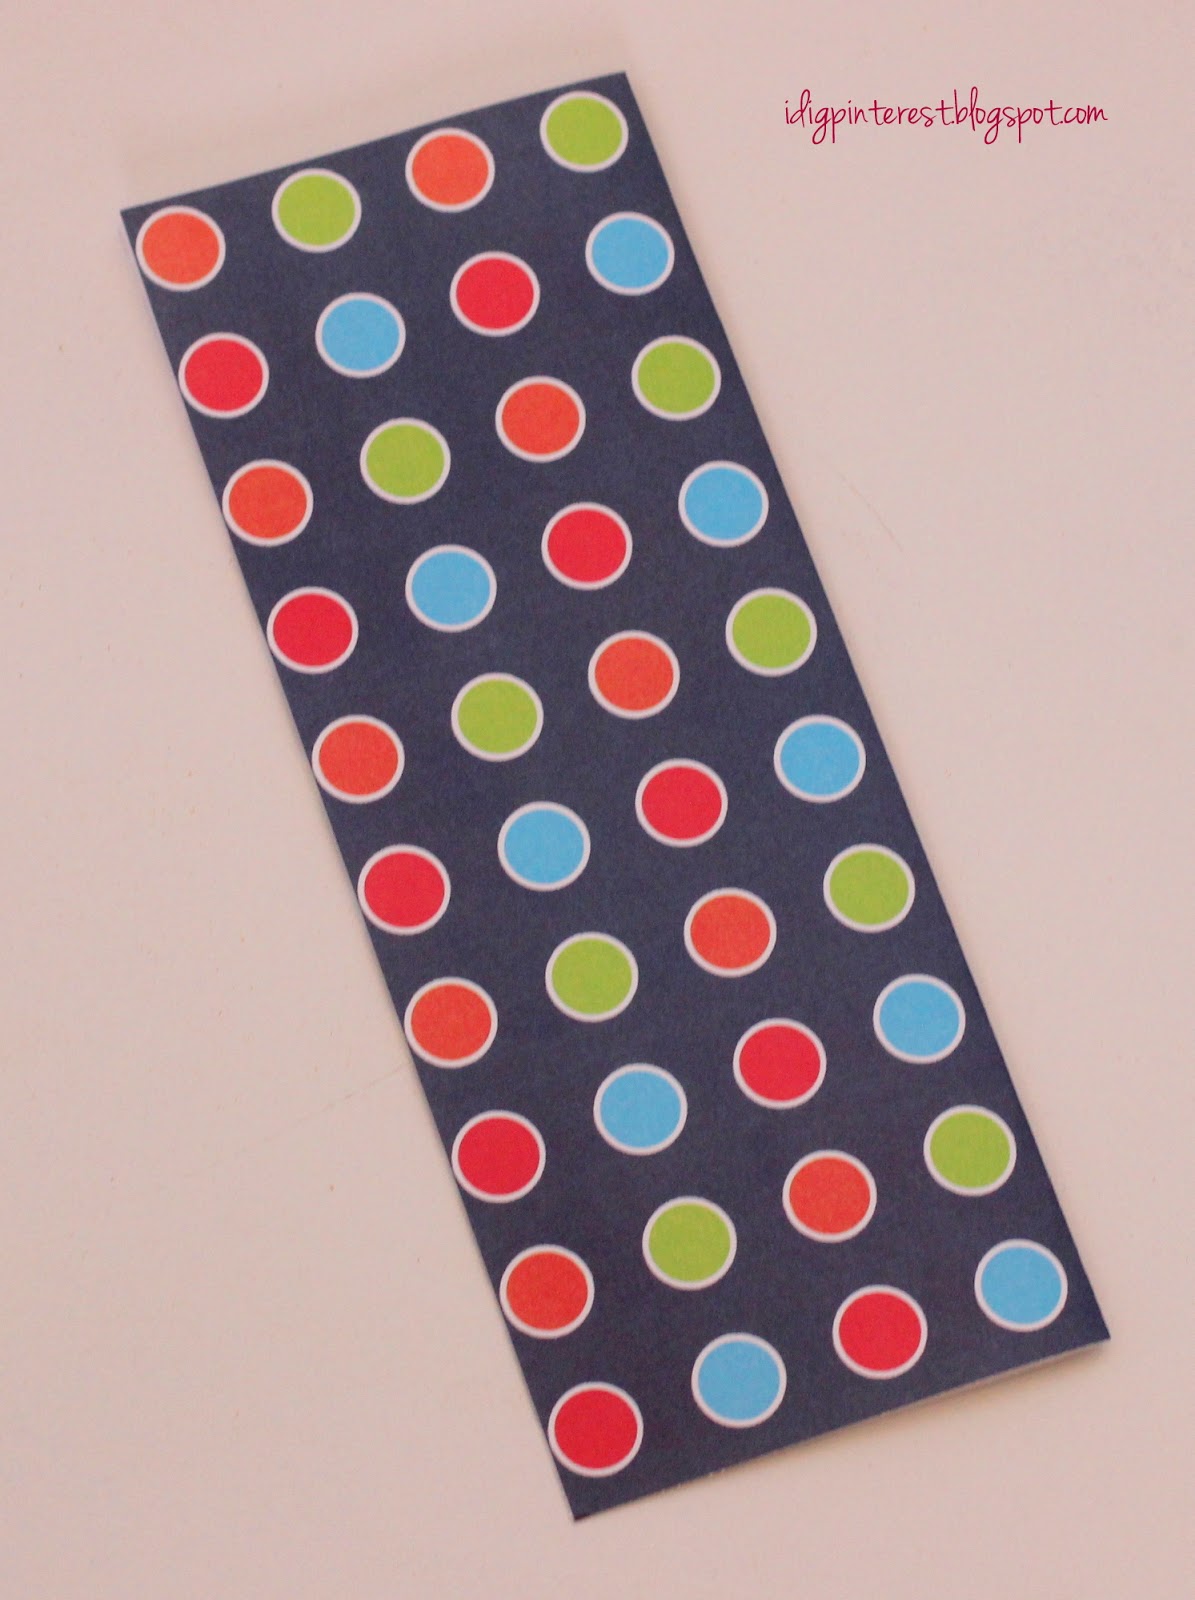
Fold it in half lengthwise, or hot dog style as I like to call it.  Make sure all the folds are precise for best results.
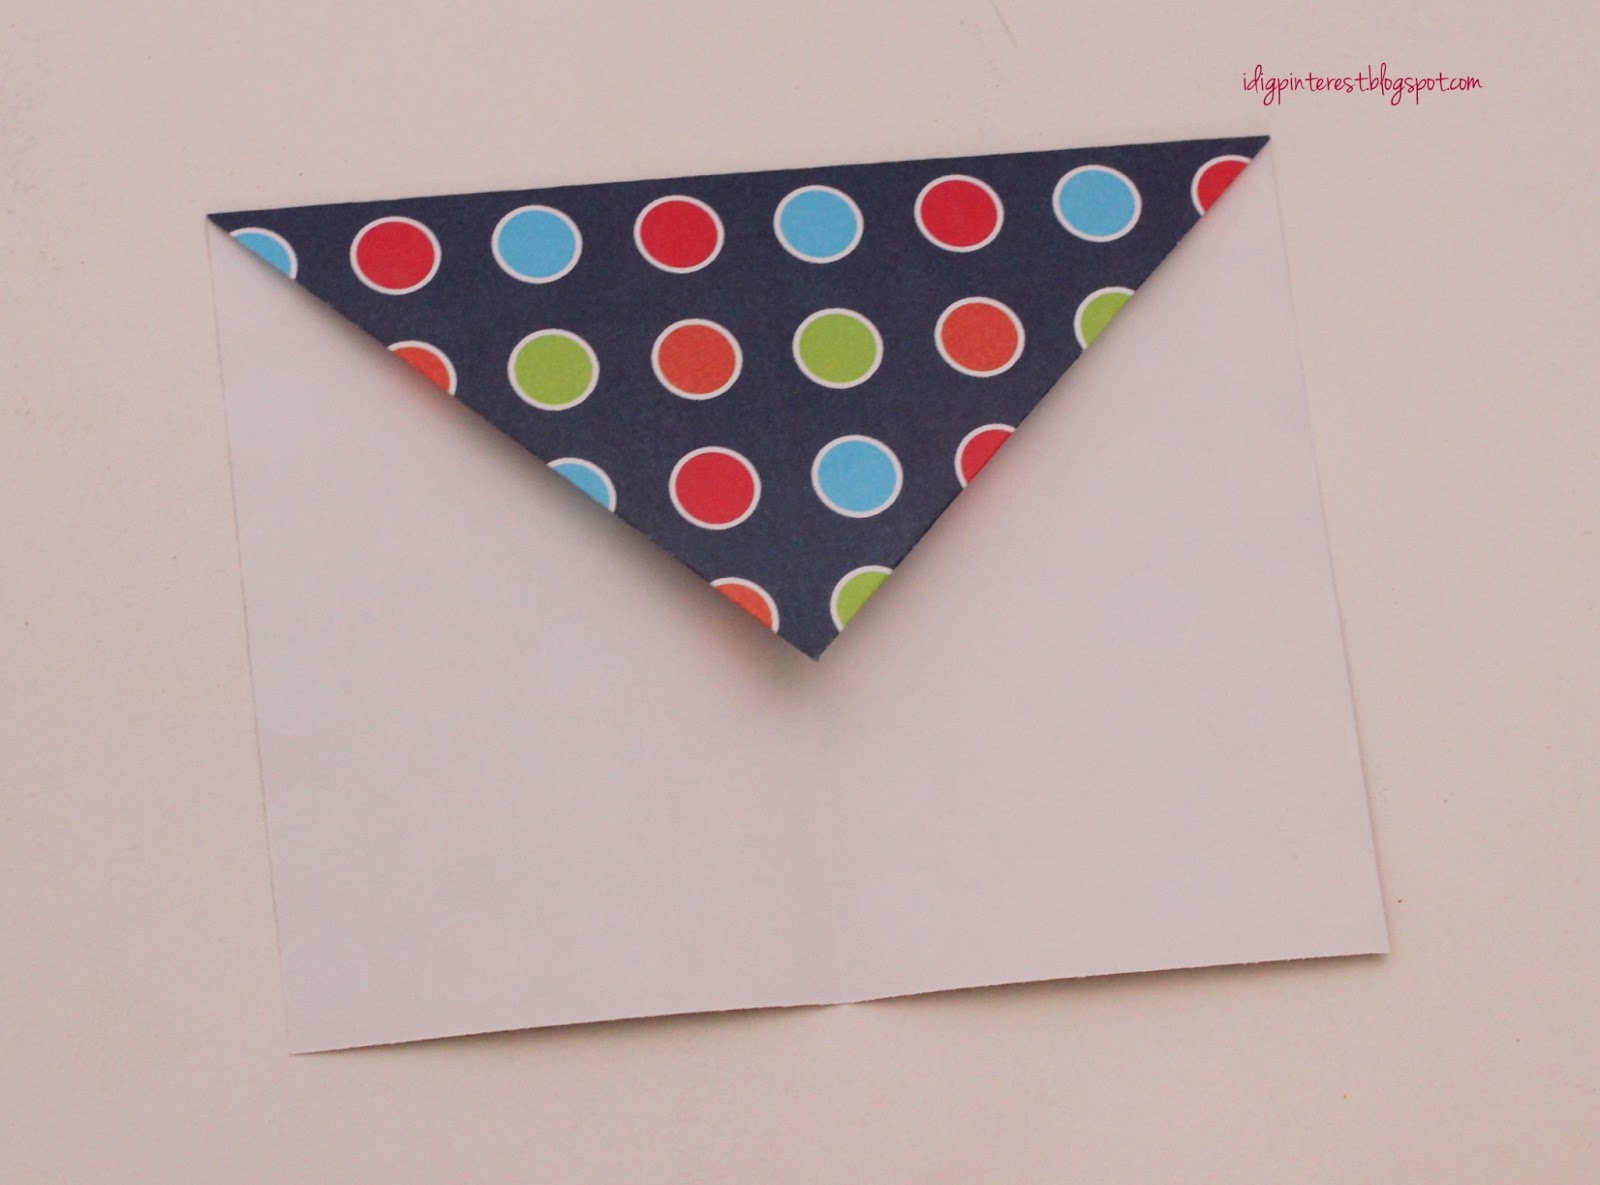
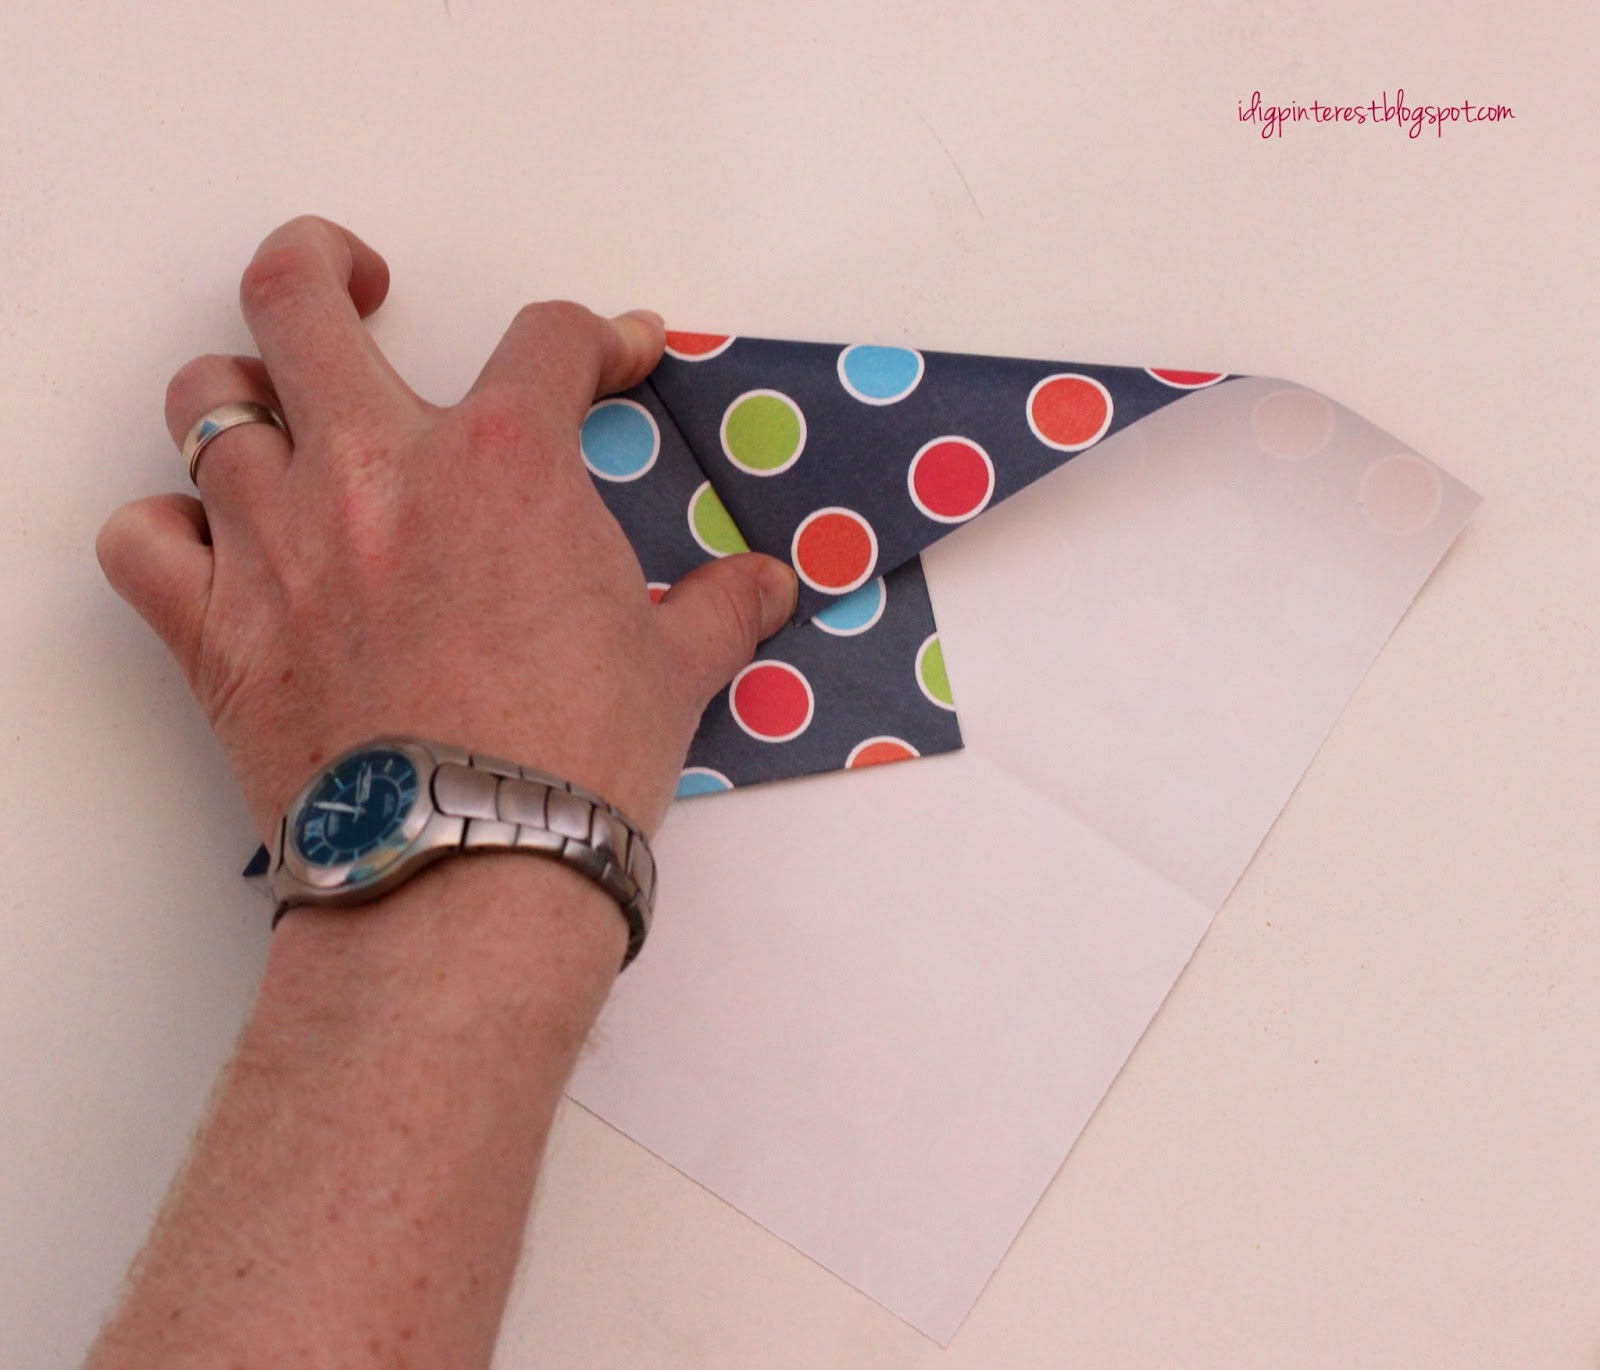
 Fold the top corners into the center fold line to form a triangle on top.
 Now fold that triangle down so the long edge of it serves as a guide for the crease.

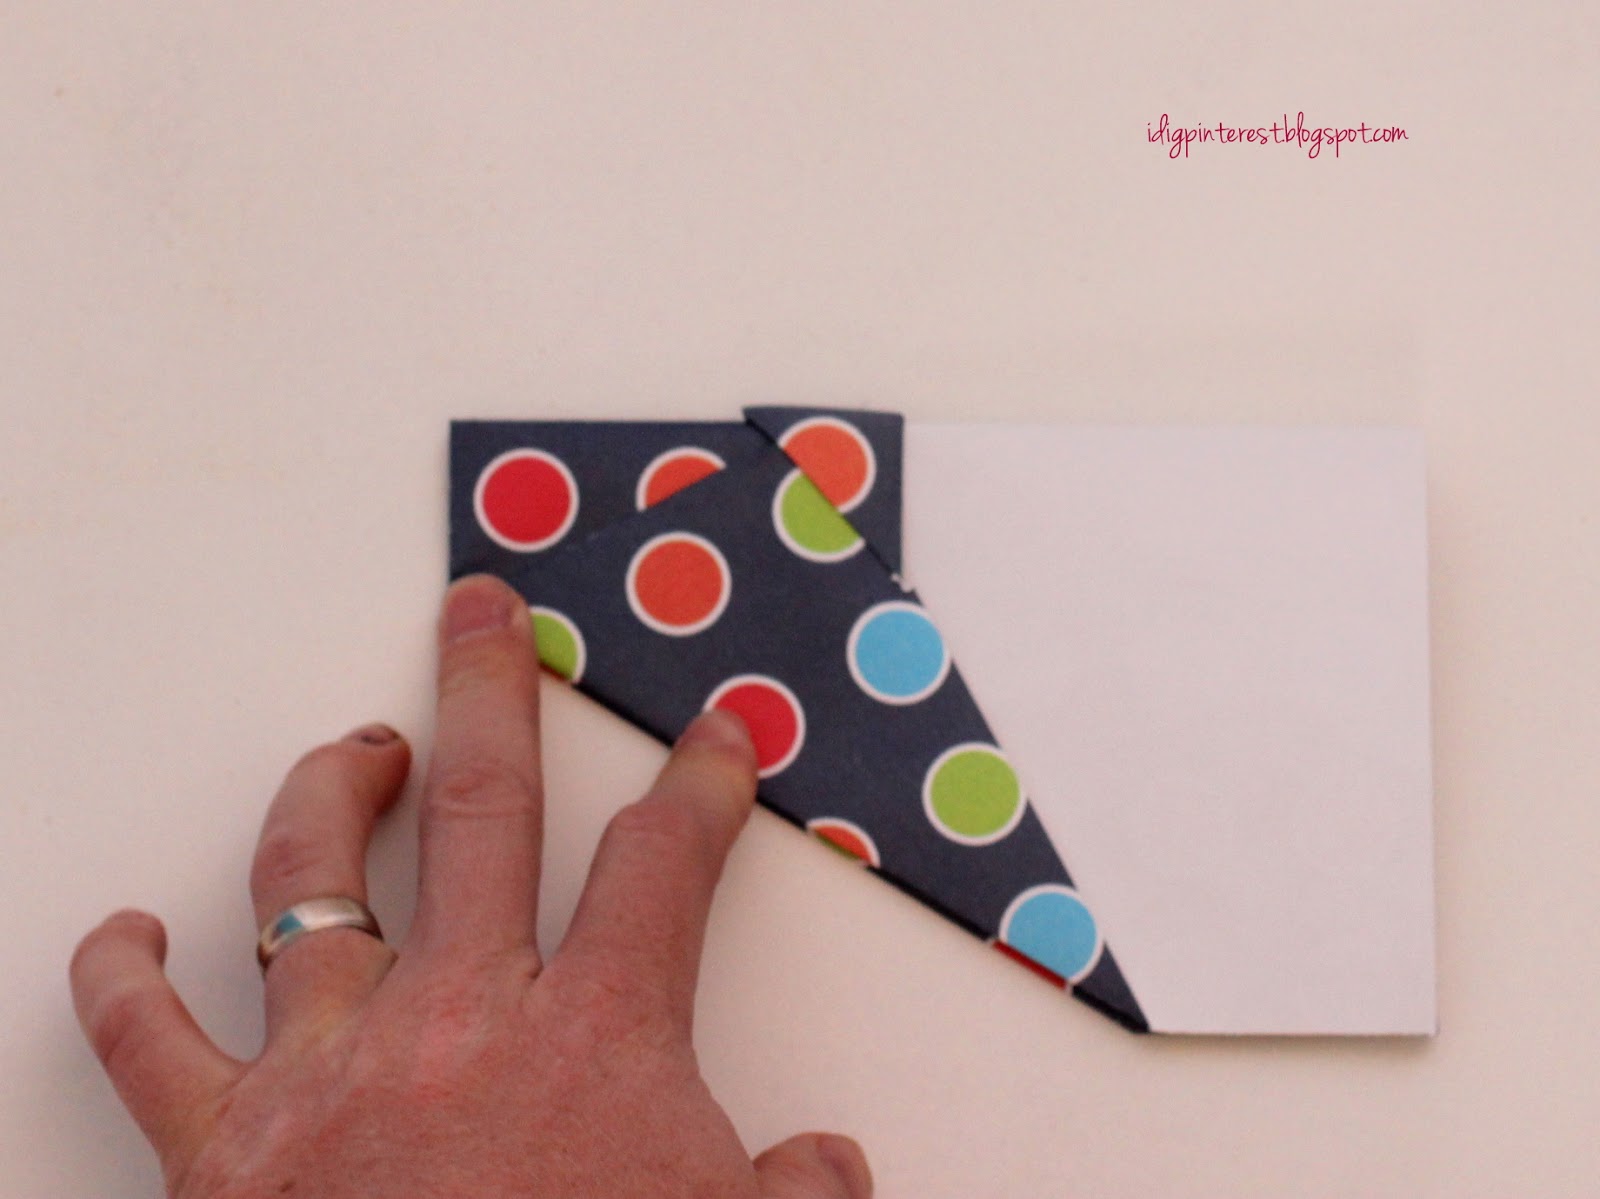
 Fold the corners in again to the center line (see the next two pictures to get a gist of where to fold).
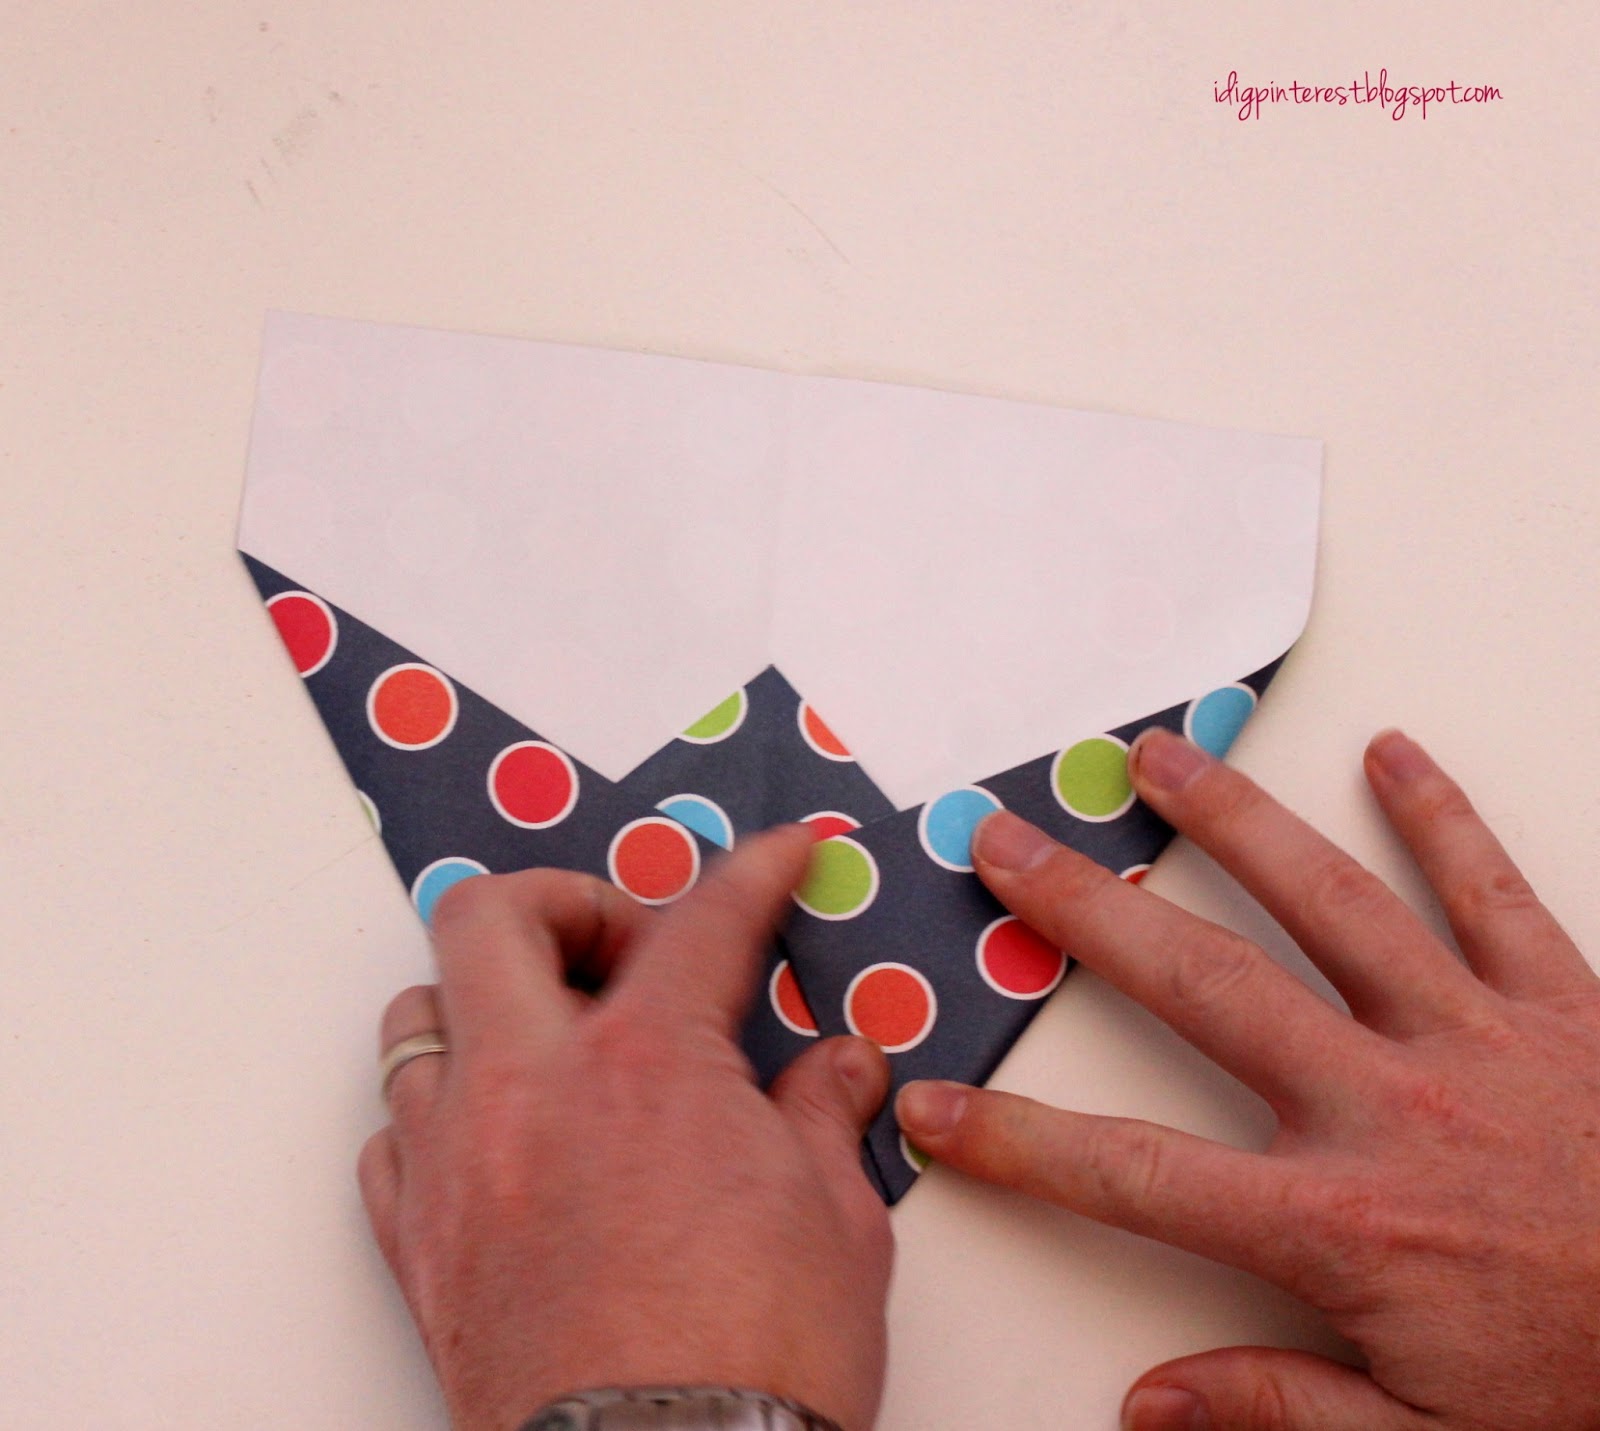
Like this.
 Here’s what it looks like when both sides are folded in.
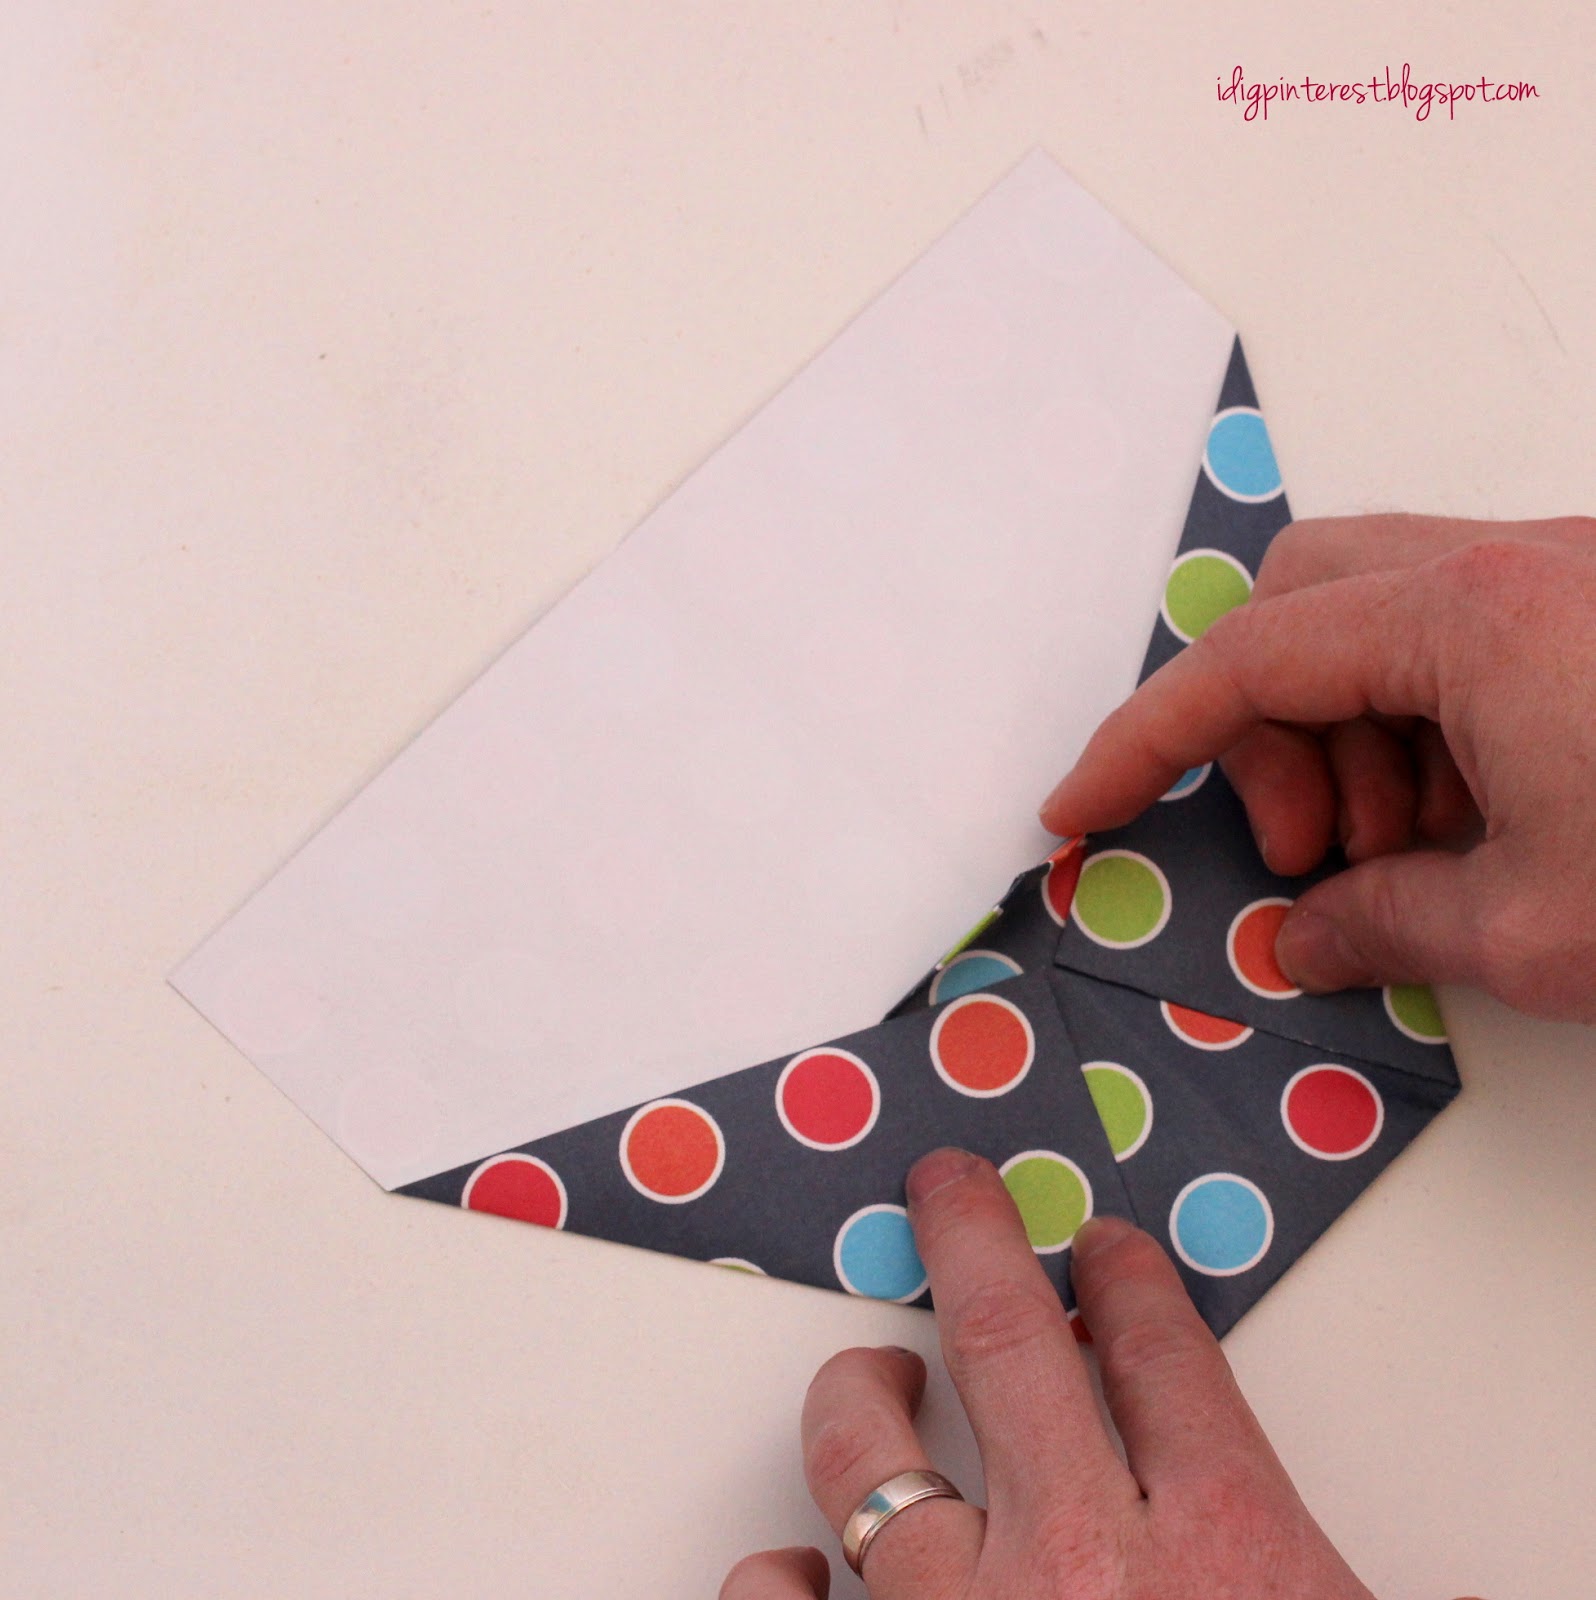
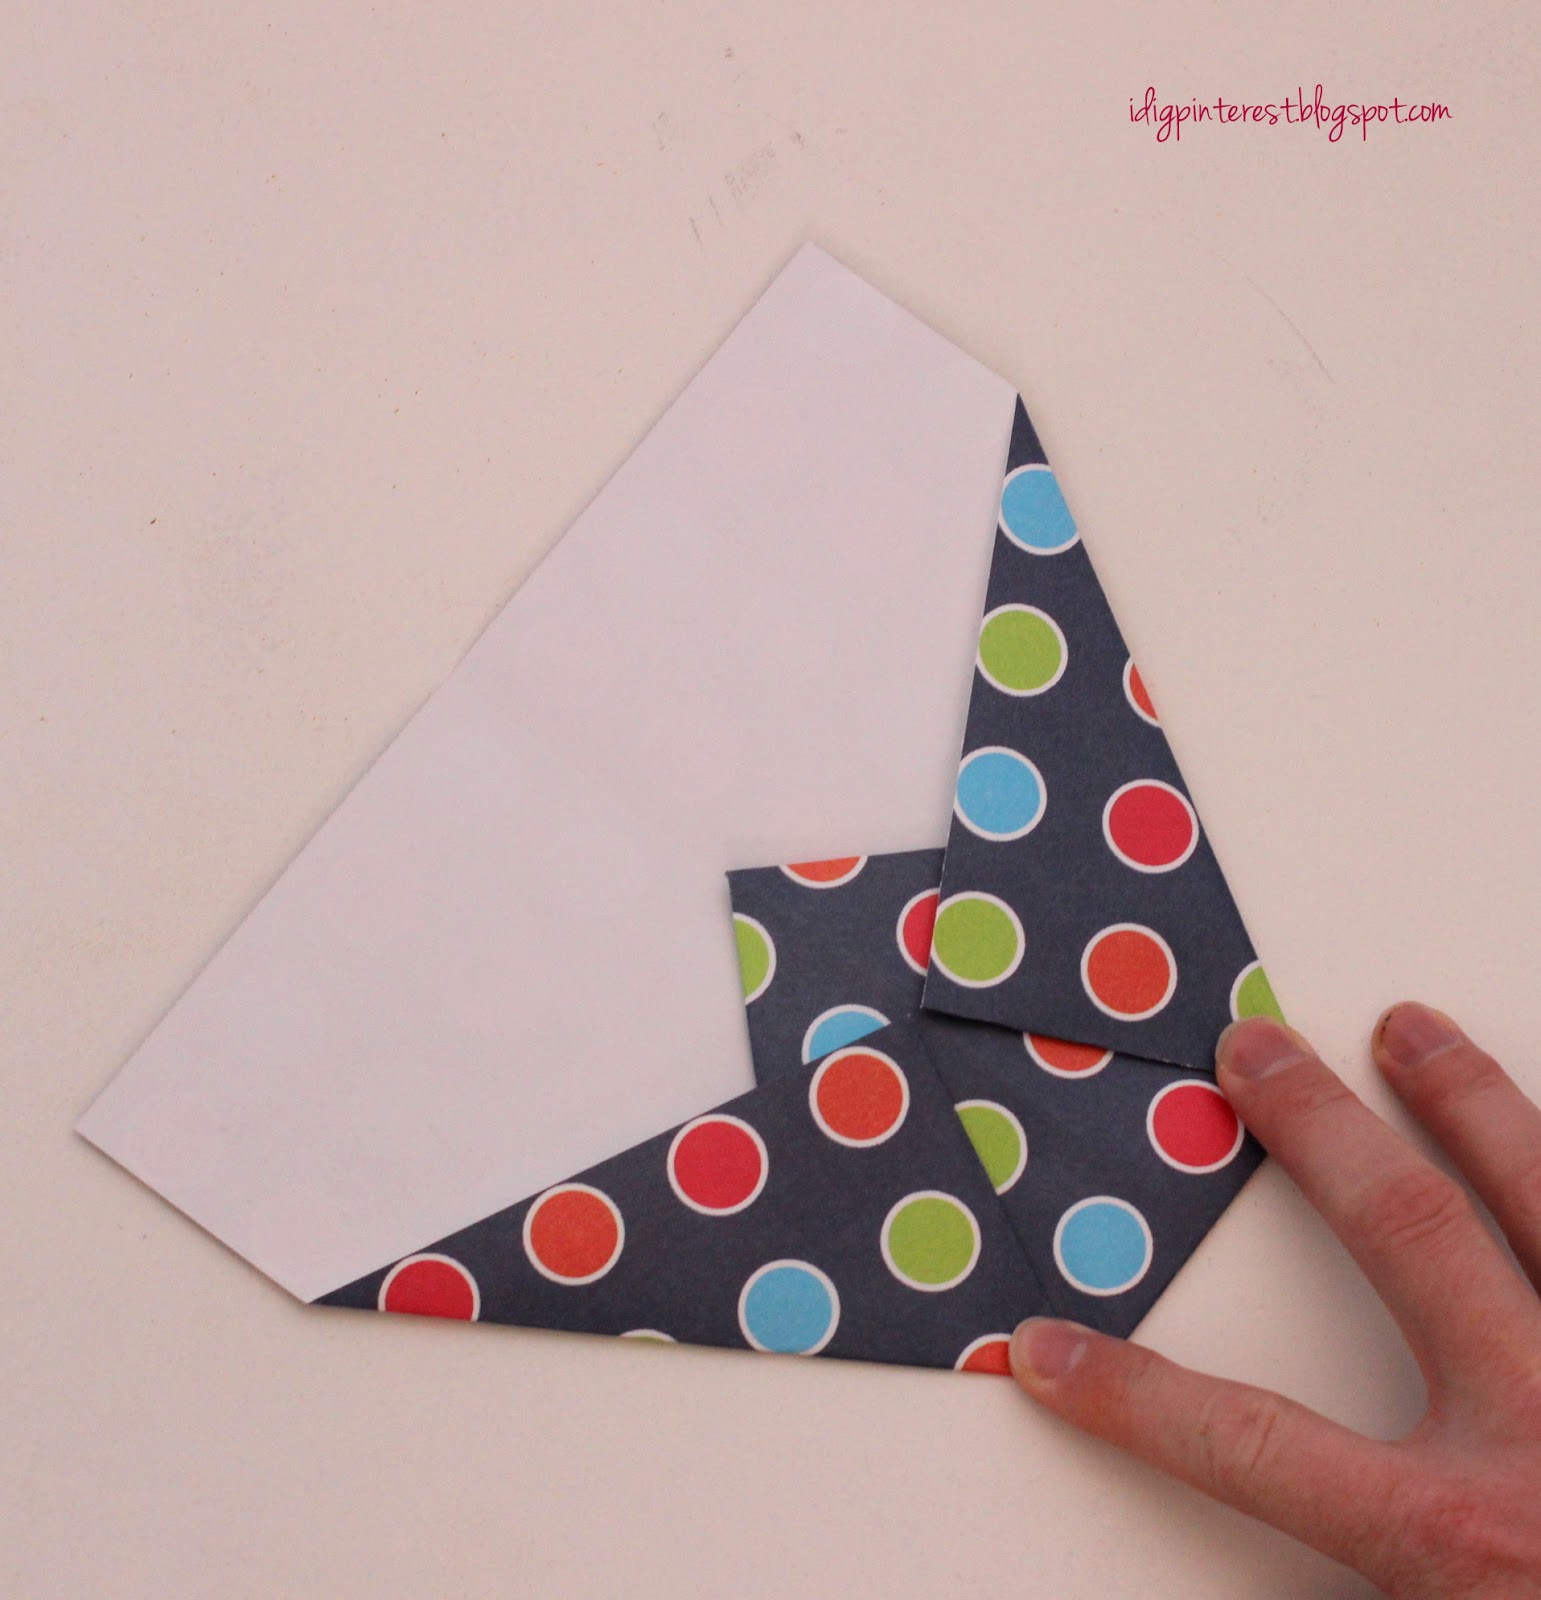
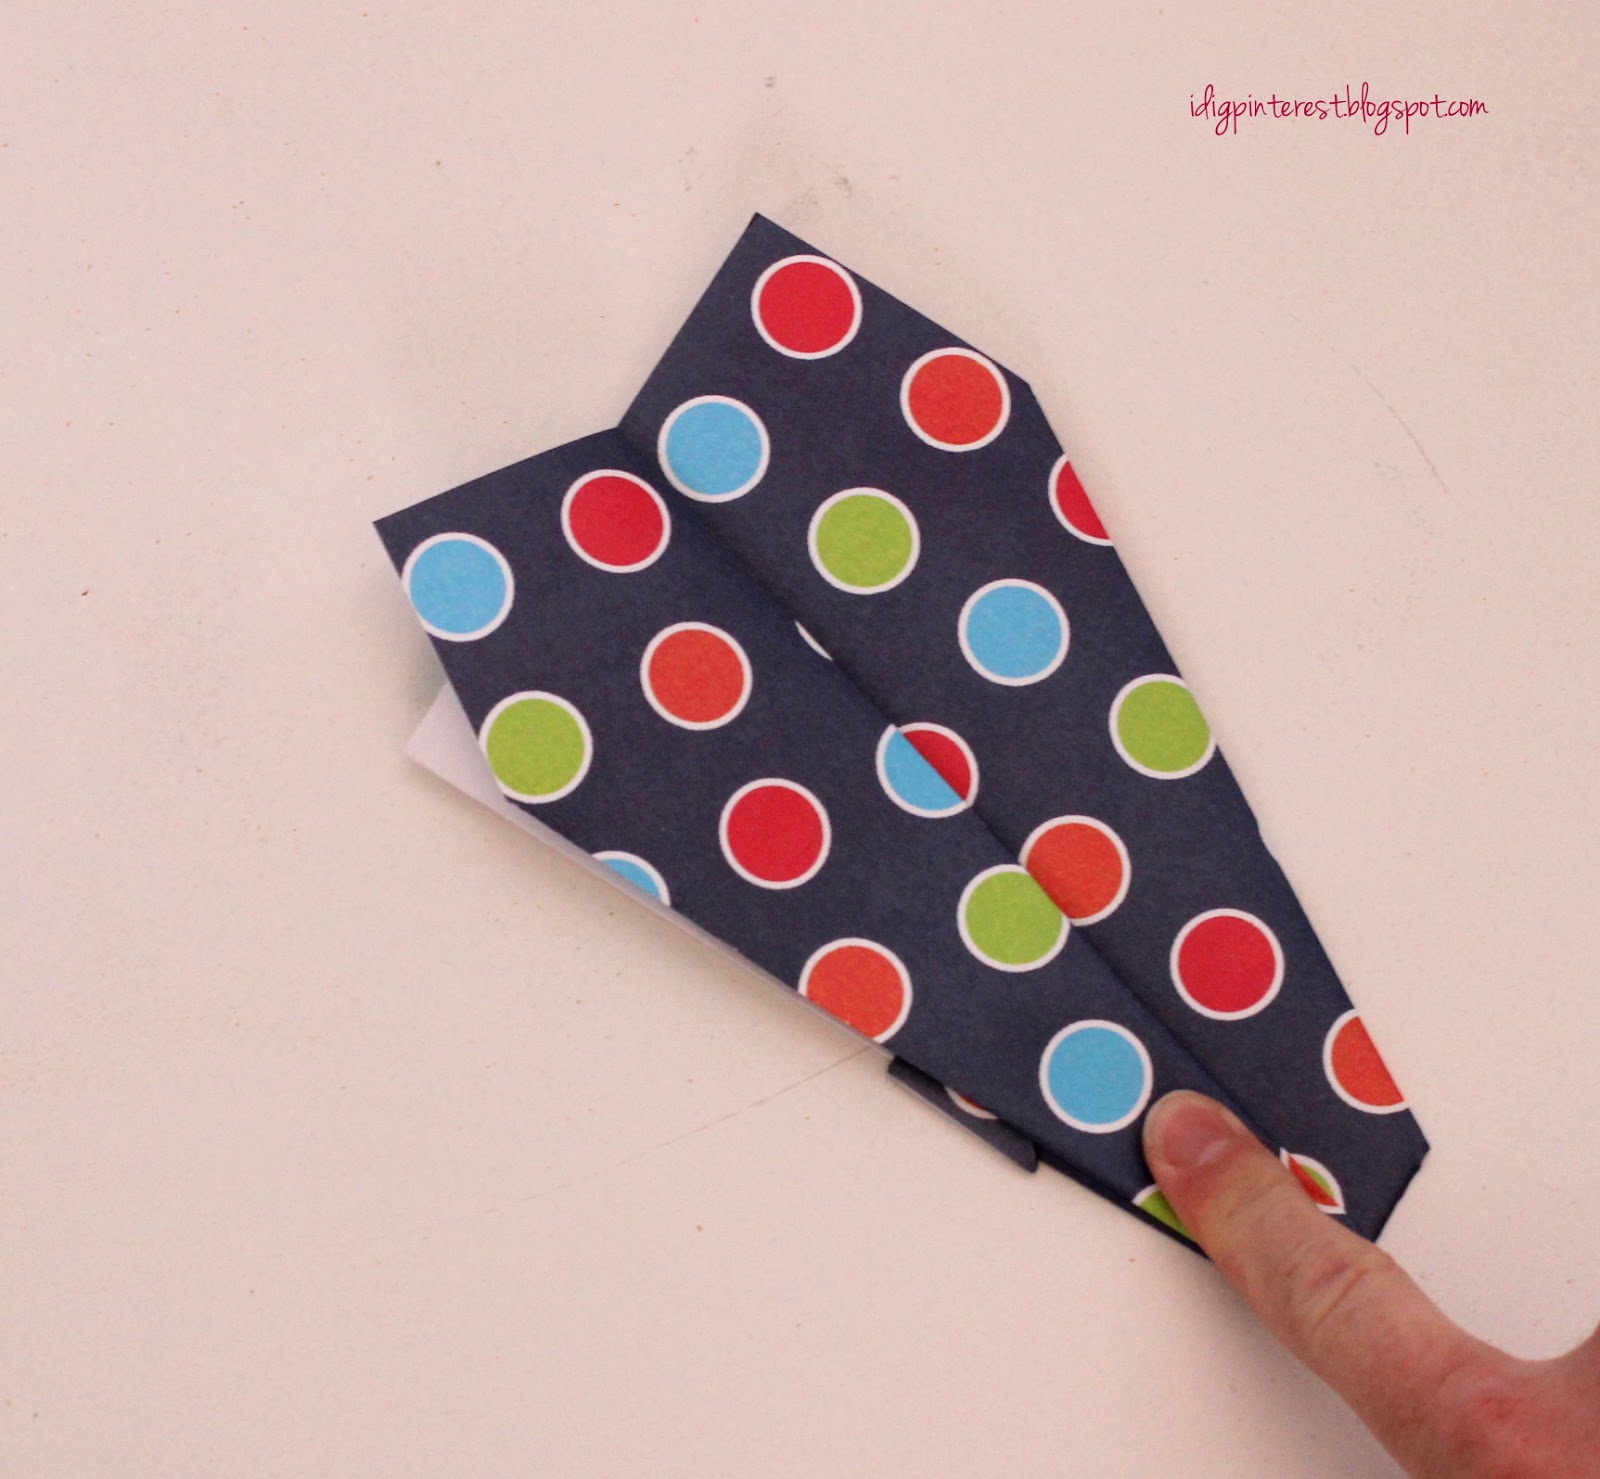
 Now fold the little piece up that’s sticking out.
 You’ll have a mini triangle in the middle which will hold the other pieces in place
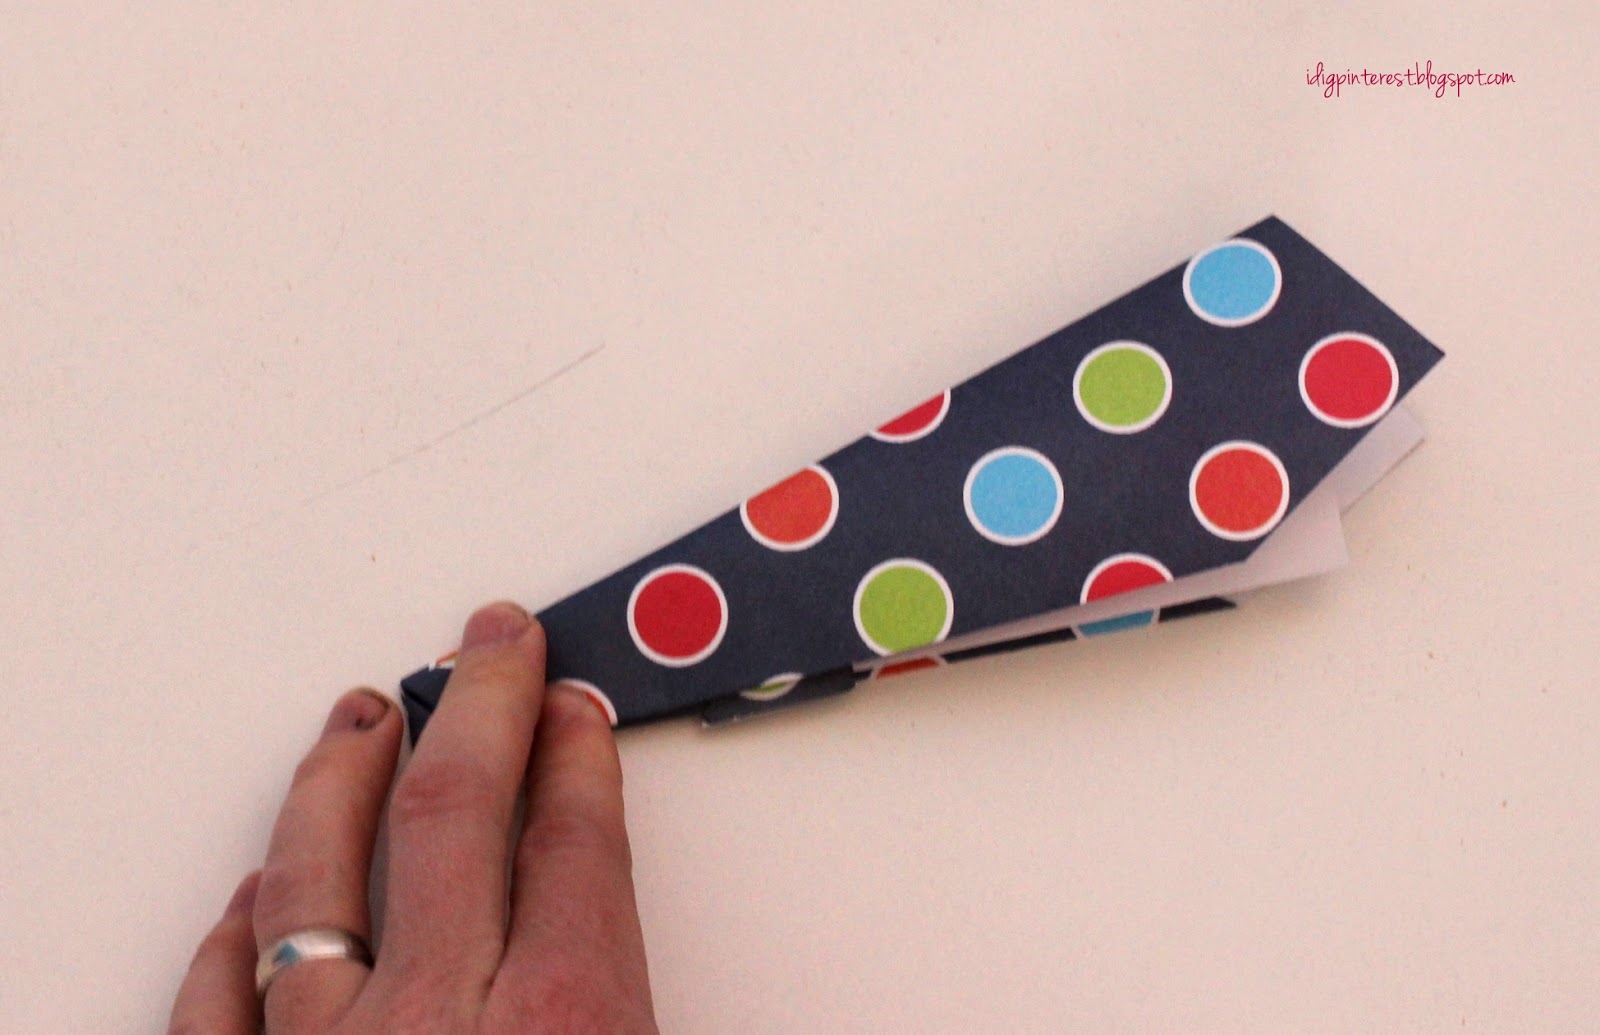
 Now fold it in half again so all your folds stay on the outside.
Fold the sides down so that the edge of the wing is exactly even with the under piece.
 Fold the other side down the same way.
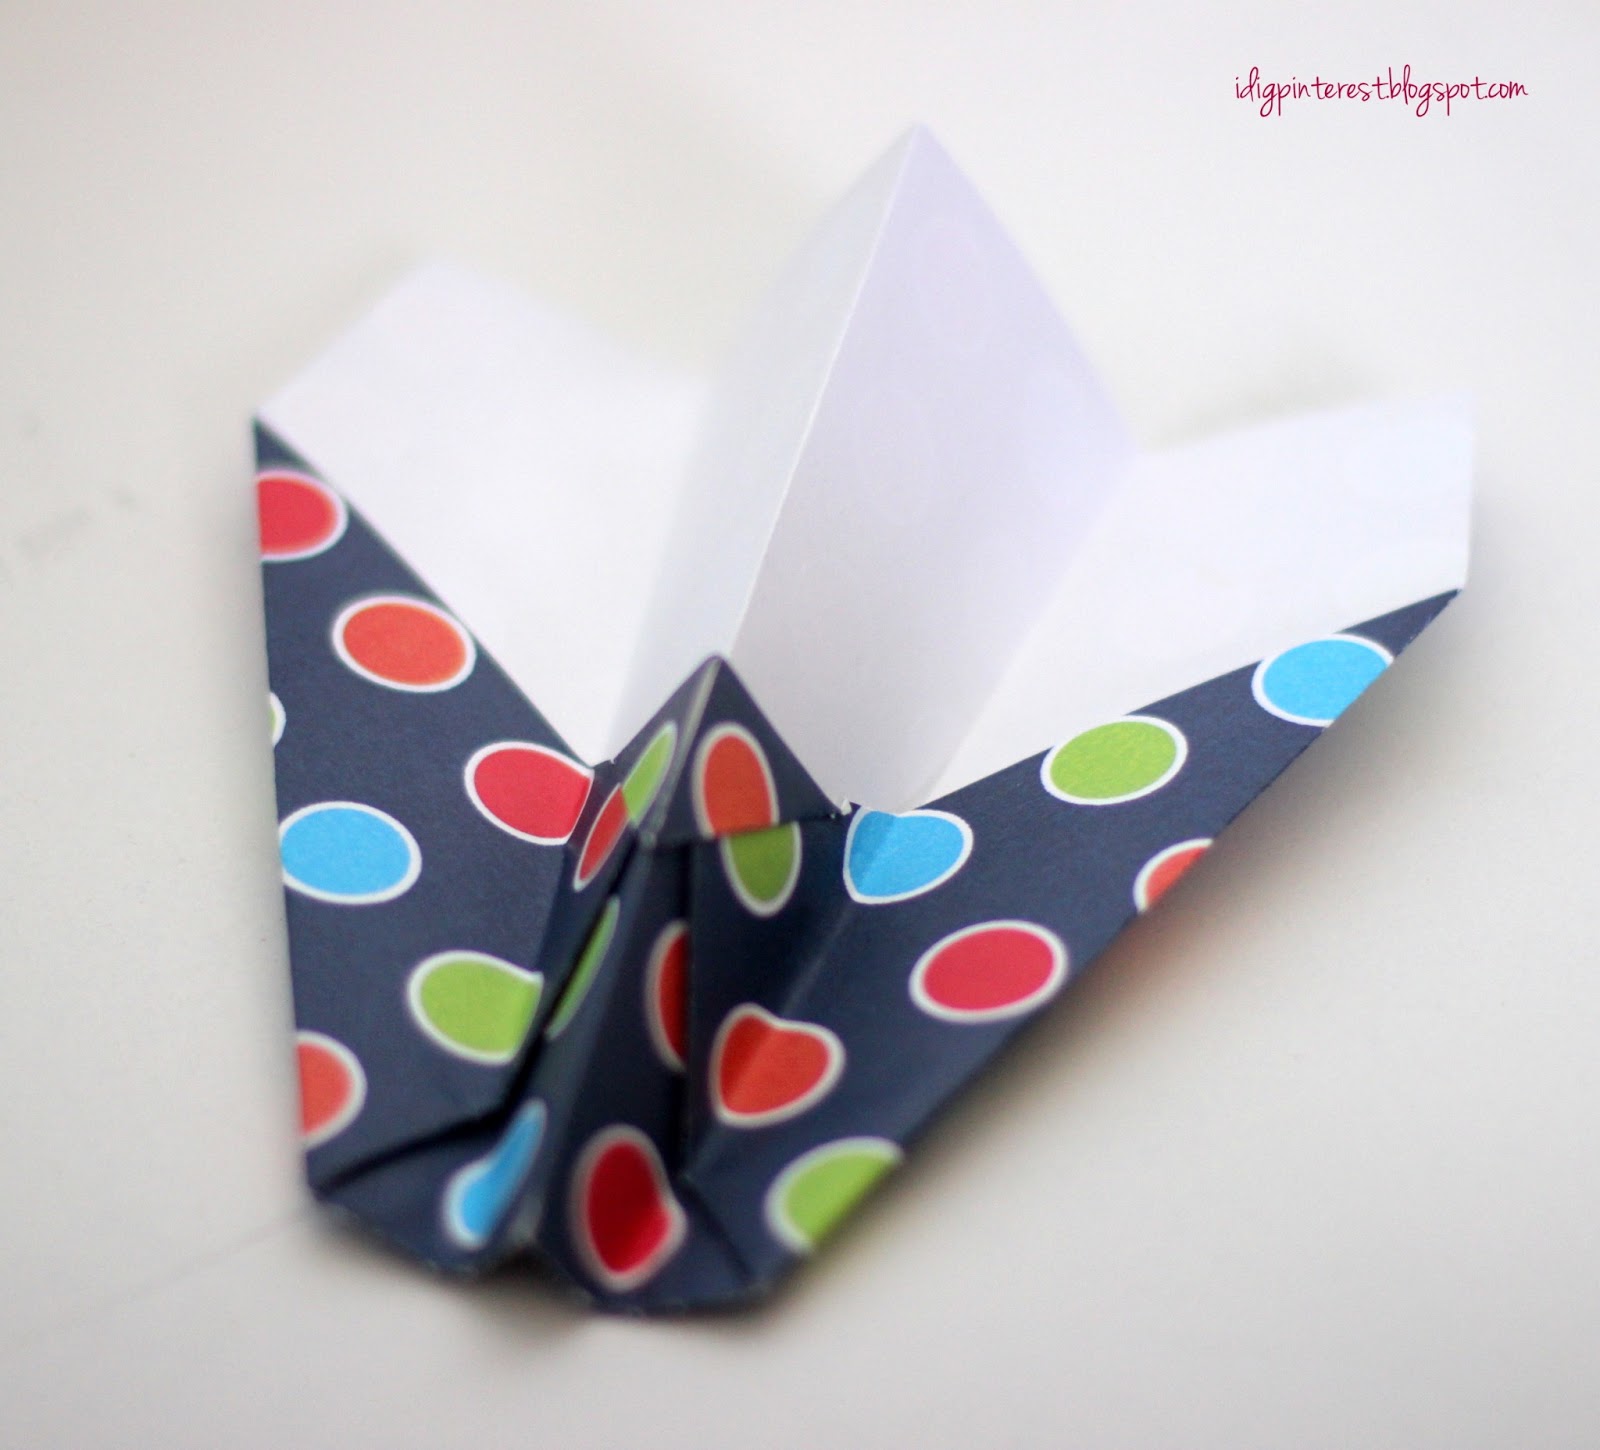
Here’s a view of the underside
 
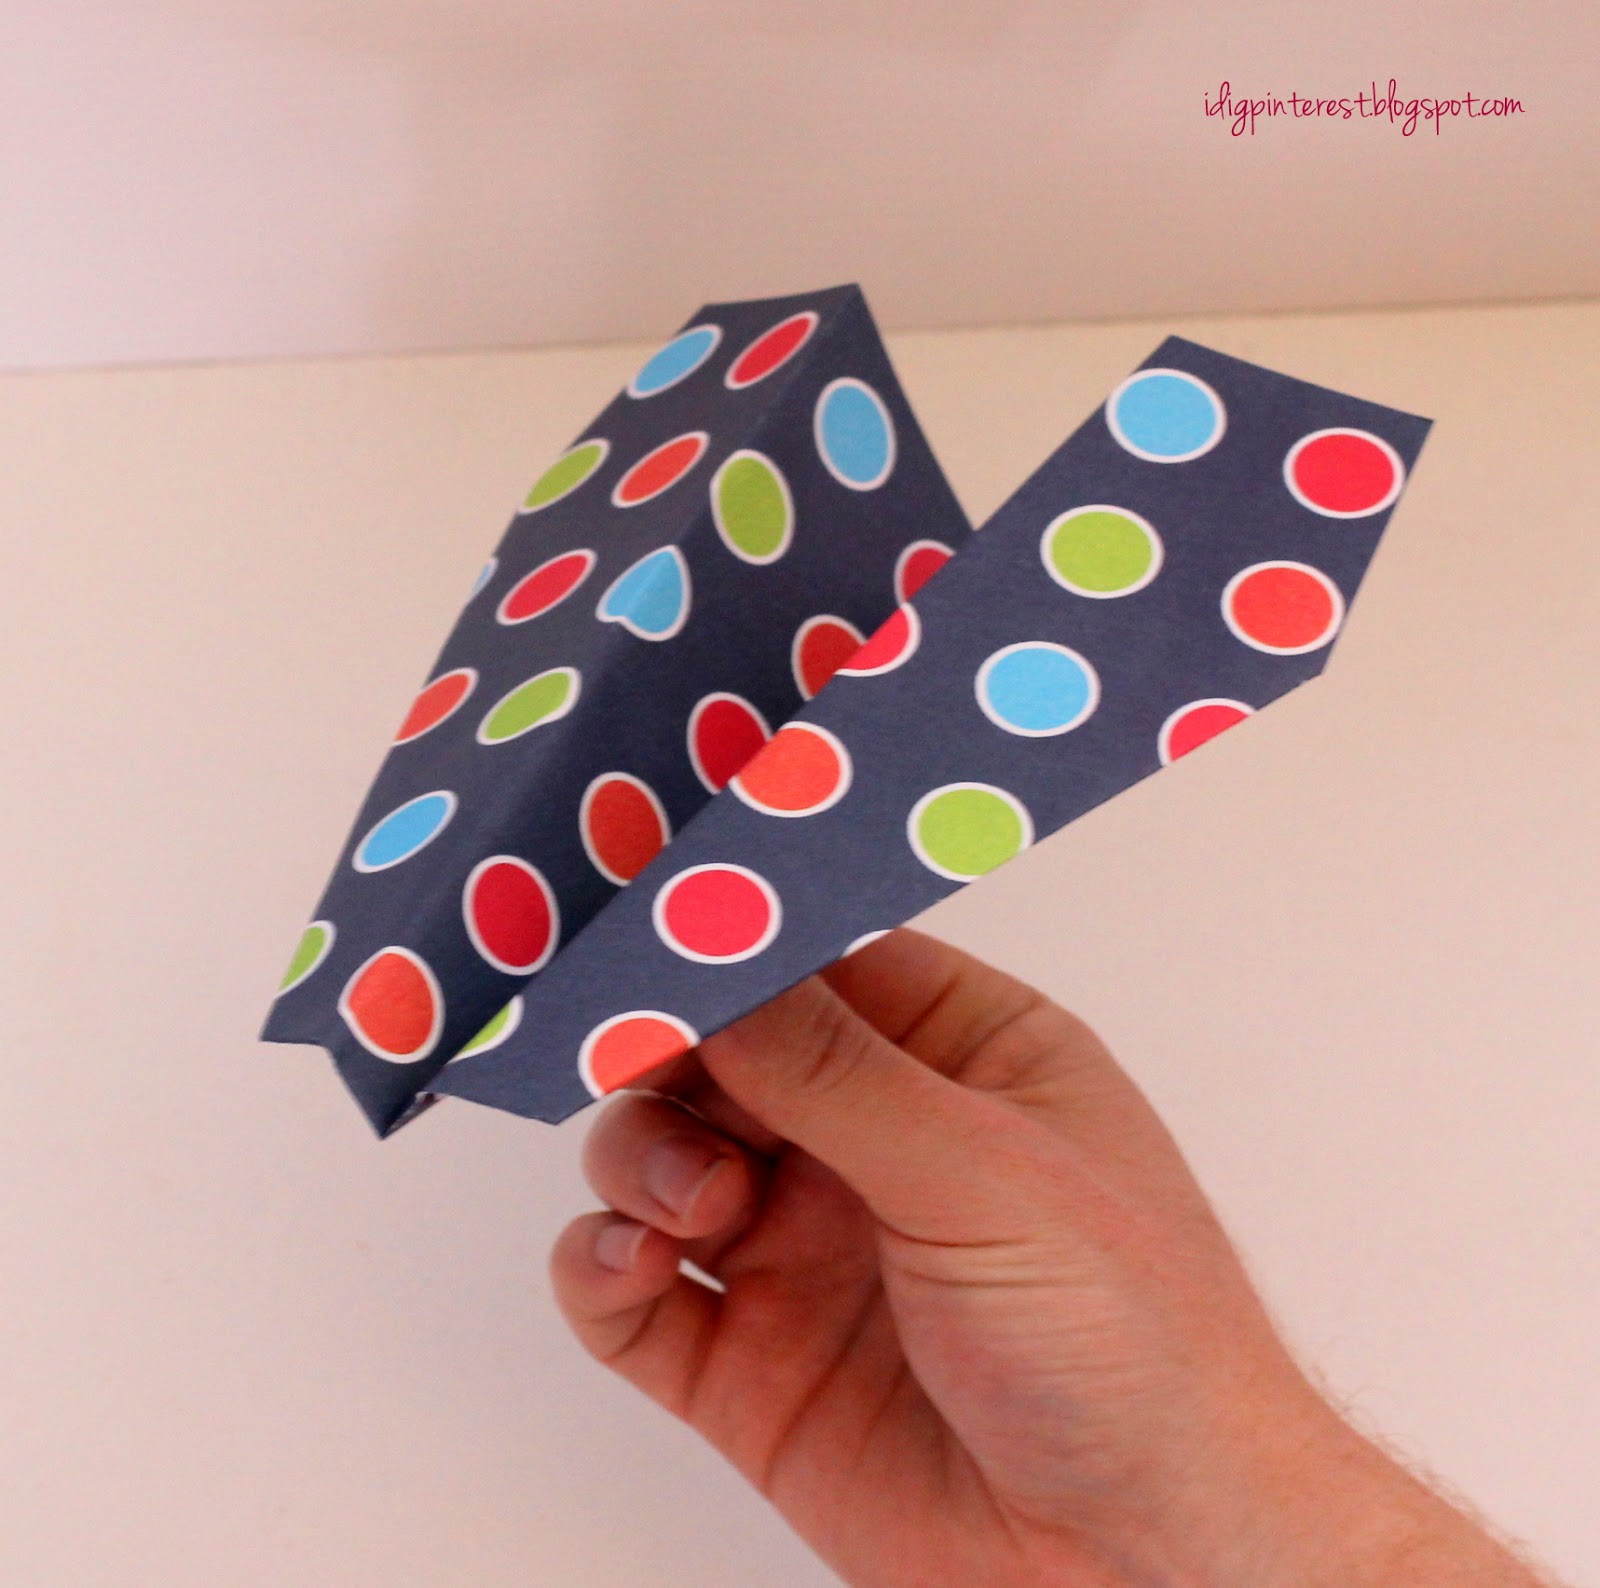
The finished product!  You’re done!
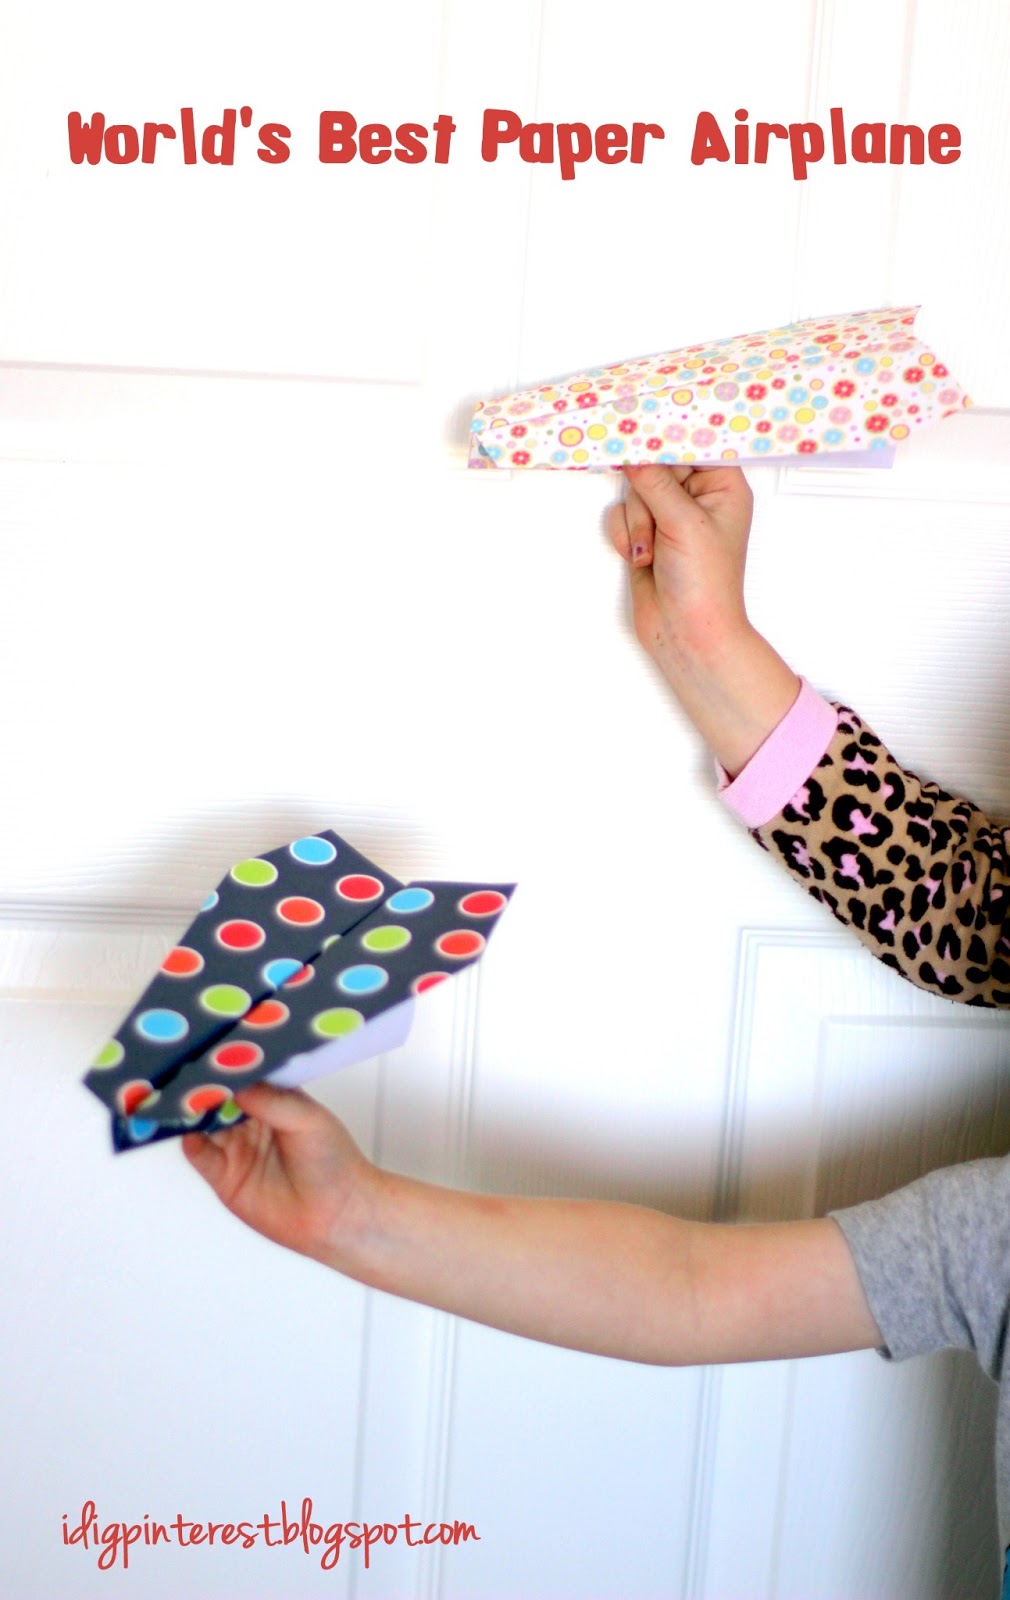
 Now fly it proudly.
Throw it gently and you will be amazed at how far it goes.
And that, my friends, is how you make the “World’s Best Paper Airplane”.  Make one and let me know if you agree!
The kids have sure had fun with these!

Filed Under: Crafting with Kids, Crafts, Kids' Stuff, Uncategorized

Reader Interactions

Comments

  1. Terri says

    April 8, 2013 at 3:15 pm

    Josh does this airplane almost every Sunday with the bulletin. If you stop after turning up the little triangle (don't fold down the sides for wings), you can put your finger tips into the opening and send it flying that way too. It's a cool glider that way.
    • Christine Bell says

      April 8, 2013 at 5:42 pm

      Cool, Terri! We'll have to try that.
  2. Elizabeth says

    April 9, 2013 at 3:53 am

    We approve :) My kids are at this moment tossing it around my room.
  3. Christine Bell says

    April 9, 2013 at 8:30 pm

    Great, Elizabeth! Thanks for the feedback. :)
  4. Margo says

    April 10, 2013 at 2:06 pm

    We are impressed, we've tried three different ones in the last three days, and yours went the farthest!
    • Christine Bell says

      April 10, 2013 at 3:17 pm

      I'm so glad to hear, Margo! This really is a great plane. Thanks for the feedback.
  5. Rita says

    April 10, 2013 at 3:14 pm

    Love it! This is the way that I learned to make paper airplanes for my boys too!
  6. Miranda @ Someday Crafts says

    April 11, 2013 at 5:16 am

    I've already pinned this and I WILL be trying this technique next time I need to make one of these! My boy will be so stoked! We'll be highlighting this tomorrow at Someday Crafts, so come by if you have a minute.
  7. Amber Crawley says

    April 12, 2013 at 2:46 pm

    So going to have to try this with my boy! I'm sure he'll love it :)

    Heidi

    http://handmadefrenzy.blogspot.com/
  8. chi dela resma says

    April 15, 2013 at 1:30 am

    Hello new follower here via GFC! I love the polka dots colors!
    Hope you can visit my blog and follow me back...

    Thanks so much

    hugs,
    Chi
    http:sunnydaysarelove.blogspot.com
  9. Jennifer Hughes says

    April 15, 2013 at 6:43 pm

    Visiting from the Family Fun Friday. My Family-Focused Monday hop is live now and I would love to see one of your awesome posts linked up @ www.mondaykidcorner.blogspot.com.

    Have a wonderful week.
  10. Raising Reagan says

    April 15, 2013 at 10:09 pm

    I remember making these when I was younger. What a fun memory.

    Thank you for linking to Raising Imperfection.
    Please come back Friday to see if you were featured. :)

    ¤´¨)
    ¸.•*´
    (¸¤ Lanaya | xoxo
    www.raising-reagan.com
  11. Ruthie Knudsen says

    April 20, 2013 at 6:20 pm

    How fun... my son loves to make paper airplanes :) Thanks for coming to (link) party with me... Come and share again today at Super Saturday http://www.whatscookingwithruthie.com :) Have a wonderful day. xoxo~ Ruthie
  12. Jenn says

    May 27, 2013 at 10:19 pm

    thank you so much for this tutorial. My girls were stuck with us at work one day and this was a great way for them to pass some time. They spent a ton of time flying these planes, they really do glide a long way. I blogged about our experience and gave links/credit back to your blog and this tutorial. We found a nifty way to add color to our blank white paper, since we discovered coloring with crayons made it top heavy and end up nose diving. Here's a link to my post. Thanks again for the inspiration. Jenn

    http://www.clevercraftycookinmama.com/2013/05/worlds-best-paper-airplane-tutorial.html#.UaPbltiyN8E
  13. Carla at Preschool Powol Packets says

    September 26, 2013 at 1:54 am

    *Love* this--paper airplanes are the best!! We have another method that I've used for years, but now I need to make a couple and compare! ;) I'm pinning this to my (CarlaINHouston) Awesome Preschool board!

Primary Sidebar

Hi! I'm Christine, and I'm addicted to Pinterest! I love sharing creative "pin"-spiration by way of delicious recipes, fun crafts, party ideas, and DIY projects. I hope you'll stop by often!

Follow by email…

Popular Posts

  • Simple DIY Spring Decor Ideas
  • Hamburger Hash Brown Casserole
  • Edible Nests
  • Coat Closet Turned Half Bathroom
  • “Jam-Packed with Fun” Teacher Appreciation Gift
  • Chicken Teriyaki Bowls

Footer

Mom It Forward: Blogger Network
Privacy Policy

Copyright © 2025 I Dig Pinterest · Implemented by WPopt

MENU
  • Home
  • About Me
  • Advertise
  • Contact
  • Recipes
  • Crafts
  • Parties
  • Printables
  • Privacy Policy