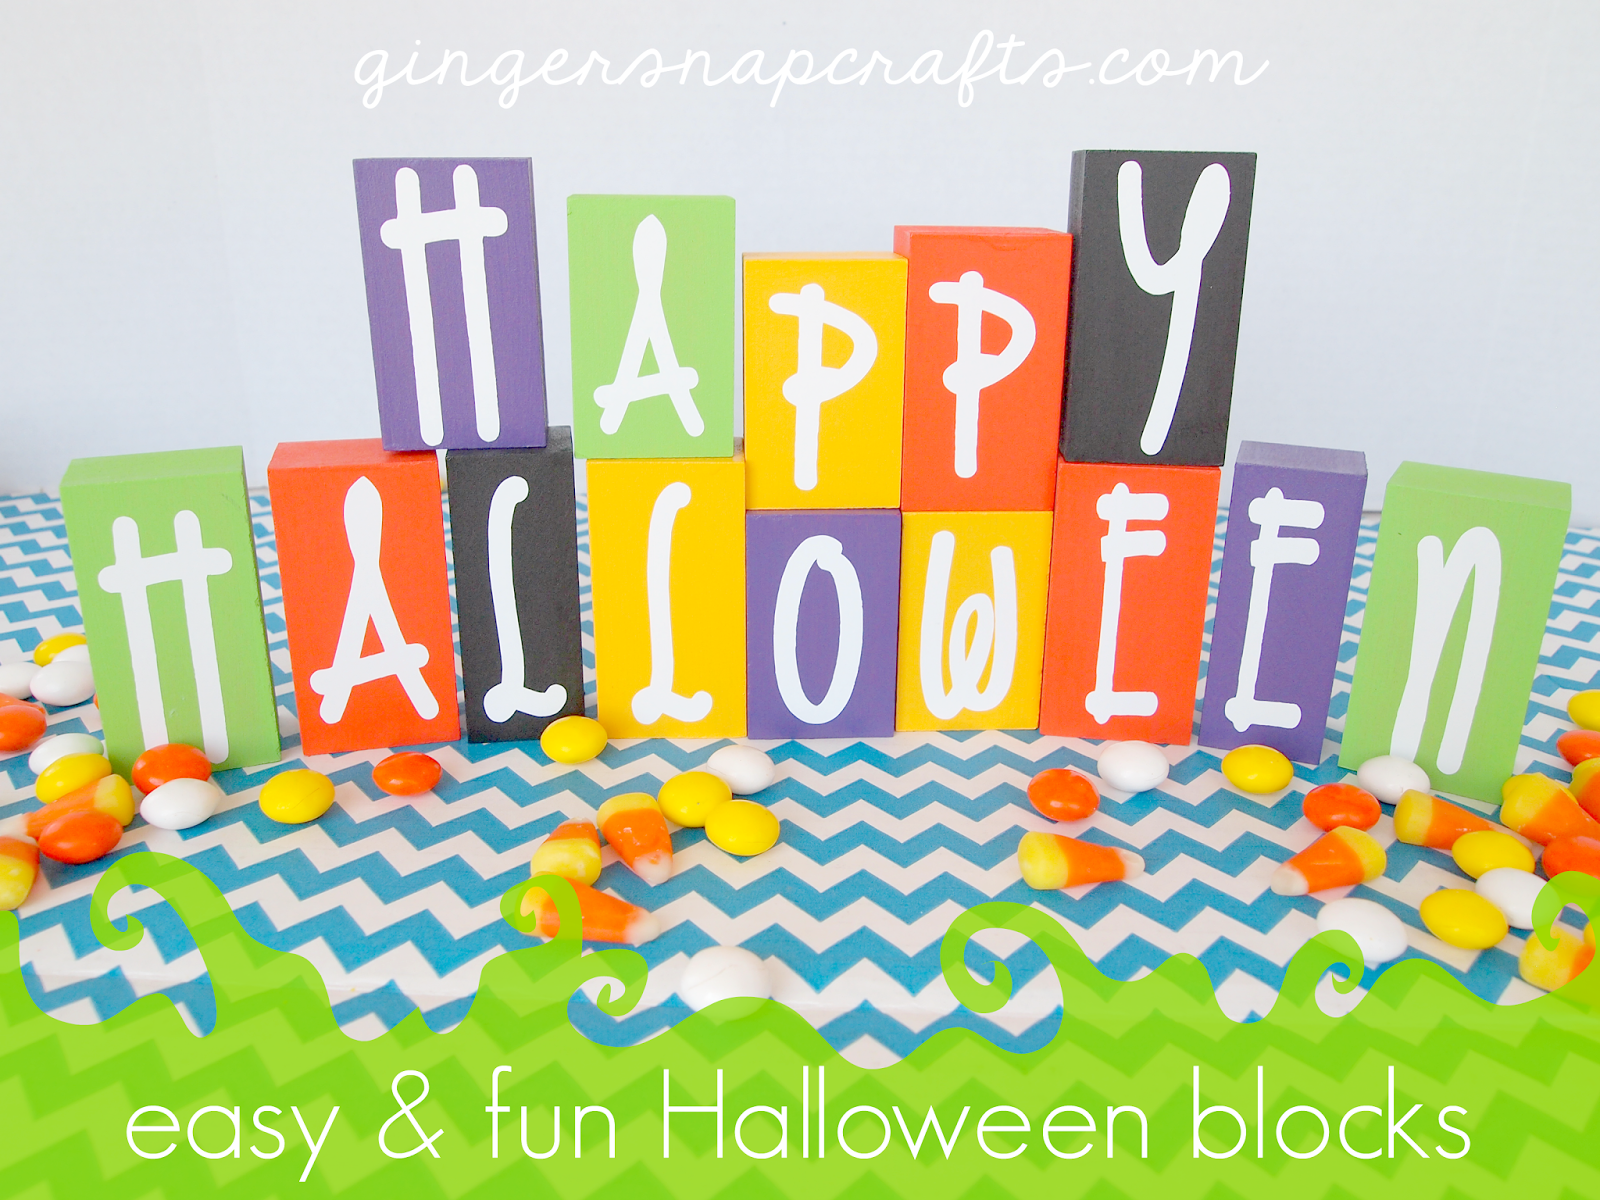
Hi! It’s Ginger from GingerSnapCrafts.com! It’s so nice to meet you. Over on my blog you will find lots of easy craft ideas, DIY projects, recipes, kids crafts, organization tips & more. I’d love to have you drop by sometime. 🙂 I’m am so excited to be here today sharing a cute & easy Halloween tutorial with all of YOU. 🙂 I love simple & easy crafts. Annnnd this project is definitely super easy to put together. You’ll only need a few supplies, too. So keep reading to see how I did it. 🙂
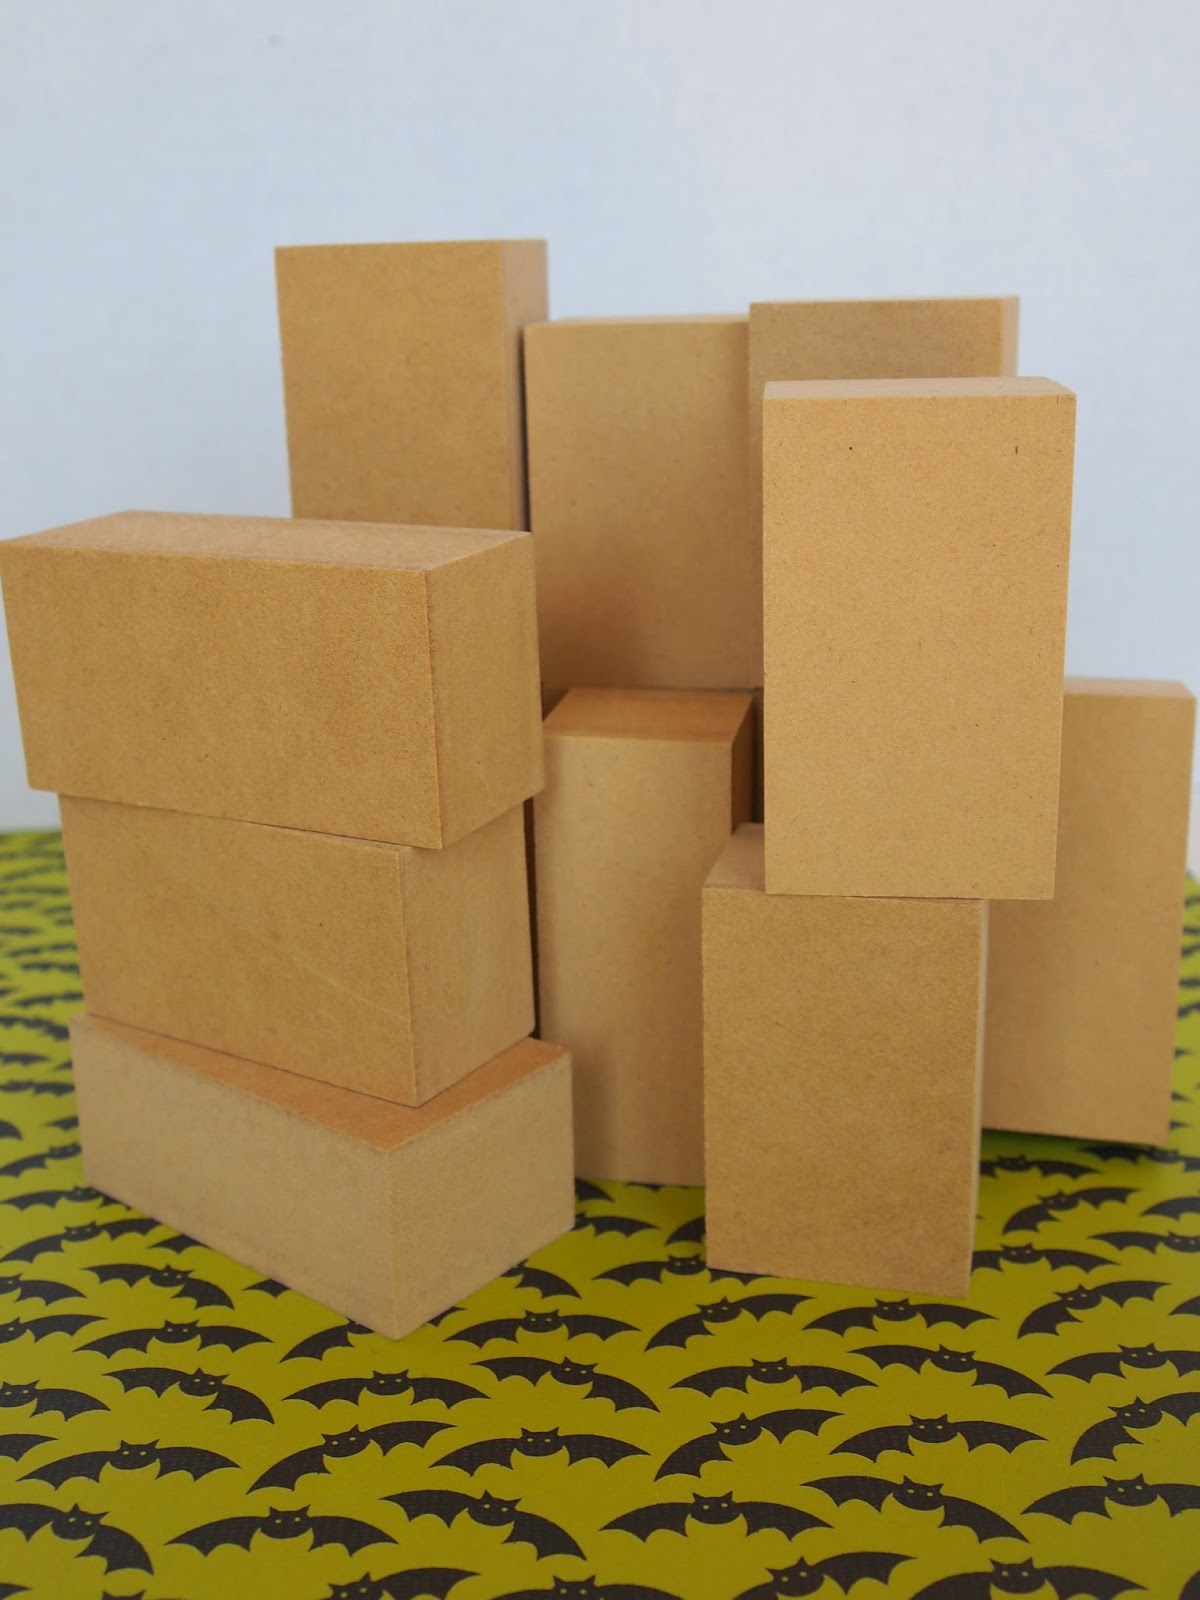
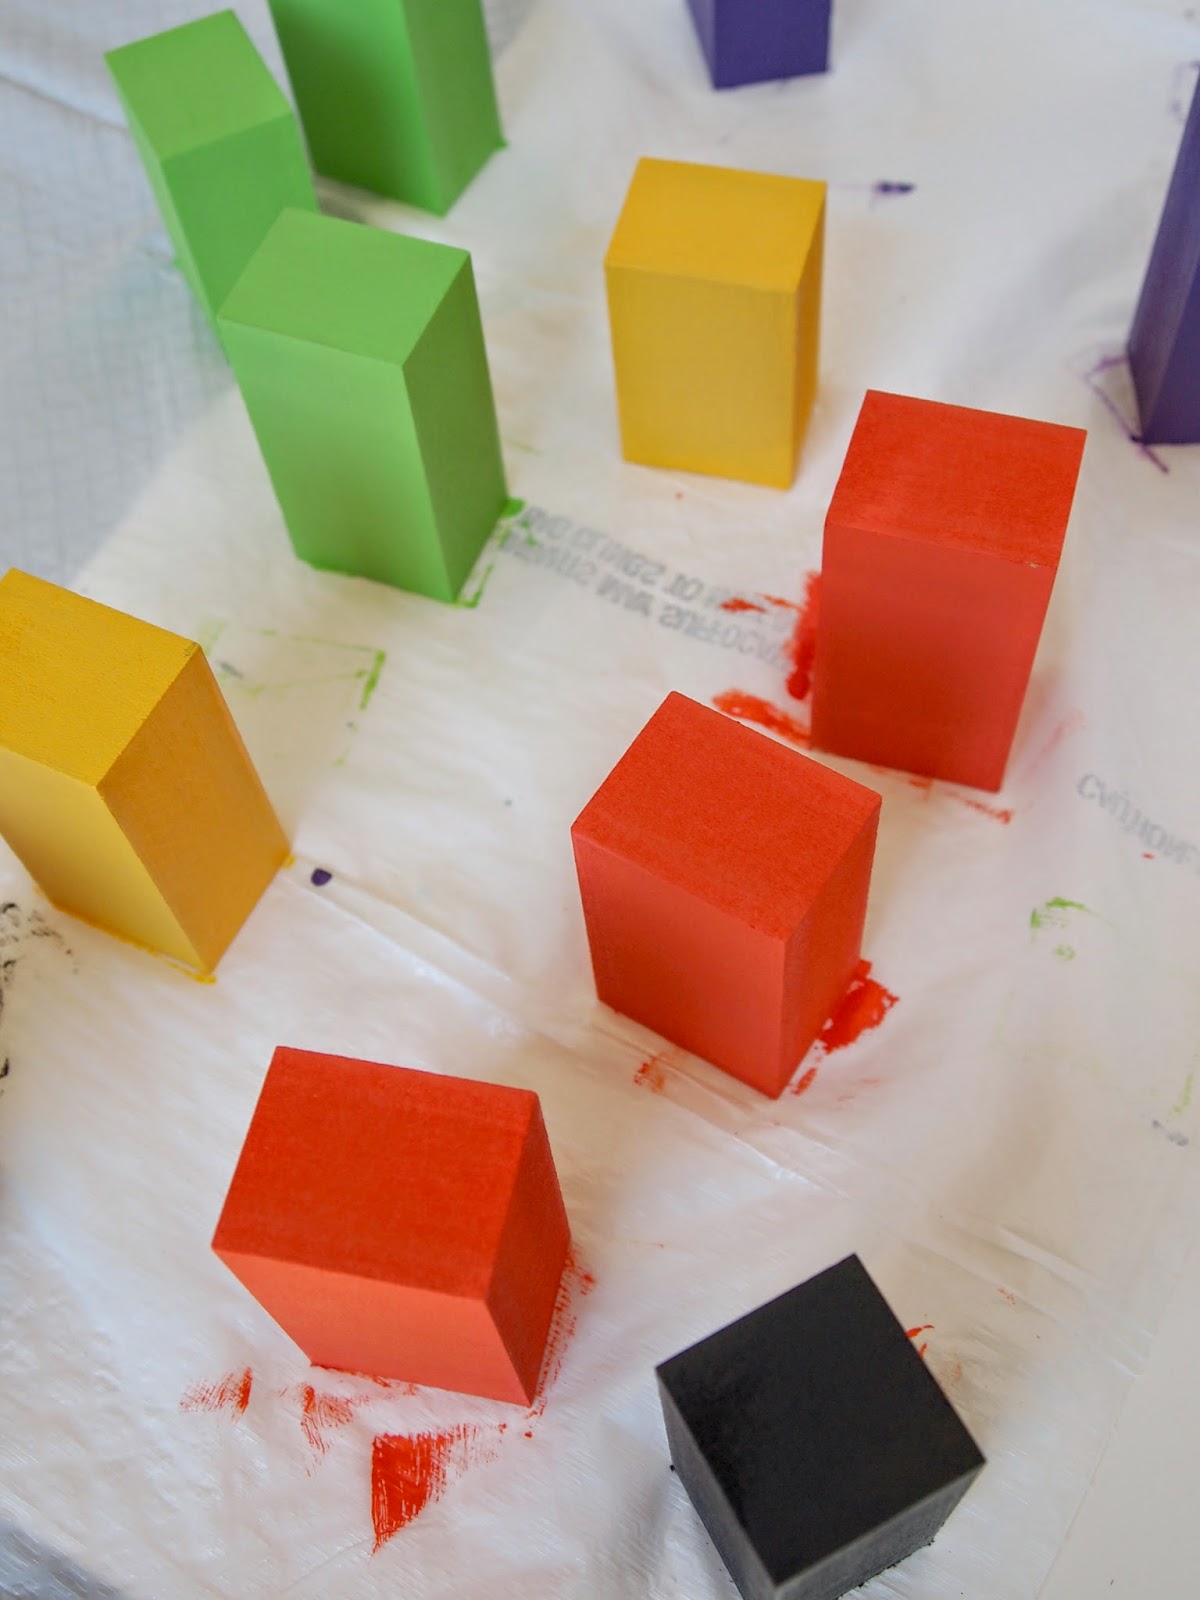
For my blocks I used these wooden blocks I had bought quite a while ago from one of those daily deal sites. I’m glad I finally decided to use them. ha! 😉 You could also use a 2×2 board cut into smaller blocks. My blocks were not cut all the same size. Some were a little taller & some were a little shorter. Some were a little wider & some a little skinnier. Have fun ~ mix them up! 😉
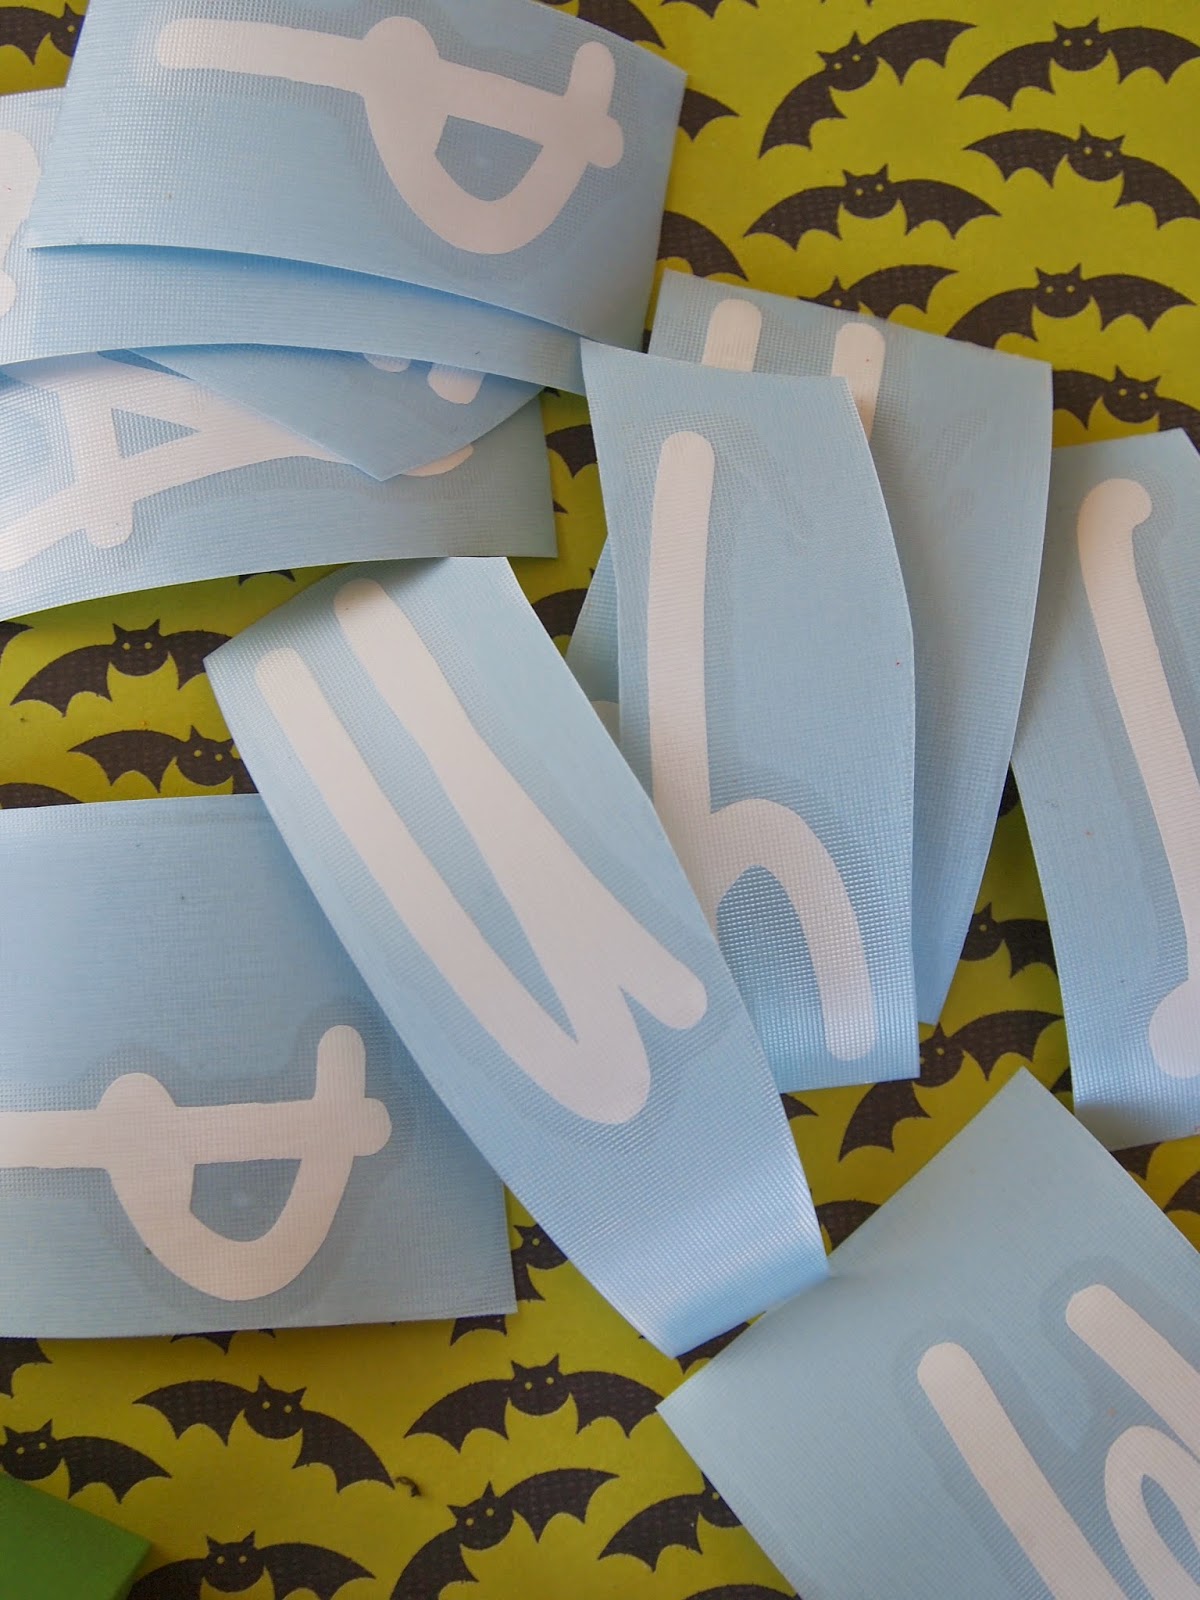
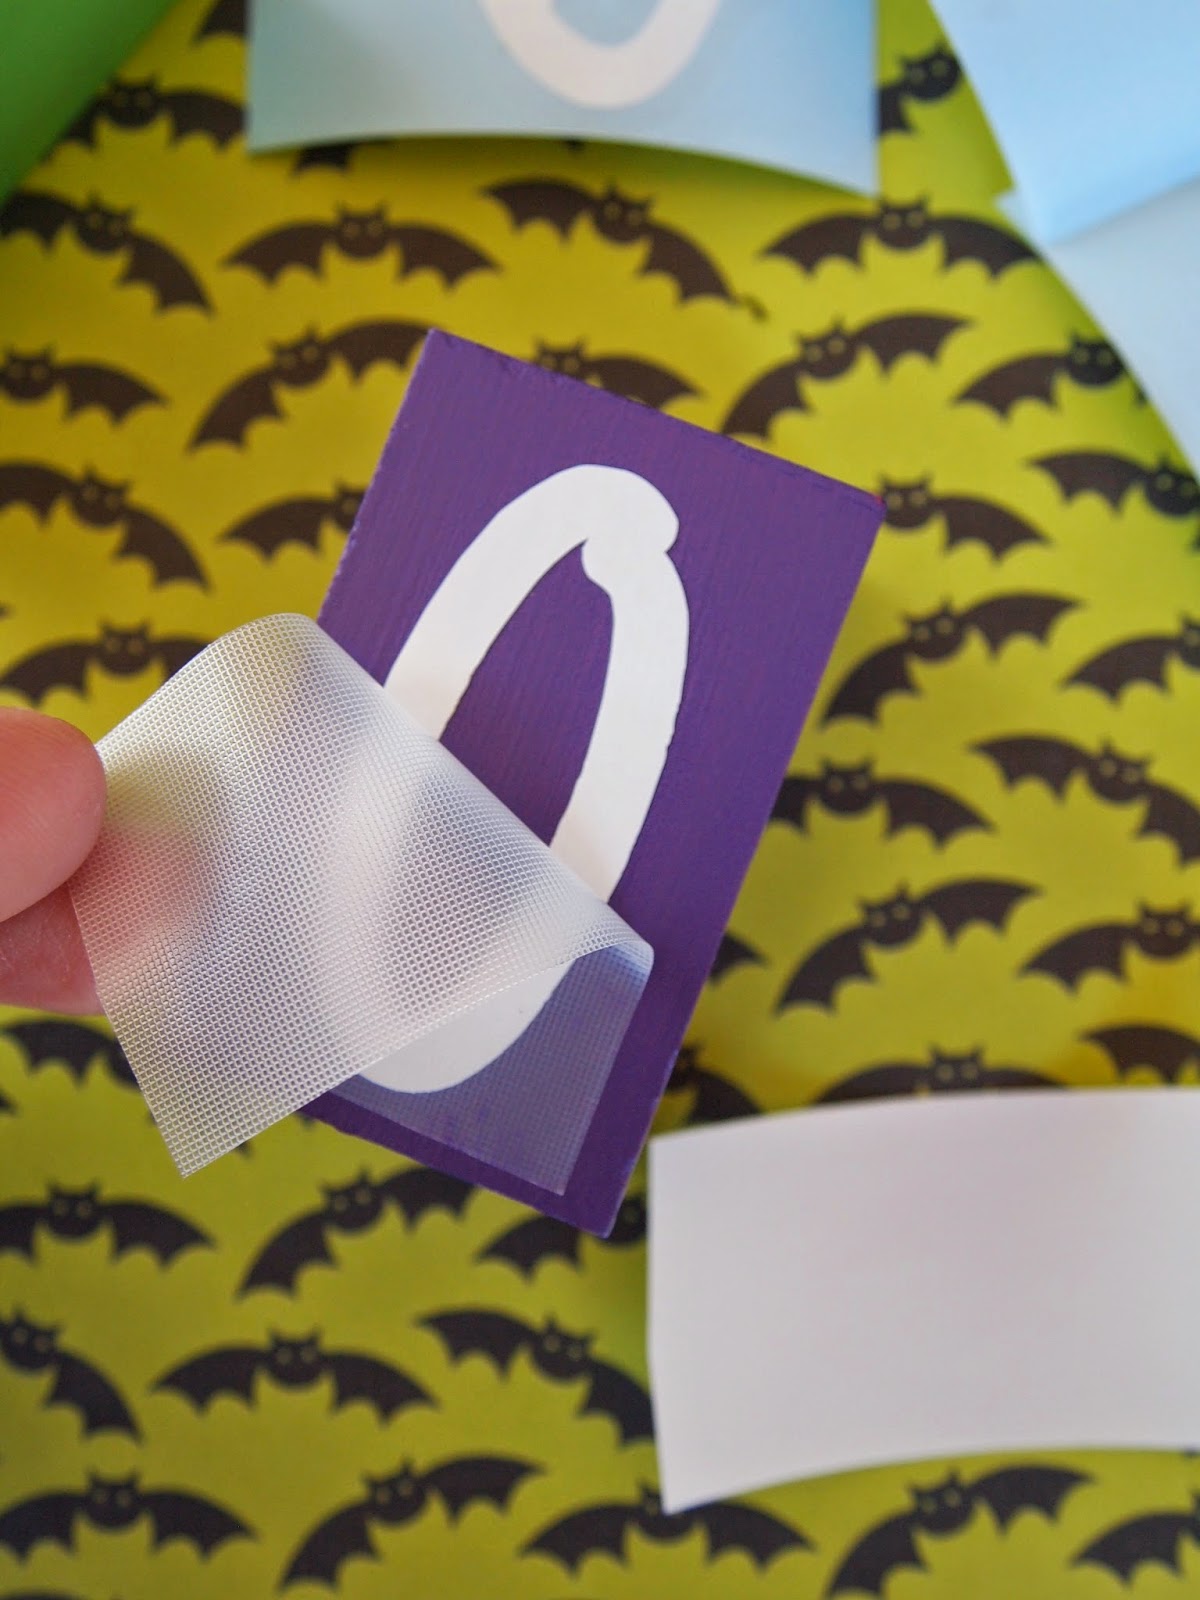
I cut my letters using white vinyl & my Silhouette using the “An Accidental Kiss” font. If you do it this way make sure you measure your blocks carefully. Since each block is a different size it makes a difference on how big your letters need to be. (If you don’t have a digital craft cutter you could use a stencil, paint marker or order vinyl letters online.)
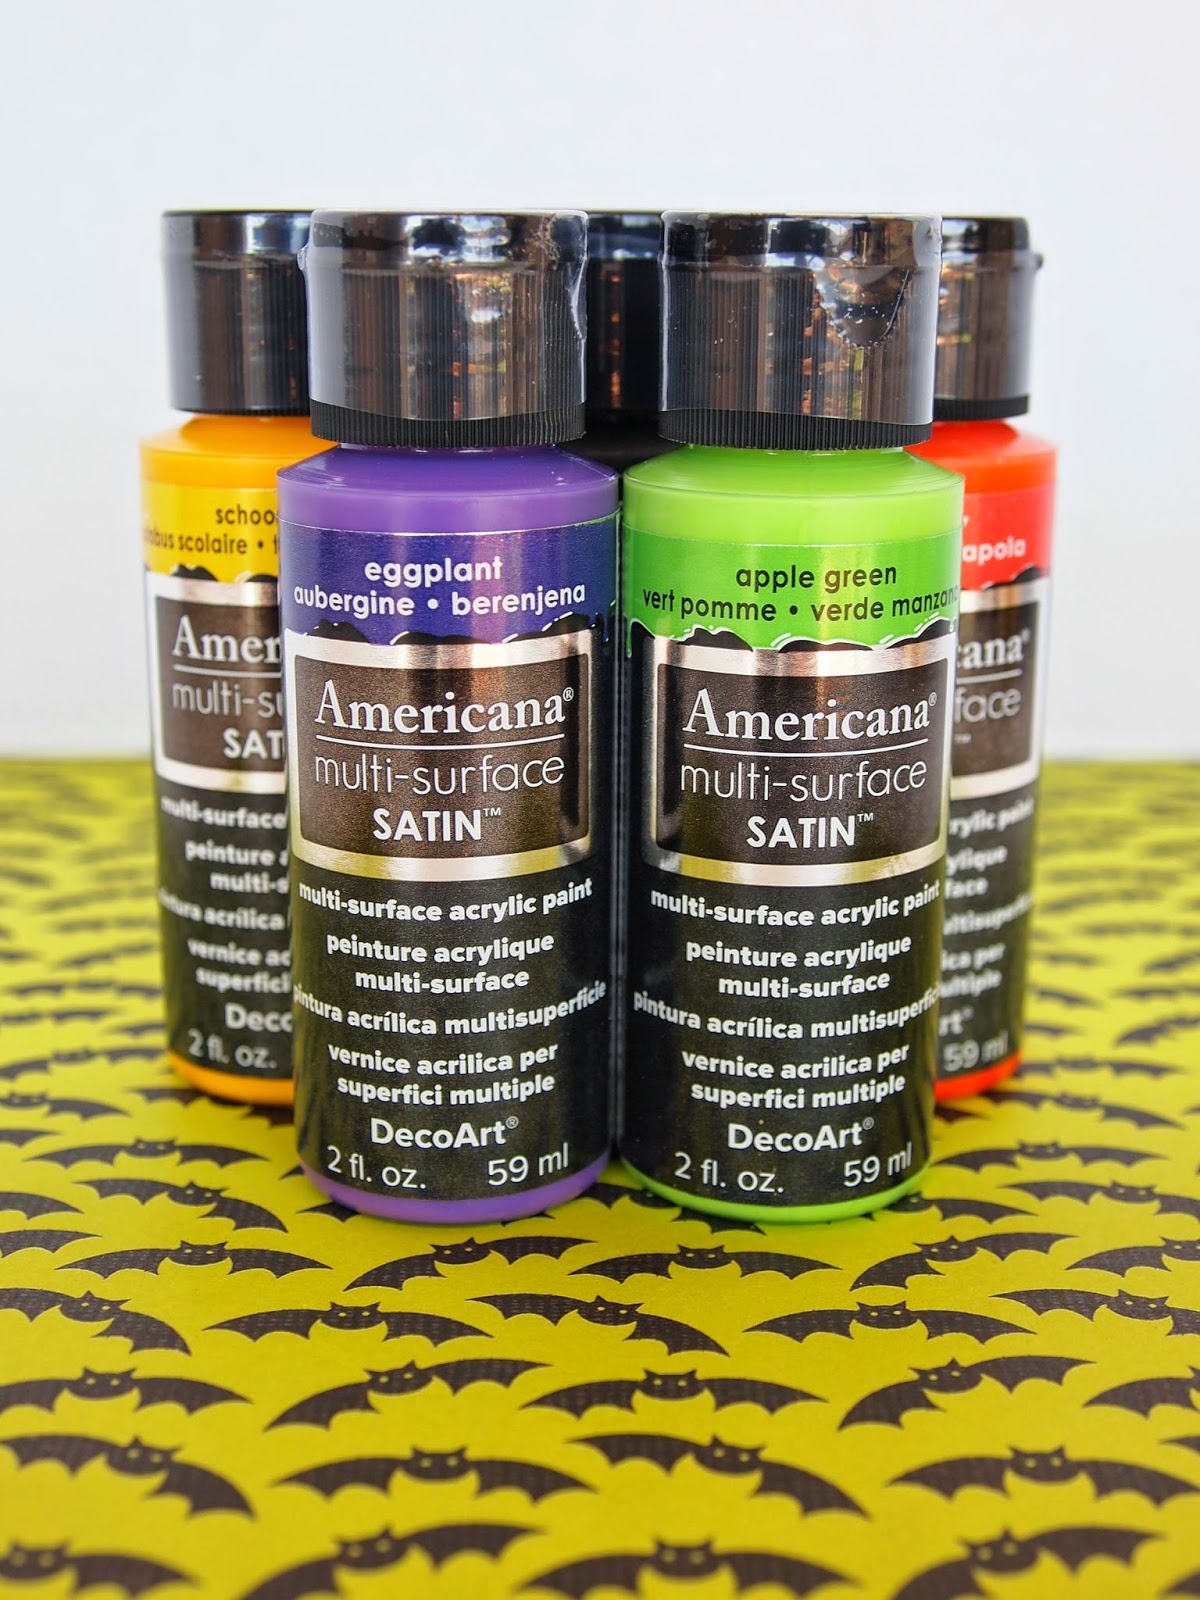
For this project I used the Americana Multi-Surface Satin paint from DecoArt in eggplant, school bus, apple green, poppy & black tie. I painted my blocks with a foam brush putting about 2 to 3 coats of paint on each block. Then I let them dry.
Then I applied my vinyl letters. You can put a coat of Mod Podge on top if you like. That’s it! Easy peasy! 🙂
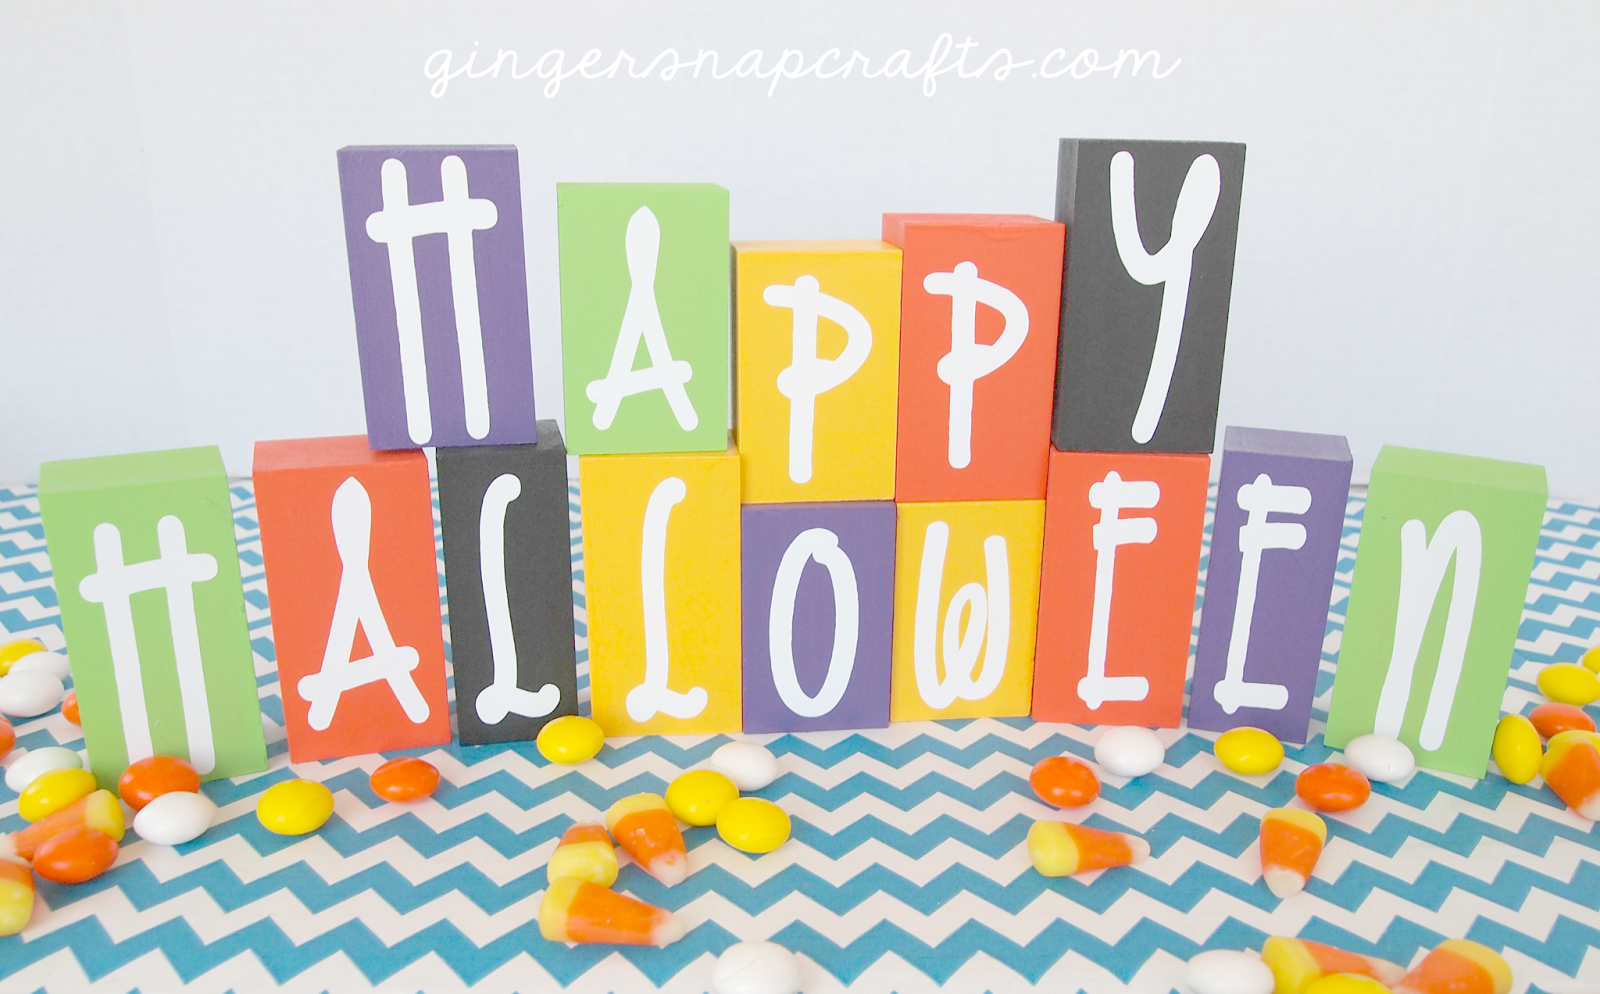
I love how this project turned out ~ not too spooky or scary & with colors that are perfect for a Happy Halloween! I also love how the white letters really pop against the colorful blocks! 🙂
You can check out some of my favorite Halloween projects below. 🙂
Thank you so much for having me over!
Be sure to stop by my blog. I’d love to see you!
You can also find me over on facebook & instagram.


Thanks so much for being our guest today, Ginger! These blocks are way too cute! I need to make some ASAP.


-Michelle @TheGraciousWife.com