My kids are wanting to keep busy this summer with lots of fun crafts, so we started off with this clever poster board Chompy Fish that has moveable parts! It is so entertaining!
We did a little research and decided that this fish most resembles the Deep Sea Anglerfish that lures its prey with a light that hangs down from its head. It also has sharp, fang-like teeth. Pretty cool!

I found this adorable idea in a Parents magazine back in October of 2012, and modified it quite a bit. We always like to give our projects a fresh, creative spin!
I think this Chompy Fish is just too cute, and it’s certainly gotten lots of attention and play time!
My son was able to help measure the pieces, cut, and glue, color and attach the brads to make it move. I love crafts where the kiddos can be involved and stay busy throughout the whole process!
I find that when the kids help make something, it’s really special to them and they play with it even more than store-bought items. It’s crazy how that works! Kind of like my kids tend to get more use out of the cardboard box the toys come in than the actual toys themselves. I’m sure you can relate.
When it comes down to it, little ones just like to let their imaginations run wild! And this project will certainly do just that. There’s plenty of room for creative license in what design to draw on the fish and what color the fish should be.

{SUPPLIES}
1 large, heavy poster board in any color
ruler
pencil
scissors
pipe cleaner
glue
brad fasteners
tape
cardstock paper
crayons or markers

Start by measuring and cutting two strips of poster board that are 2″x12″.

Now cut two pieces of poster board that are “P” shaped. The dimensions are 12″ long and 5″ at the widest point, with the stem measuring 2″ wide. We cut one, then used it as a pattern to trace and cut the other.

Now crisscross/overlap the two “P’s” so they meet after the curves. They should be placed so there’s a curvy part on top and bottom with the flat sides in between, creating the mouth space. Poke a hole with a pencil or punch with a small hole punch through both pieces.

Now insert a brad. This will be the fish’s head.
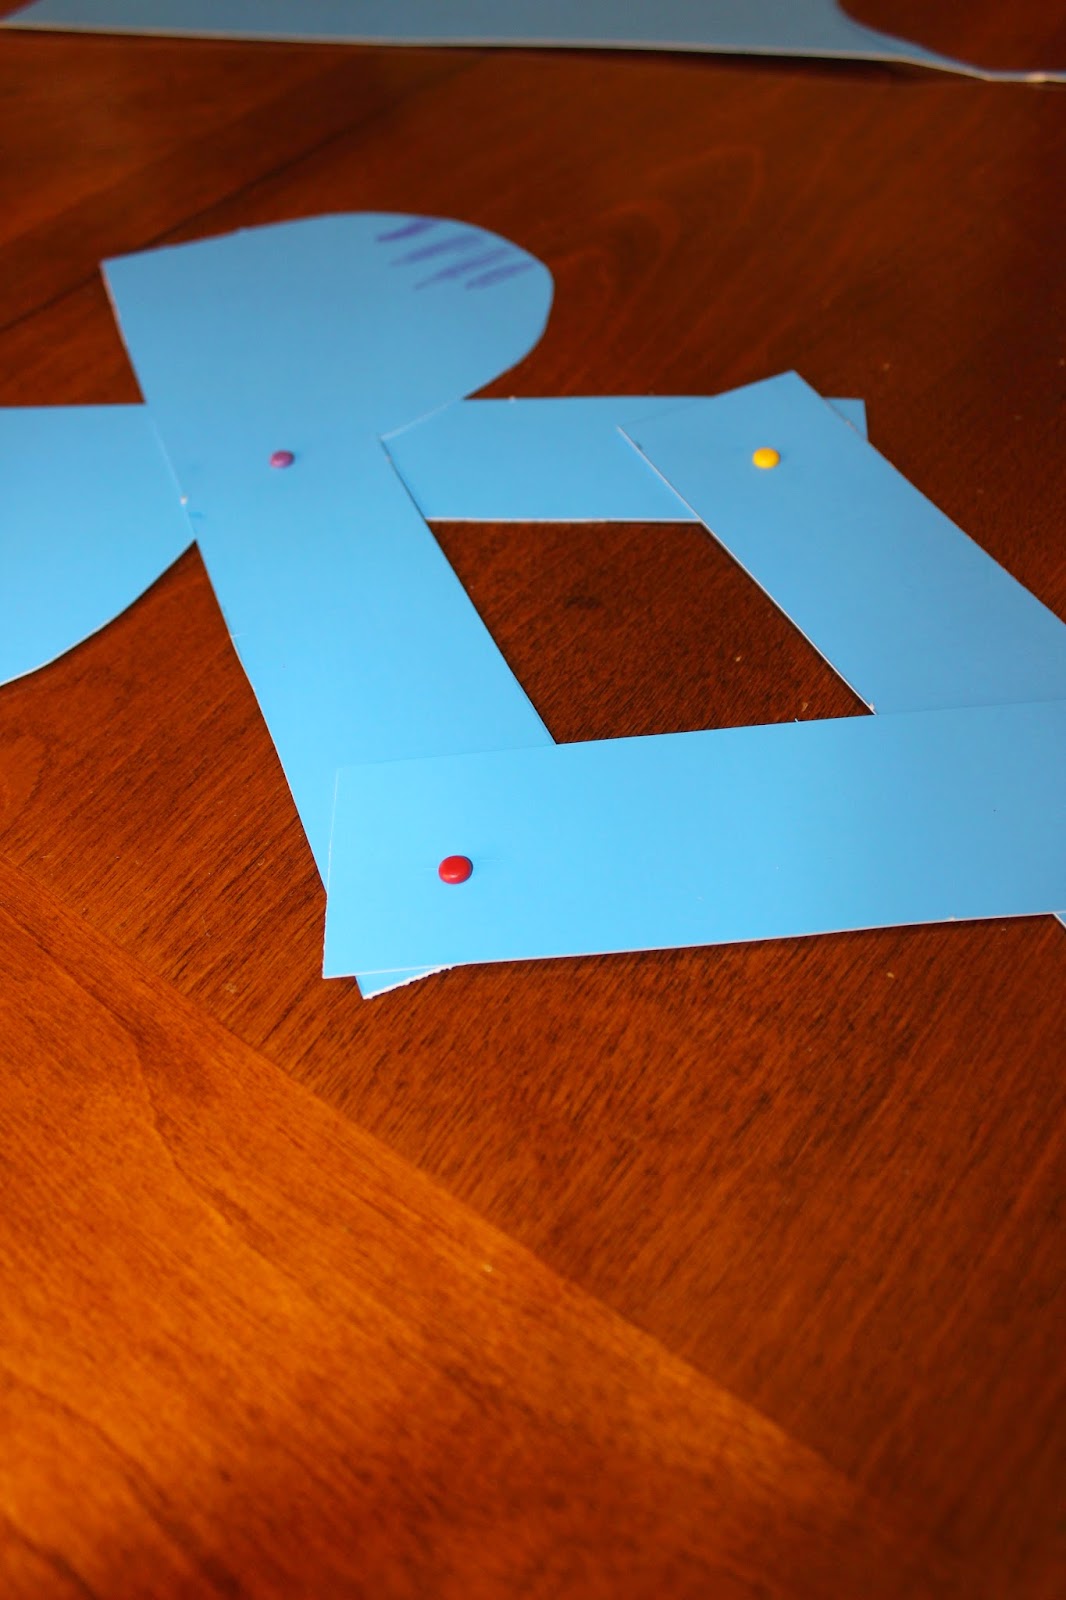
Grab your two other strips of poster board and overlap them on the ends of the “P” pieces. Punch or poke a small hole where the brads will go and then insert the brads in those places.
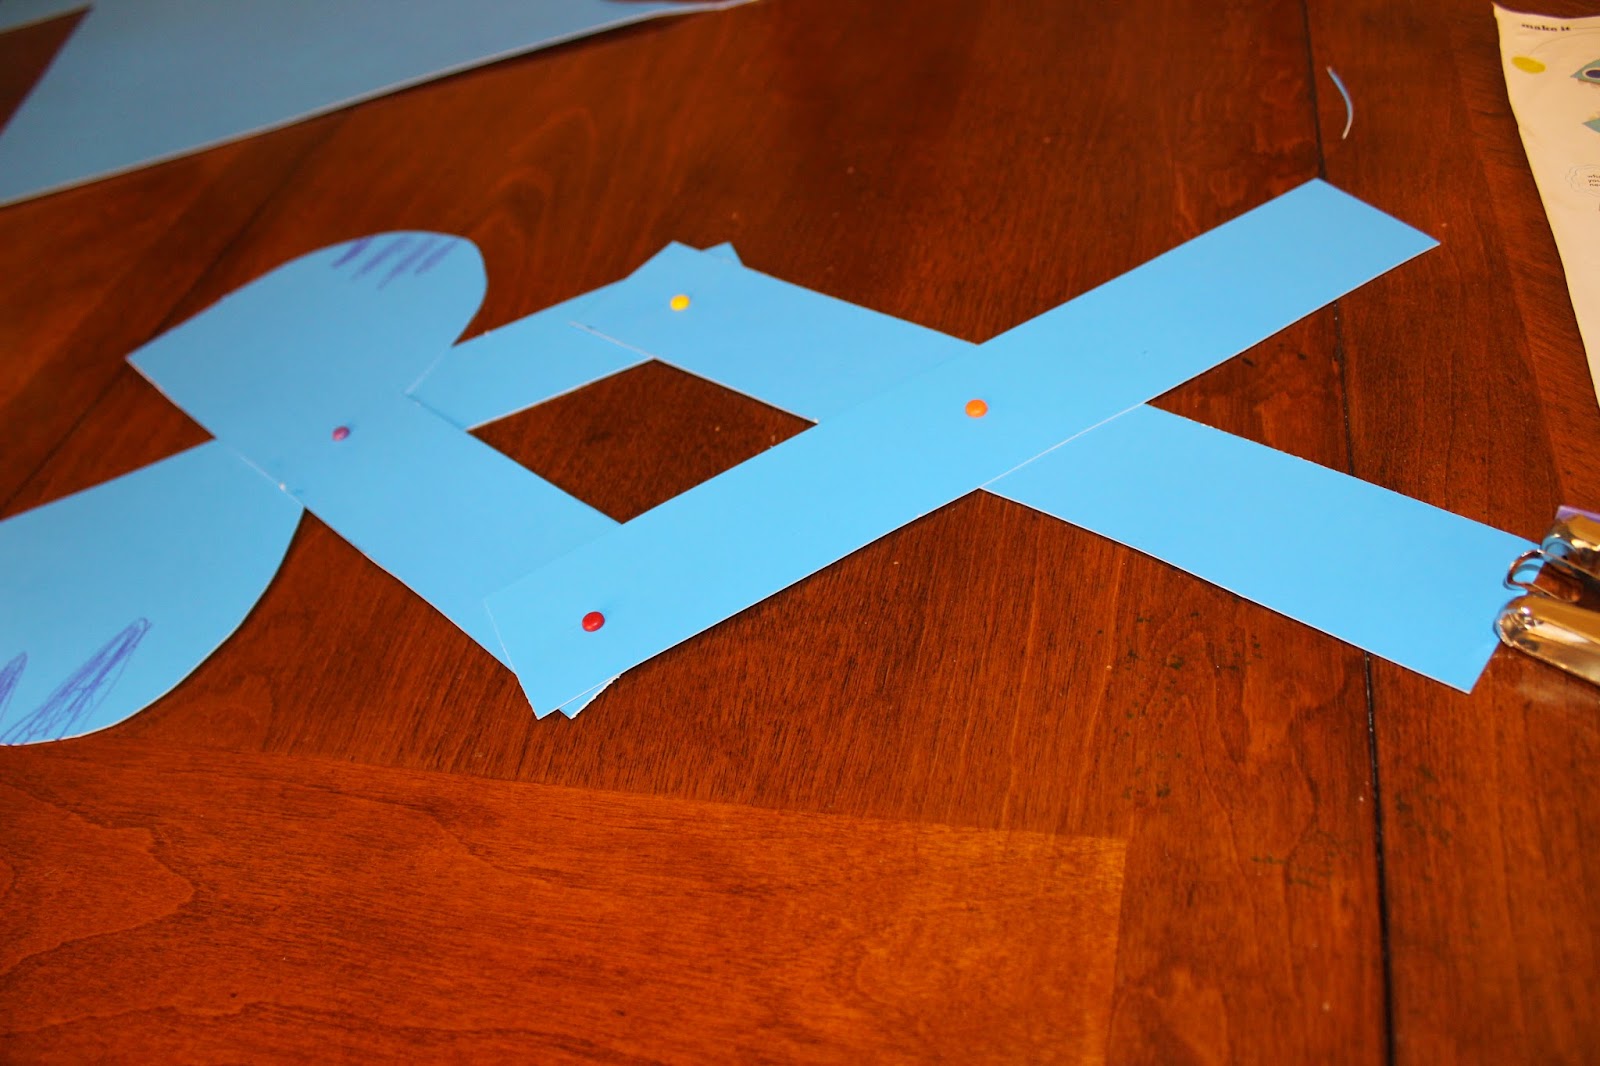
At the point where your two 2″x12″ strips overlap exactly in the center, poke or punch a hole and insert a brad.

Now make some eyes by cutting out circles with your cardstock, then coloring the center smaller circles with crayon or marker. Glue the eyes to the top part of the fish’s head. Draw stripes, swirls, or dot designs to decorate the fish, if you’d like.

Now make the appendage/lure on top by cutting a piece of pipe cleaner that’s about 8″ long, curving it slightly, and taping it to the back of the head. Color and cut a circle out of cardstock and tape or glue it to the end of the pipe cleaner.
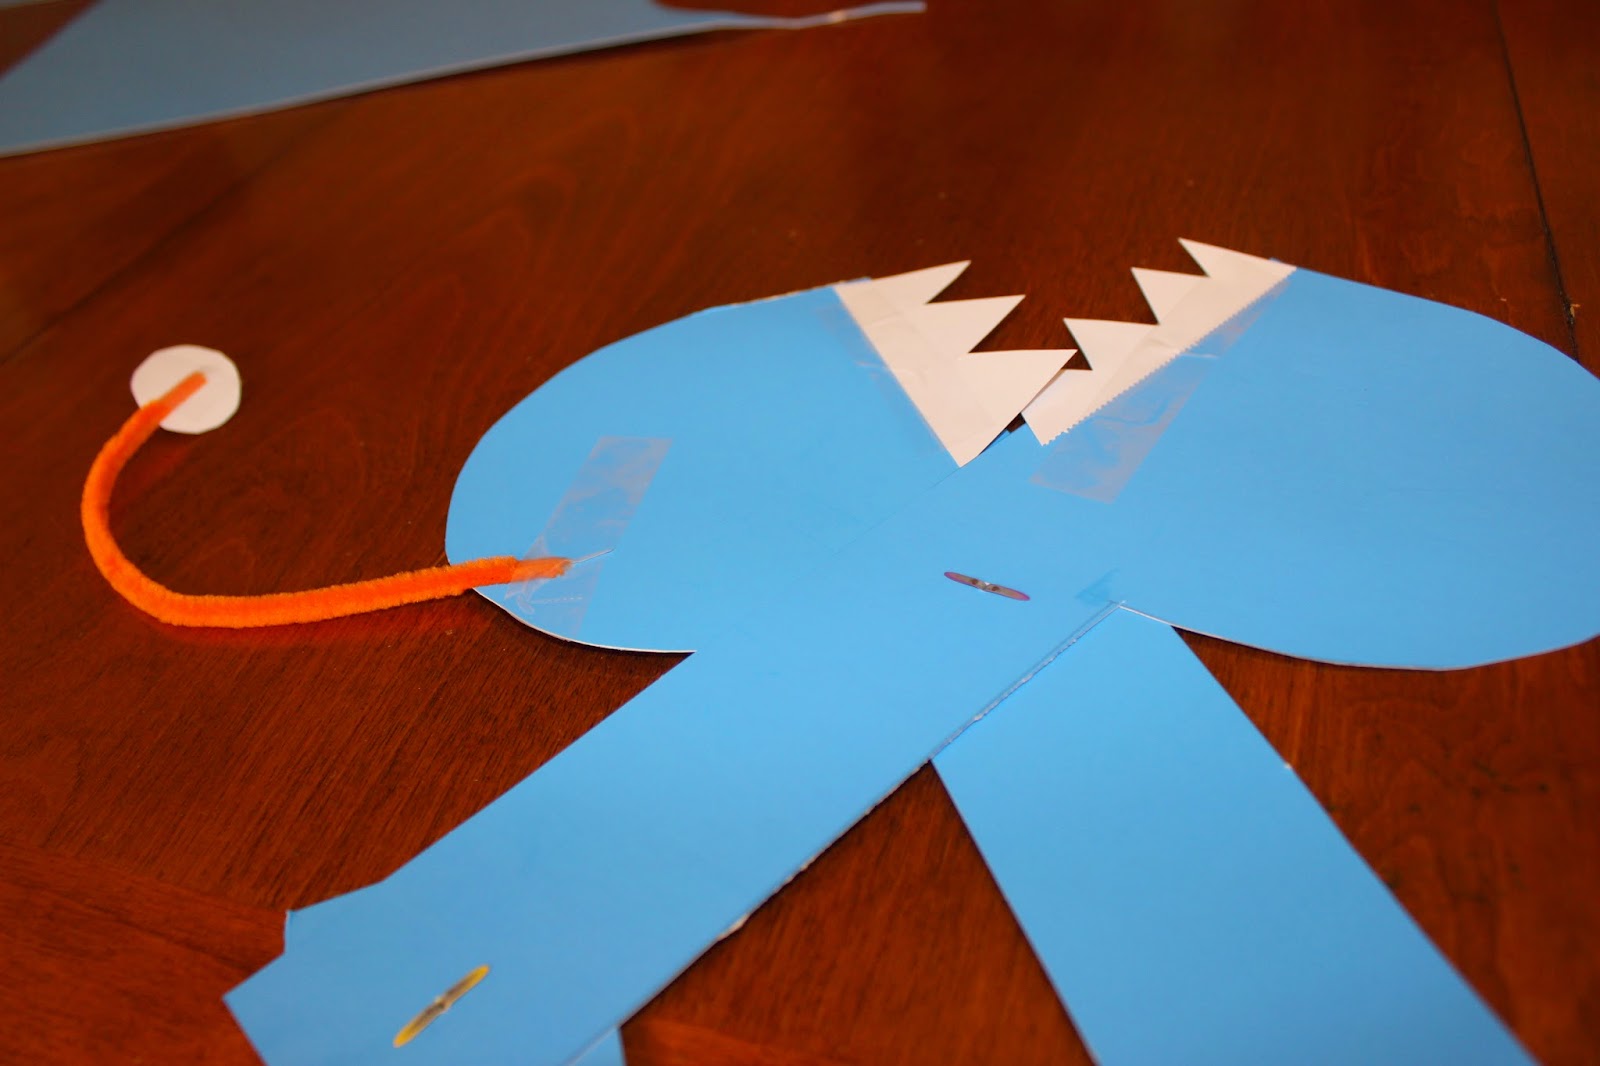
Now cut teeth out of cardstock and tape or glue them to the back of the fish’s mouth pieces.
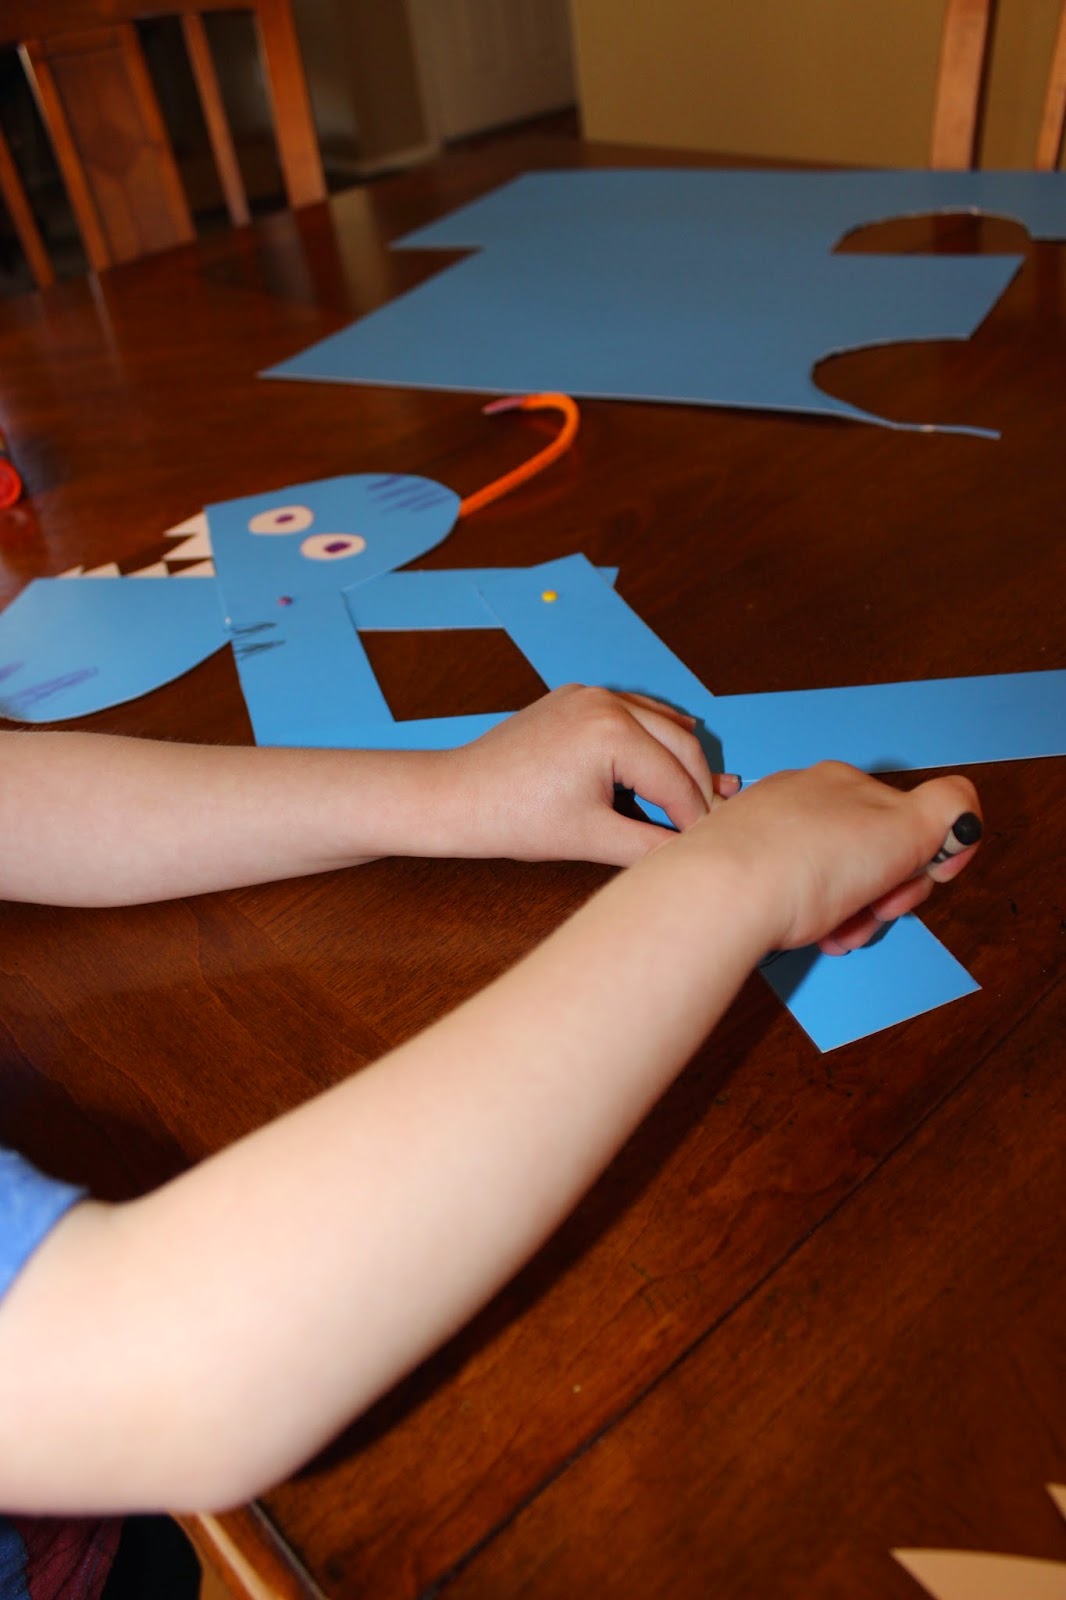
Finish coloring any pattern designs, and then put this chompy guy to the test!

Just pull up and down on the ends to make the mouth move!
This is such a fun and easy craft for the kids! My son actually commented that he wanted the project to last longer. 🙂 Needless to say, there’ll be plenty more cutting, coloring, and gluing at our house over the next few summer months! I love having my kids home!


Comments