This shop is part of a social shopper marketing insight campaign with Pollinate Media Group® and Office Depot, but all my opinions are my own. #pmedia #inspirestudents http://my-disclosur.es/OBsstV.
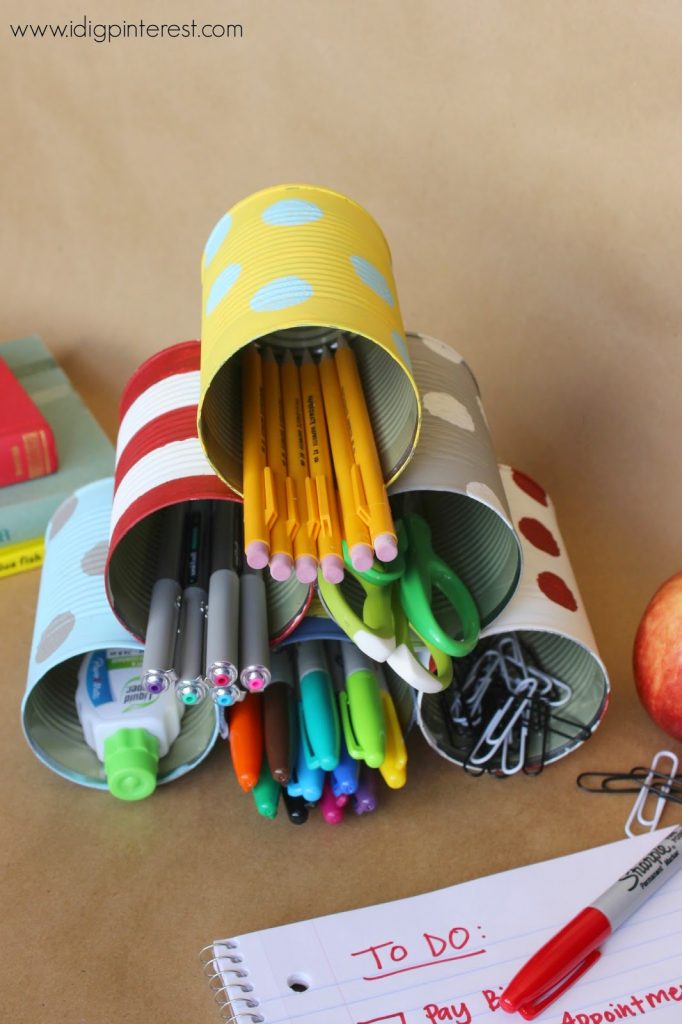
I de-cluttered my once-messy work space with this simple tin can DIY Desk Supply Organizer that would also make a great teacher gift! Isn’t it fun?

It’s back to school time, which means organizing and preparing for change! I’m embracing it wholeheartedly with this cute DIY desk supply organization station.
There’s nothing more frustrating than scrambling and failing to find a pen for jotting notes when making an important call or turning the house upside down in search of a single pair of scissors. Have you done this? It happens all too often around here, I’m afraid. Talk about a stressful situation!
So in my attempt to start the school year off right this time around, I stuck my supplies in one, tidy place where they’re right at my fingertips! It’s conveniently portable too! So when my daughter’s doing homework, I can move this handy caddy to the table where she has easy access to all she needs.
Because I’m a little obsessed with stripes and polka dots (ask my friends and family about my wardrobe), I chose to paint them onto empty tin cans for a very inexpensive desk organizer with some serious spunk! It’s a definite conversation piece, don’t you think?

The other day I took a trip out to Office Depot for school supplies, but this time my husband watched the kids. Hallelujah! I was like a kid in a candy store with time to kill and no children to chase. Talk about heaven! The associates had to keep checking in on me because I was taking so long to make a decision….just because I could! 🙂
I totally scored, because this gigantic package of Sharpies was only 5 bucks! Way to make me smile, Office Depot.

I ended up with a cart full of beautiful items that I just must have before the school year can start and then set home to organize them in style! No more frantic searches for writing utensils!
Right now is a perfect time to tackle this project, because you can save $5 Off your purchase of $20 or more on Select Newell Rubbermaid Brands (PaperMate, Expo Neon Window Markers, Sharpie, Uni-Ball, & Mr. Sketch)! All of my favorites are definitely included in that list.
Office Depot and Office Max have the best sales on back to school supplies! From Aug 24-30 find weekly savings on select products like PaperMate Flair 4pk’s: $4, Sharpie 12CT Asst Fine & Ultra Fine Asst: $6, Sharpie Dozen Box Black Fine & Ultra Fine: $6, while supplies last. Sounds good to me!

{SUPPLIES}
6 tin cans of equal size, emptied, outer paper removed, and cleaned
Acrylic Paints in various colors
Foam Paint Brushes and a round foam brush for the polka dots
Masking tape for the stripes
Hot Glue Gun
Clear Acryllic Matte Spray for a protecting top coat (optional)

Rinse and clean your cans well. We wouldn’t want our supplies to end up smelling like green beans. 🙂 Make sure to remove any sharp edges that may be left on the inside of the can. Turn them over and let dry completely.

Paint the base color on each of the cans. You may need 2-3 coats for full coverage. Let dry in between.

Make sure the base paint is completely dry before this next step or the paint will peel off when masking. Ok now go ahead and add some fun patterns…polka dots, stripes and such!

To paint the polka dots, you’ll want a round foam brush as shown above. Simply dab it in the paint, blot it once on a test surface to remove excess paint, then carefully stamp the brush onto your can. Repeat for each polka dot.

For the stripes, tape off the areas where you want the base color to show through.

Paint, then remove the tape. I was a little impatient and didn’t allow mine to dry all the way beforehand, so my paint wanted to come off with the tape in certain areas. I quickly touched those up, though.

Now let them dry completely. Spray them with a Clear Acryllic Matte protecting coat if you’d like. It seals the paint and will reduce the chance of paint flaking and scratching off.

Now secure the cans together by laying three down side by side, then hot gluing them where they touch at the joints in front and back. Stack two more on top and repeat the gluing process. Lastly, stack one can on top and glue.

Now fill it with those pretty supplies and admire! I love it when functional meets cute! I’m thinking I’ll keep this one and make another for my daughter’s teacher. What a useful gift it will make, and a great impression too. I’m all for earning brownie points. I see a big A+ in my daughter’s future! 🙂
——
How do you stay organized after school starts? I’d really like to hear your tips!For all other back to school projects go HERE.


Comments