
There are lots of editing options available in the free version of Pic Monkey, but many more if you’re willing to upgrade to a Royale very-reasonably-priced paid membership. Some fun options to play around with are: text, borders, labels, flourishes, textures, overlays, touch-ups, and effects like black and white, sepia, and frost. You can also make collages, which is another great option for a holiday card if you want to use more than one family photo.
For our Christmas card this year, I chose to use a Winter theme with “Flakery” add-ins and a snowflake frame.
Here’s how to replicate the simple process for your own holiday card.

Go to Pic Monkey and click on “Edit a Photo” at the top. Choose a photo from your computer that you’d like to edit. Now click the Snowflake icon at the bottom of the list on the left hand side (with the “New” orange banner). Click “Winterland” and then “Flakery” under “Overlays”. Now choose a snowflake design and position it where you’d like on the photo. You can re-size the flakes by pulling the double-sided arrow up and down when the snowflake is selected. Now you’re ready for the frame!
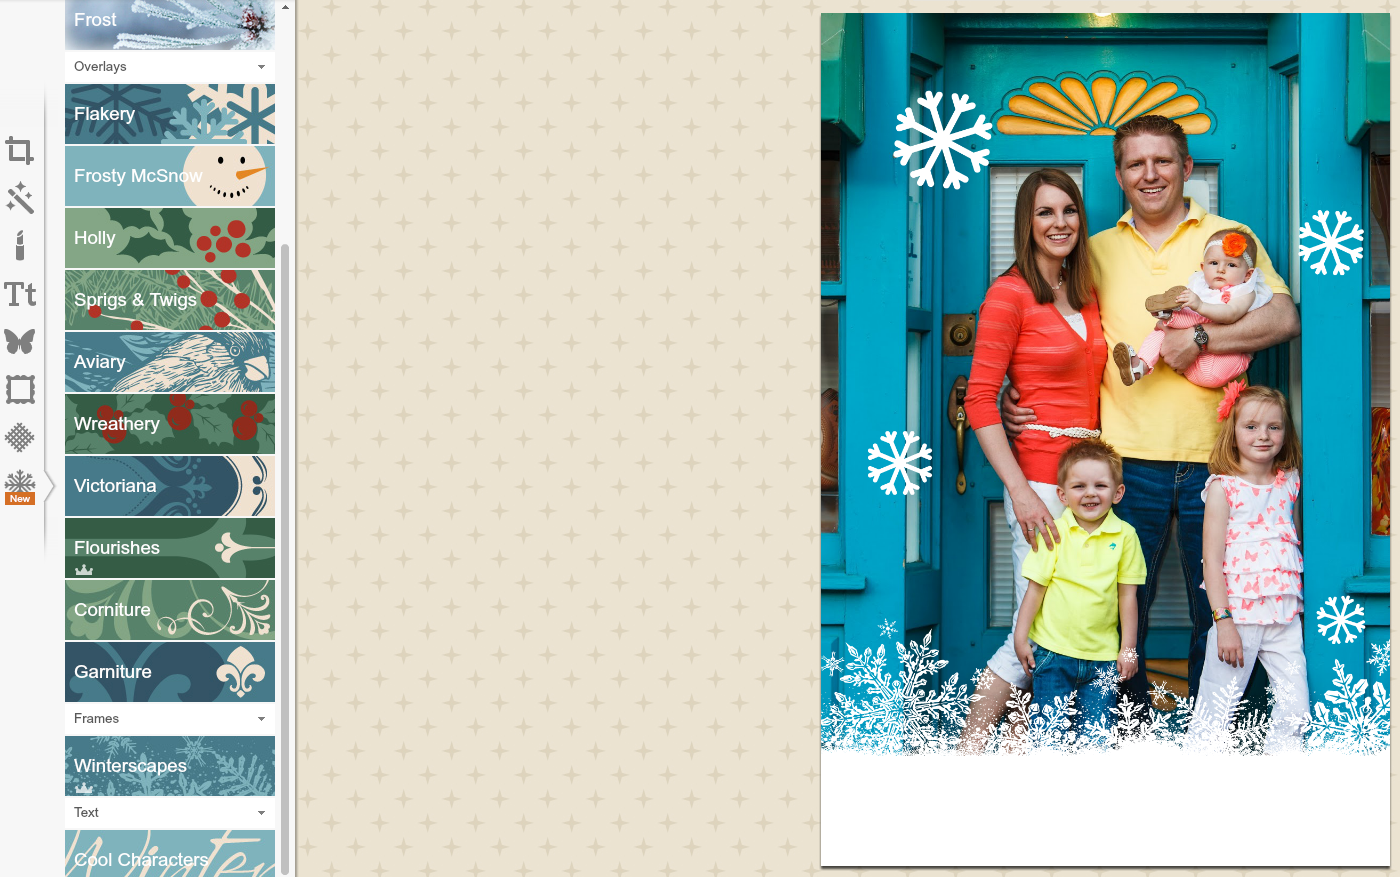
While still in Winterland, click on “Winterscapes” under “Frames”. I chose the snowflake option. It will display on the bottom of your photo. Change the color if you’d like.


I’ll be hand-writing a personal message in each one and mailing them off very soon. It’s quite the process, but I love the thoughtfulness of an old-fashioned pen-on-paper sentiment.


Debbie @ One Little Project
Gracielle from http://mommya-z.com