• Skip to primary navigation
  • Skip to main content
  • Skip to primary sidebar
  • Skip to footer
  • Home
  • About Me
  • Advertise
  • Contact

I Dig Pinterest

Creative "Pin"-spiration

  • Bloglovin
  • Email
  • Facebook
  • Instagram
  • Pinterest
  • RSS
  • Twitter
  • Recipes
  • Crafts
  • Parties
  • Printables
  • Home Improvement
  • Shop My Style

November 11, 2013

Simple No-Sew Burlap Thanksgiving Bunting

I’m in love with burlap!  You may have gathered that from my DIY Burlap Halloween Table Runner tutorial or my DIY Simple Decorative Pillows Post.   Burlap in any form-plain or printed is just so fun!

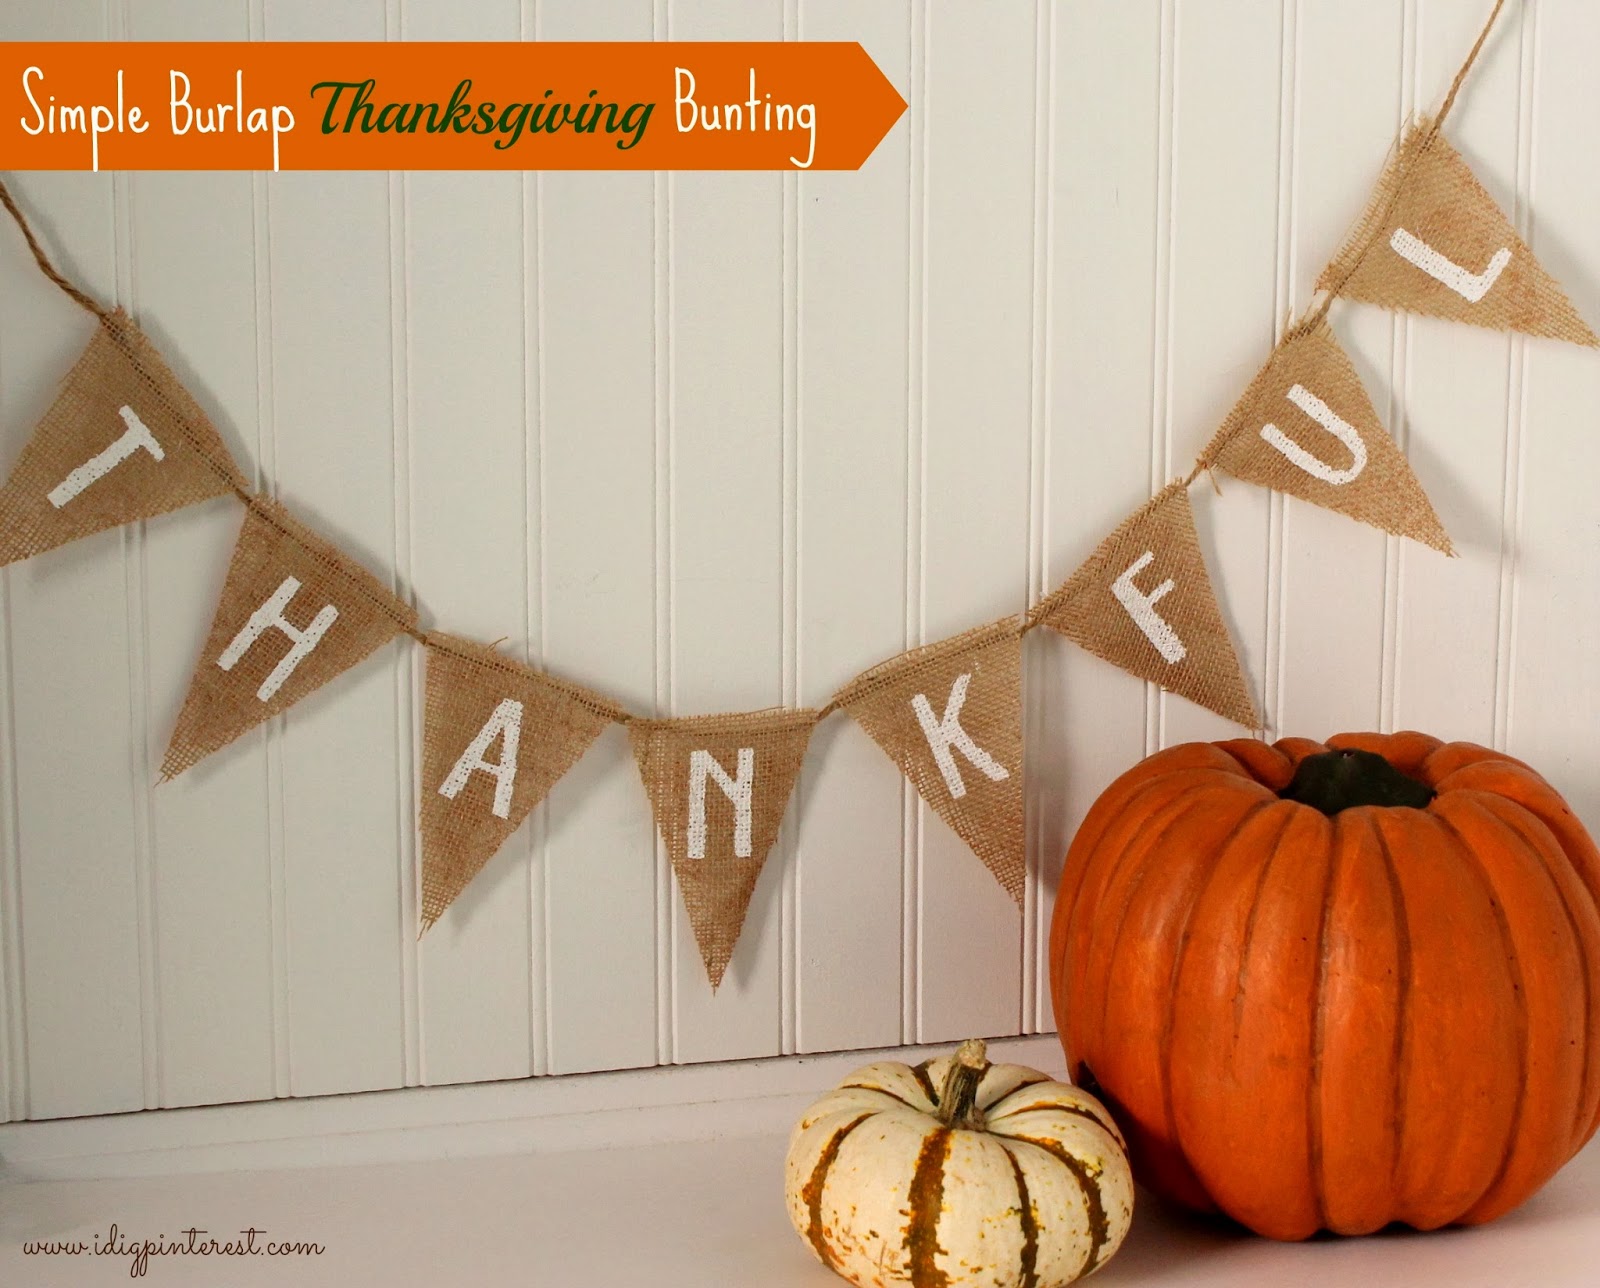
With all the Halloween decorations down, my house was feeling a little bare.  So I decided to make a new bunting to spruce up my mantel in commemoration of Thanksgiving.  I’ll reveal the mantel in its entirety soon, so stay tuned for that.  🙂

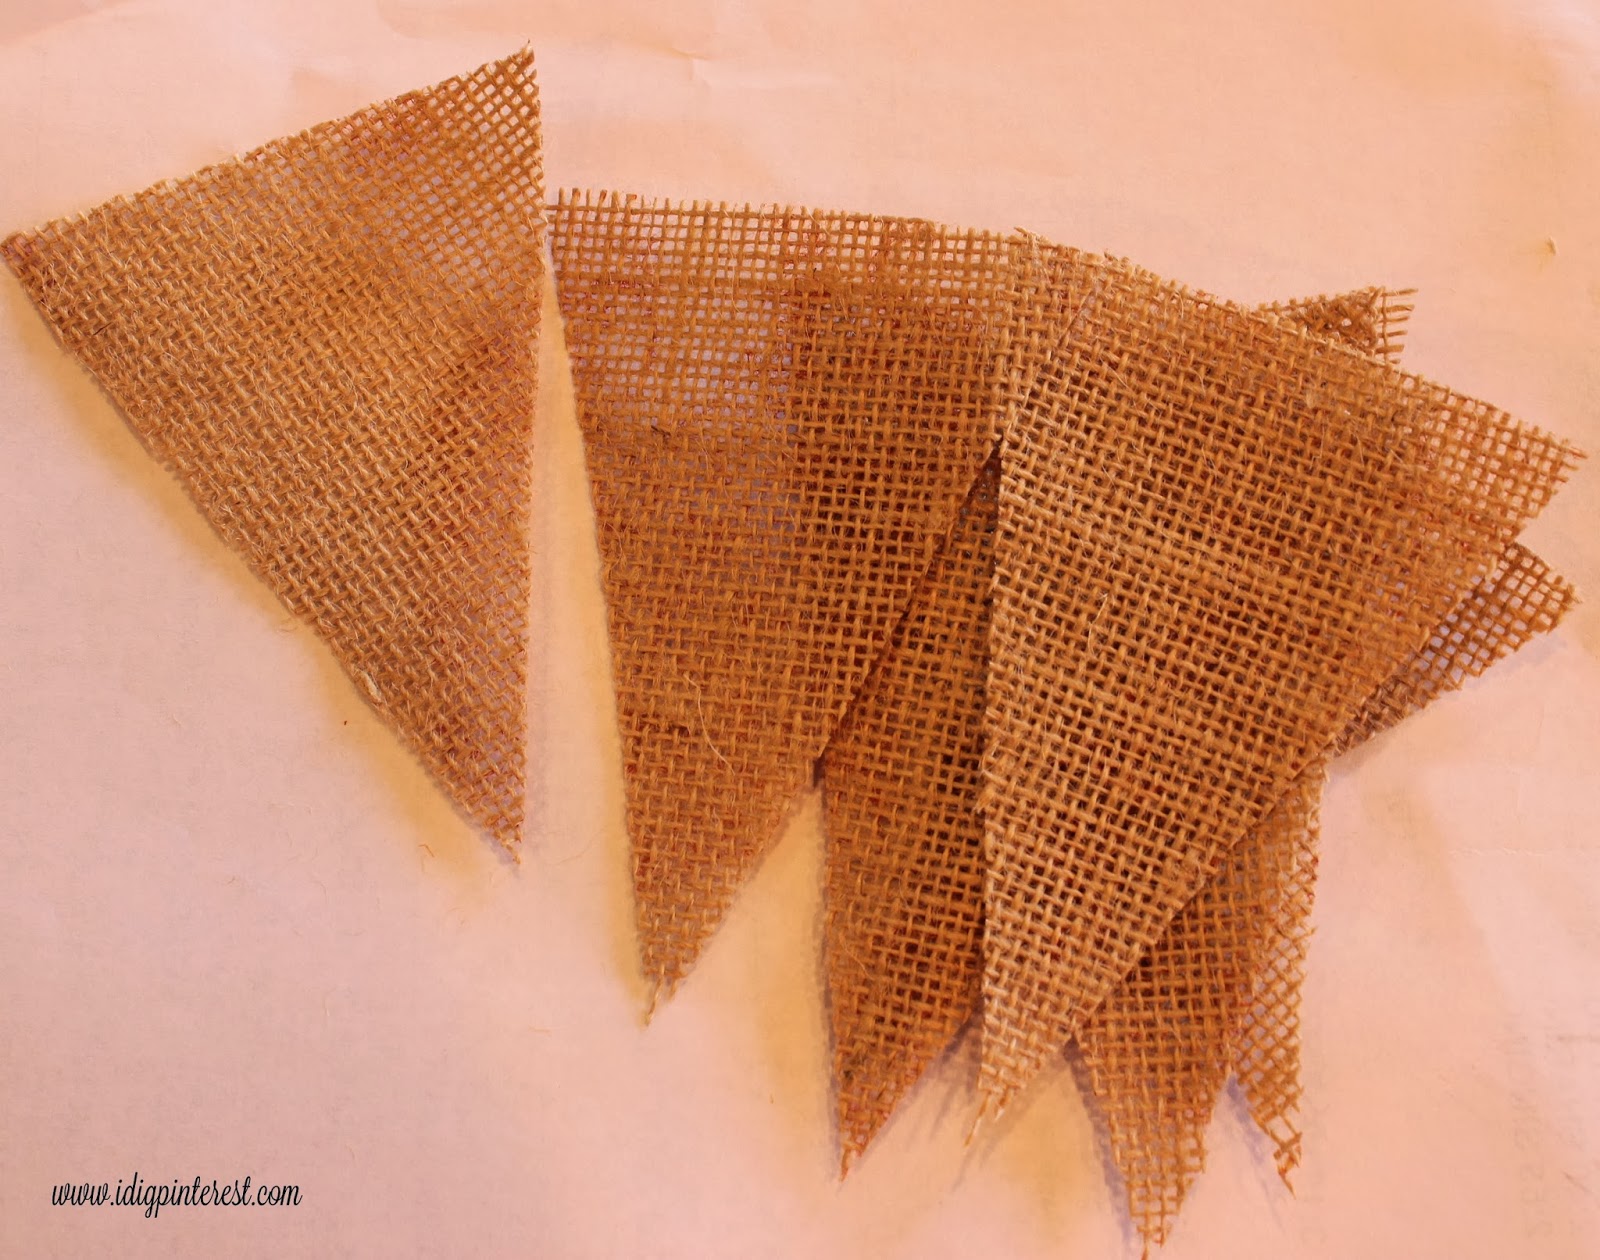
This pennant banner is SO simple.  I put it together in about an hour or less.  My favorite part of this project was that it cost zero dollars!  I already had all the supplies in my closet just waiting to be used.  I just grabbed some leftover printed burlap from my Halloween Table Runner, flipped it over, and got busy creating a fun new fall decor piece.

Want to make your own?  Here’s how:
{MATERIALS}
Burlap (can be printed-just flip it over and use the un-printed side)
White craft paint
Craft Cutter, or just print out letters and use a craft knife to carefully cut out the letters by hand
vinyl
Hot glue gun
scissors
jute/twine


 Make a triangle pattern on paper like the one shown above.  Mine measured 3″ at the top.


 Cut out 8 triangles for the letters in “THANKFUL”, using your pattern.


 Using your craft cutter, cut out the letters in “THANKFUL”, or another Thanksgiving word of your choice.  I used the “Ever After” font.  My letters measured 1 3/4″ tall by 1 1/4″ wide.  Remove the insides of the letters.
 Now grab your transfer paper or clear ConTac paper and stick to the letter pattern.


 Now apply it to your burlap triangle.


 Peel off the sticky part leaving just the outsides of your letter.
 Now blot white paint into the empty letter space, being careful not to let it go outside the vinyl.
 Immediately after painting, carefully remove the vinyl.  Let the letter dry completely.  Repeat for remaining letters.  Hot glue your pennants onto some jute, and you’re done!

If the burlap triangles fray a little-all the better-it’ll just add to the “shabby chic” look of it!

Such a cute way to say “Happy Thanksgiving”, and a great reminder of what this time of year is all about.  I’m truly thankful for so many things, and I’m glad that we have a holiday to remember life’s rich blessings.Stay tuned for the reveal of my Thanksgiving Mantel later this week or early next week!

post signature

Filed Under: Crafts, Silhouette Projects, Thanksgiving, Uncategorized

Reader Interactions

Comments

  1. MommyonDemand says

    November 11, 2013 at 2:04 pm

    So cute and so simple!! This would look great on mantle!
  2. Jenn Kurkiewicz says

    November 11, 2013 at 3:02 pm

    Love this, so cute! I love how simple it is to make & would be perfect on our mantel for Thanksgiving! Thanks for sharing & I pinned :)

    ~ Jenn
  3. Shaffer Sisters says

    November 11, 2013 at 3:42 pm

    So cute and simple. I'm super cheap and stingy with my vinyl so I would probably print it off and put it in the background and then paint using as a stencil. But this is great. Thank you.
    With Love,
    Al @ Shaffer Sisters
  4. PJ @ Planned in Pencil says

    November 11, 2013 at 8:10 pm

    Very cute! I made as similar one last year, hmmmmm... wonder where that bad boy is!
  5. Cindy Eikenberg, Little Miss Celebration says

    November 11, 2013 at 10:14 pm

    Hi Christine! I love this darling bunting and how great would this look over the Thanksgiving buffet? thanks so much for sharing and pinning! Hope you are having a great Monday!
  6. Britni Vigil says

    November 11, 2013 at 10:55 pm

    I love this Christine, I'm really looking for something for my mantle and think burlap might be the winner.
  7. Rohan Singh says

    November 13, 2013 at 9:02 am

    Well, I must say that great work has been done. These creations are looking amazingly beautiful allowing anyone to get thanked in the most amazing way. I personally love craft work done in any way and this is a very nice example of very beautiful and attractive artwork I have seen. I love wooden handicrafts the most as the products made of wood encase natural beauty into them.
  8. Sami Bookout says

    November 14, 2013 at 3:11 am

    How cute! You had me at "no sew"! What a great way to decorate for Thanksgiving!
    Thanks,
    Sami
  9. Vivian says

    November 14, 2013 at 2:52 pm

    This looks so easy and fun to do, I love everything burlap so I will give it a try! I invite you to link this project to our link party. Hope to see you there! http://www.thefamilyfunspot.com/2013/11/bloggers-unidas-1.html
  10. Ruth Soukup says

    November 14, 2013 at 6:52 pm

    I love, love, love burlap DIYs. This is so pretty and I love the fact that it is simple and yet it's so perfect for Thanksgiving. Thank you for sharing how you made it and for linking up to Thrifty Thursday.
  11. Randi@SowderingAbout says

    November 15, 2013 at 5:14 am

    Such a simple simple project! I love everything burlap and I love how you did this! Great job!!!!
    I would love it if you joined us this week for our linkup party!
    http://www.sowderingabout.com/2013/11/awesome-things-tuesday-and-giveaway.html
  12. JoAnn SweetPepperRose says

    November 16, 2013 at 1:02 pm

    Very pretty and easy. Burlap and twine projects are amongst my very favorites! visiting thru Practically Functional party ;-)
  13. Therese Feeman says

    November 17, 2013 at 3:24 pm

    very cute! Thanks for sharing at the DIY Sunday Showcase!
    Cheers,
    Therese @ Fresh Idea Studio
  14. Bobbie S says

    November 18, 2013 at 11:06 pm

    So cute! I would love for you to stop by and add your link to Check Me Out Saturdays on A Vision to Remember: http://iamonly1woman.blogspot.com/2013/11/check-me-out-saturday-craft-link-party_15.html

Primary Sidebar

Hi! I'm Christine, and I'm addicted to Pinterest! I love sharing creative "pin"-spiration by way of delicious recipes, fun crafts, party ideas, and DIY projects. I hope you'll stop by often!

Follow by email…

Popular Posts

  • No Bake Cherry Cheesecake
  • Best Ever Homemade Yellow Cake
  • Slow Cooker Cheesy Scalloped Potatoes and Ham
  • Outdoor Movie Party
  • Soft Molasses Cookies
  • Valentine’s Monster Cookies

Footer

Mom It Forward: Blogger Network
Privacy Policy

Copyright © 2025 I Dig Pinterest · Implemented by WPopt

MENU
  • Home
  • About Me
  • Advertise
  • Contact
  • Recipes
  • Crafts
  • Parties
  • Printables
  • Privacy Policy