• Skip to primary navigation
  • Skip to main content
  • Skip to primary sidebar
  • Skip to footer
  • Home
  • About Me
  • Advertise
  • Contact

I Dig Pinterest

Creative "Pin"-spiration

  • Bloglovin
  • Email
  • Facebook
  • Instagram
  • Pinterest
  • RSS
  • Twitter
  • Recipes
  • Crafts
  • Parties
  • Printables
  • Home Improvement
  • Shop My Style

March 5, 2013

Easter Egg Candlesticks

My sister-in-law found these on Pinterest and suggested that we make some when she came for a visit a short while ago.  We went to Hobby Lobby and bought the supplies and then had a blast crafting and chatting all weekend long.  I have to give Kerri credit, because she really did most of the work for these (thanks, Kerri!).  My children were not on my side that day. 🙂
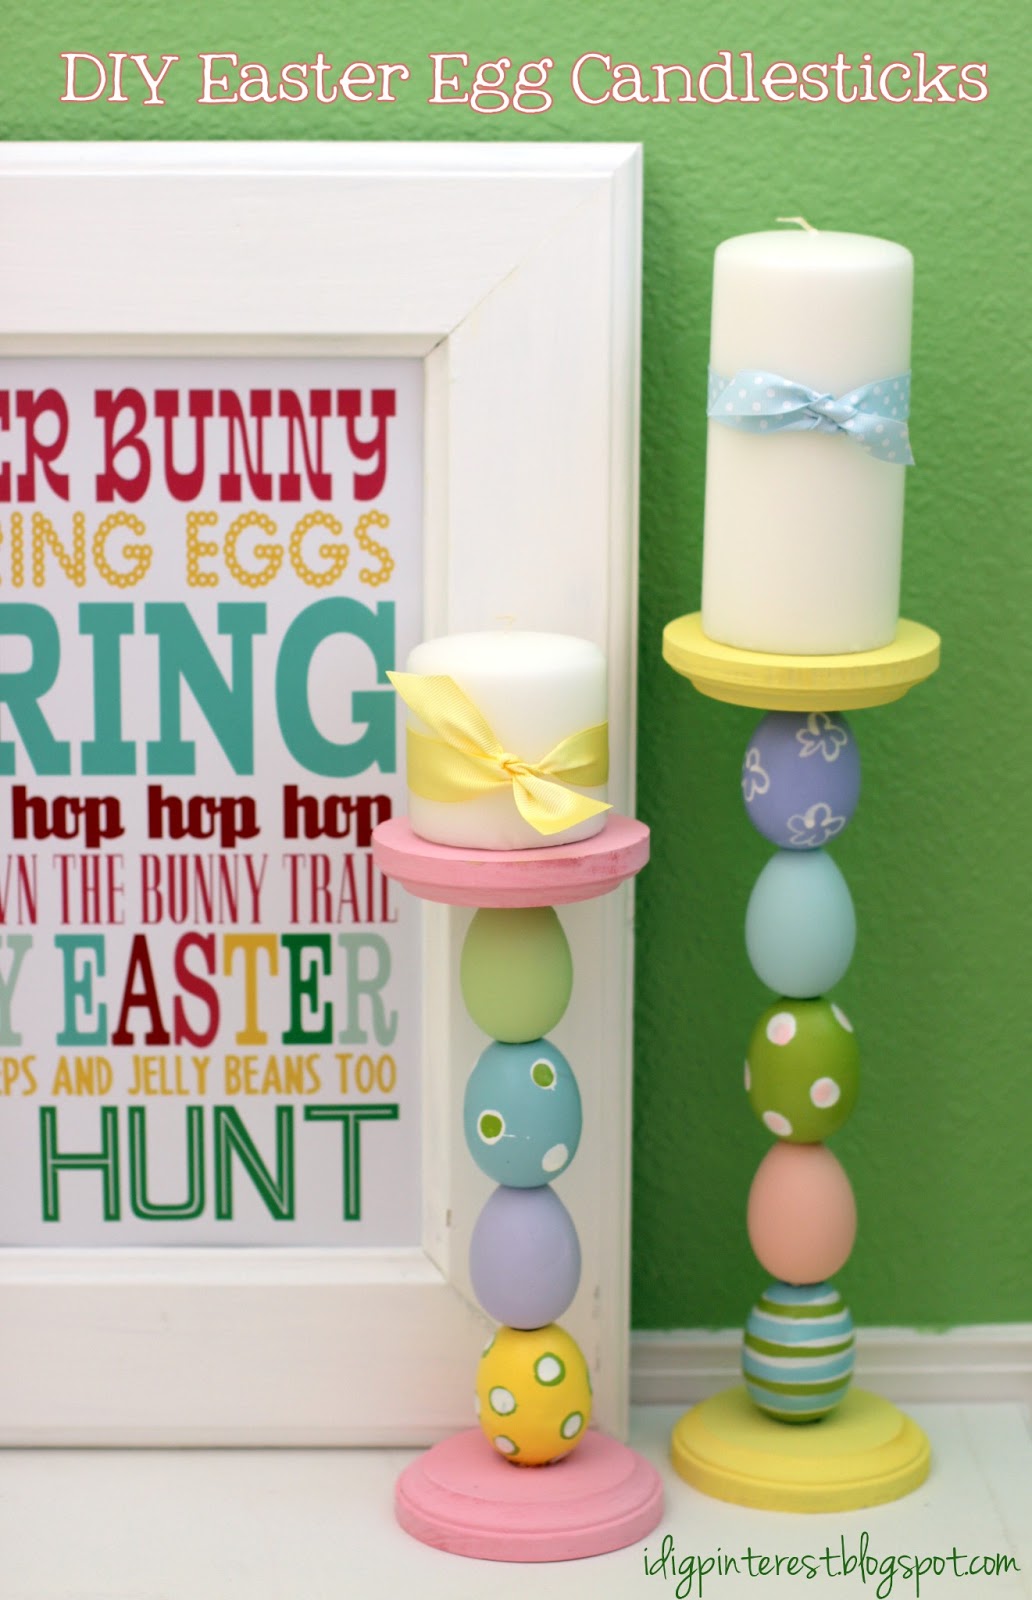
They are such fun decor pieces.  I love the happy spring colors.  And they come together without a ton of fuss as long as you don’t have kids bugging you. :)These would be the perfect thing to make at a ladies’ craft night because you could share the materials and tools.


{MATERIALS}
 
Two round wooden plaques per candlestick
Plastic Eggs (The number will depend on how tall you want your candlesticks to be.  I bought one bag of decorative eggs and one bag of plain from Hobby Lobby.)
(3/8″) Wooden Dowel (this will ensure a nice, stable base after you put your candles on)
Paint
Drill
Hot Glue, Wood Glue, or Gorilla Glue
Candles and Ribbon
Something to cut your dowel (a small saw or a really sharp knife)
  1. Sand and paint your wood tops and bases. You can paint your dowel if you’d like, but none of it should show for the end result, so it’s not required.
  2. Pull the ribbons off your eggs and drill holes up through the center of the eggs.
  3. Cut your dowel to be slightly taller than your stack of eggs (you need to leave just enough space to insert and glue the dowel into the top and bottom wooden plaque).  You just don’t want to see any of the dowel between your wooden pieces and the eggs.
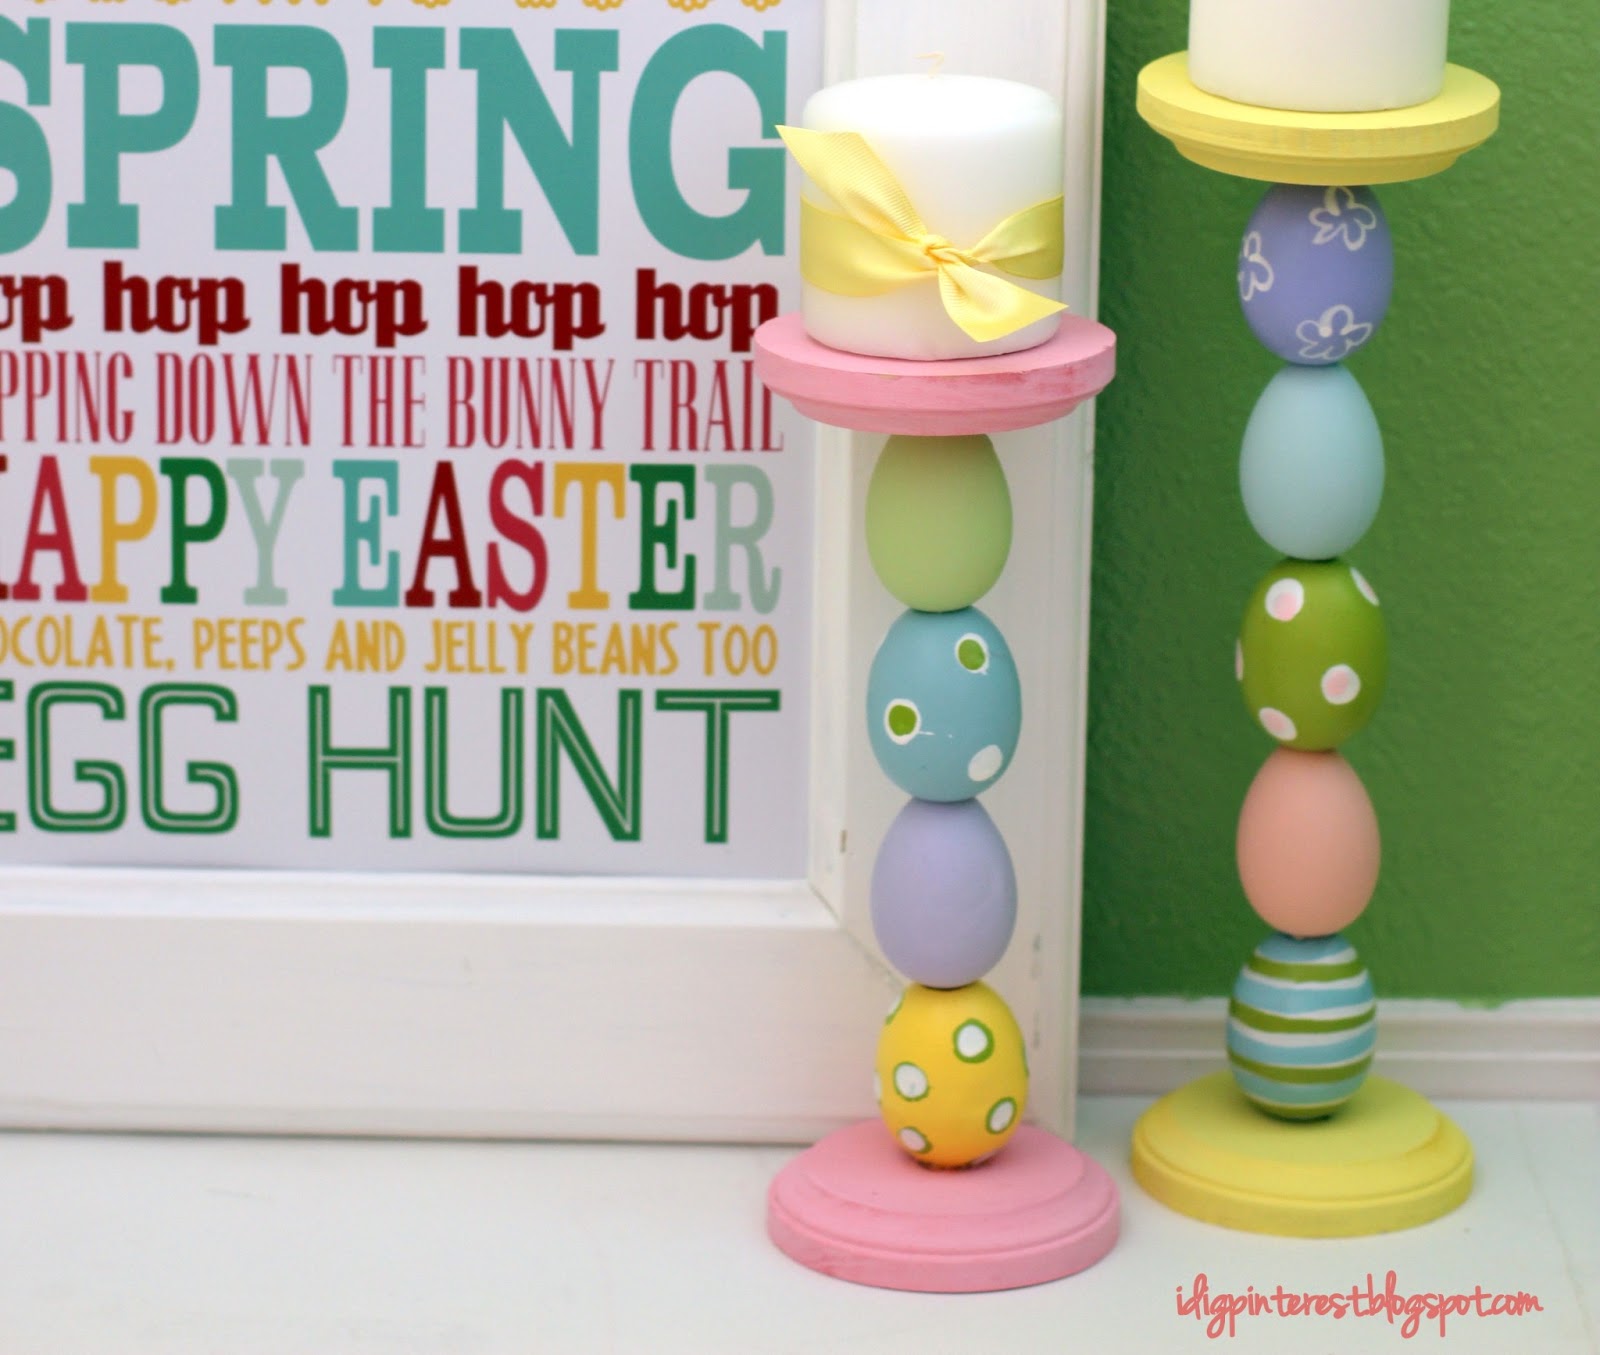
  4. Slide the eggs onto your dowel.  The goal is for them to fit tightly onto the dowel.
  5. Drill a hole in the center of each wooden circle where the dowels will be glued (be careful not to drill all the way through!).
  6. Put a little hot glue into the hole that you just drilled on the wooden circle that will be the bottom of your candlestick.  Insert the dowel into the hole and push to make sure it fits snuggly.  Then put some glue in the hole of your top piece of wood and push the dowel into it.  You may need to gently pound the top circle into the dowel using a hammer, to make sure it fits right and will be sturdy.
  7. Grab your candles and tie ribbon or secure a strip of patterned paper around them for added decoration.
  8. Put the candles on top.  Place your candlesticks on your mantel or a shelf or use as a centerpiece on your dining room table!


Enjoy!**These were featured over at Someday Crafts, iamonly1woman, theanswerischocolate, thegingerbreadblog, and yourhomebasedmom!

Filed Under: Crafts, Easter, Uncategorized

Reader Interactions

Comments

  1. KC Coake says

    March 5, 2013 at 3:36 pm

    I have those pinned to make someday as well. They are so cute! Love how they turned out.
    KC
  2. Alise Jennings says

    March 5, 2013 at 4:22 pm

    SO cute!
  3. Jen @ Yummy-Healthy-Easy says

    March 5, 2013 at 5:24 pm

    I love how they turned out!! Adorable!!!

    ~Jen
  4. Wes and Dani says

    March 5, 2013 at 5:25 pm

    So cute! I also love that subway art in the frame there!
  5. Jeni IGOTTHISMARTHA says

    March 5, 2013 at 6:59 pm

    Super cute idea!
  6. Lori WhoNeedsaCape says

    March 5, 2013 at 8:29 pm

    Very, very cute! Good job!

    Lori
    Whoneedsacape.com
    Not Your Average Super Moms!
  7. Jessica @ My World - Made By Hand says

    March 6, 2013 at 5:17 pm

    Super cute! I'd love it if you'd link up to my party...it's going on right now!

    Jessica
    myworldmadebyhand.blogspot.com
  8. Marium says

    March 6, 2013 at 6:13 pm

    These are so cute and simple! Love them!
    Now following!
  9. Michelle@Somedaycrafts says

    March 6, 2013 at 7:26 pm

    These are so cute and perfect for Easter. Thanks for linking up at Someday Crafts. Just wanted to let you know that these are going to be featured later this afternoon, so be sure to check it out! Thanks!
  10. Diana - FreeStyleMama says

    March 7, 2013 at 4:11 pm

    Super cute!!
  11. Misiabe says

    March 7, 2013 at 5:50 pm

    So great! I love it :)
  12. Rita says

    March 8, 2013 at 2:15 am

    This is so cute! Thanks for sharing.
  13. Kimberli B. says

    March 8, 2013 at 5:29 pm

    Love these! They are so cute and so Easter@! I want to make some now!
    Visit me at http://greatastestuesdays.blogspot.com/
    Kimberli!
  14. Lizbeth McGow says

    March 9, 2013 at 6:29 am

    very pretty, love the pastel colors!
    Came over from The Best Blog Recipes party
    thanks for sharing and have a great weekend.
  15. Kathy Penney says

    March 9, 2013 at 3:40 pm

    One of the cutest things I've seen in a while! Love it! Great job!
  16. Brenda @ChattingOverChocolate.blogspot.com says

    March 9, 2013 at 4:14 pm

    Such a clever idea! Very cute! Nicely done ;)
  17. Breezy Brie says

    March 10, 2013 at 6:07 pm

    These are the cutest thing I have ever seen! I absolutely love it :)

    Pinning these!! Stopping by from the Raising Imperfection linky.

    Brie @ Breezy Pink Daisies
  18. Leslie @ Violet Imperfection says

    March 10, 2013 at 6:43 pm

    Oh my goodness, these are so adorable. What a great idea!

    Thanks for sharing your favorite post at Raising Imperfection! We feature our favorites on Friday, make sure to come back and check.
    Leslie
  19. Raising Reagan says

    March 11, 2013 at 12:26 am

    Super cute ~ Going to have to pin these!

    Thank you for linking to Raising Imperfection.
    Please come back Friday to see if you were featured. :)

    ¤´¨)
    ¸.•*´
    (¸¤ Lanaya | xoxo
    www.raising-reagan.com
  20. Bev Carter says

    March 11, 2013 at 2:17 pm

    These are awesome and so cute for Easter. I pinned them.
    Have a great week
    Bev
    @http://eclecticredbarn.blogspot.com
  21. Bobbie S says

    March 12, 2013 at 5:46 pm

    Love the candlesticks and the subway art! Thanks for linking up to Check Me out Saturday craft link party on A Vision to Remember You were featured on this weeks highlights:
    http://iamonly1woman.blogspot.com/2013/03/check-me-out-saturday-craft-link-party_12.html
  22. Monica Pruett says

    March 12, 2013 at 9:14 pm

    Very pretty. ;-) Thanks for sharing at Family Fun Friday!
    Monica
    http://happyandblessedhome.com
    hope to see you again later this week at:
    http://happyandblessedhome.com/category/family-fun/
  23. Beth Baumgartner says

    March 13, 2013 at 1:21 pm

    This is such a great idea!!! I found you linked up at Real Housewives of Riverton! Pinning!
    Beth @ The First Year Blog
  24. Kaysi @ Keeping it Simple says

    March 14, 2013 at 2:44 am

    These are so cute!!!
  25. Angie - easylivingmom.com says

    March 14, 2013 at 3:55 am

    Ooh I love these! I pinned this so I can remember to try it (and to share it with everyone also, of course). Very cute!
  26. Lindsay @Artsy-Fartsy Mama says

    March 14, 2013 at 3:33 pm

    So cute! Love the colors!
    Thanks for sharing at Artsy Corner, you were featured today! :)
  27. Carol TheAnswerIsChocolate says

    March 15, 2013 at 12:05 am

    Thanks so much for sharing at last week's BFF Open House link party. Wanted to let you know I featured you at this week's party, now open. Hope you'll join the fun again.
  28. Shauna Smart says

    March 24, 2013 at 5:13 pm

    Thanks for linking up this post to The Best Blog Recipe’s Weekend re-Treat #7!

    These are so stinkin cute!!! I really should make these before Easter too :)

    Wanted to stop by and pin your image to My Link Parties Craft/DIY & Recipe Boards while I was here.

    Hope to see you link up again at the party this weekend!

    Shauna
    http://thebestblogrecipes.blogspot.com/
    http://ready2loseweight.blogspot.com/
  29. Debi and Charly @ Adorned From Above says

    March 25, 2013 at 1:28 am

    Your candle sticks are really cute. Thanks so much for sharing at Wednesday's Adorned From Above Blog Hop. Have a great week.
    Debi, Charly, Marci, and Suzan
    http://www.adornedfromabove.com
  30. Tina Pippo says

    April 1, 2013 at 11:41 am

    Wonderful tutorial! I loved the outcome!
    Great post!! I included it in my post Βόλτα στη Γειτονιά #26 :)
    Have a great week!!
  31. Krystie says

    April 14, 2013 at 1:25 am

    love these egg candle holders! very fun & festive
  32. party props says

    August 23, 2013 at 3:39 pm

    The candle stands are beautiful.....I am really very much inspired by this. I am going to try it out for my Christmas party.
  33. Kara says

    March 19, 2014 at 7:20 pm

    These are so adorable! Thanks so much for linking them up today. I've pinned them to my Easter board so I'll remember to make them later. Hope I can drill straight holes! :)

Primary Sidebar

Hi! I'm Christine, and I'm addicted to Pinterest! I love sharing creative "pin"-spiration by way of delicious recipes, fun crafts, party ideas, and DIY projects. I hope you'll stop by often!

Follow by email…

Popular Posts

  • Chicken Noodle Bake
  • The Best Apple Pie
  • Old-Fashioned Oatmeal Cake
  • Three Fun Halloween Family Games
  • Strawberry Cake Mix Cookies
  • Make Learning Fun with Disney Jr., Preschool Superhero Sounds & Counting Free Printables!

Footer

Mom It Forward: Blogger Network
Privacy Policy

Copyright © 2023 I Dig Pinterest · Implemented by WPopt

MENU
  • Home
  • About Me
  • Advertise
  • Contact
  • Recipes
  • Crafts
  • Parties
  • Printables
  • Privacy Policy