You can never have too much Halloween decor, at least that’s my firm belief, so I made a Fringe Ghost Decoration with inexpensive tissue paper to “spookify” my home a little! It’s deceivingly easy to do, too! Come see!
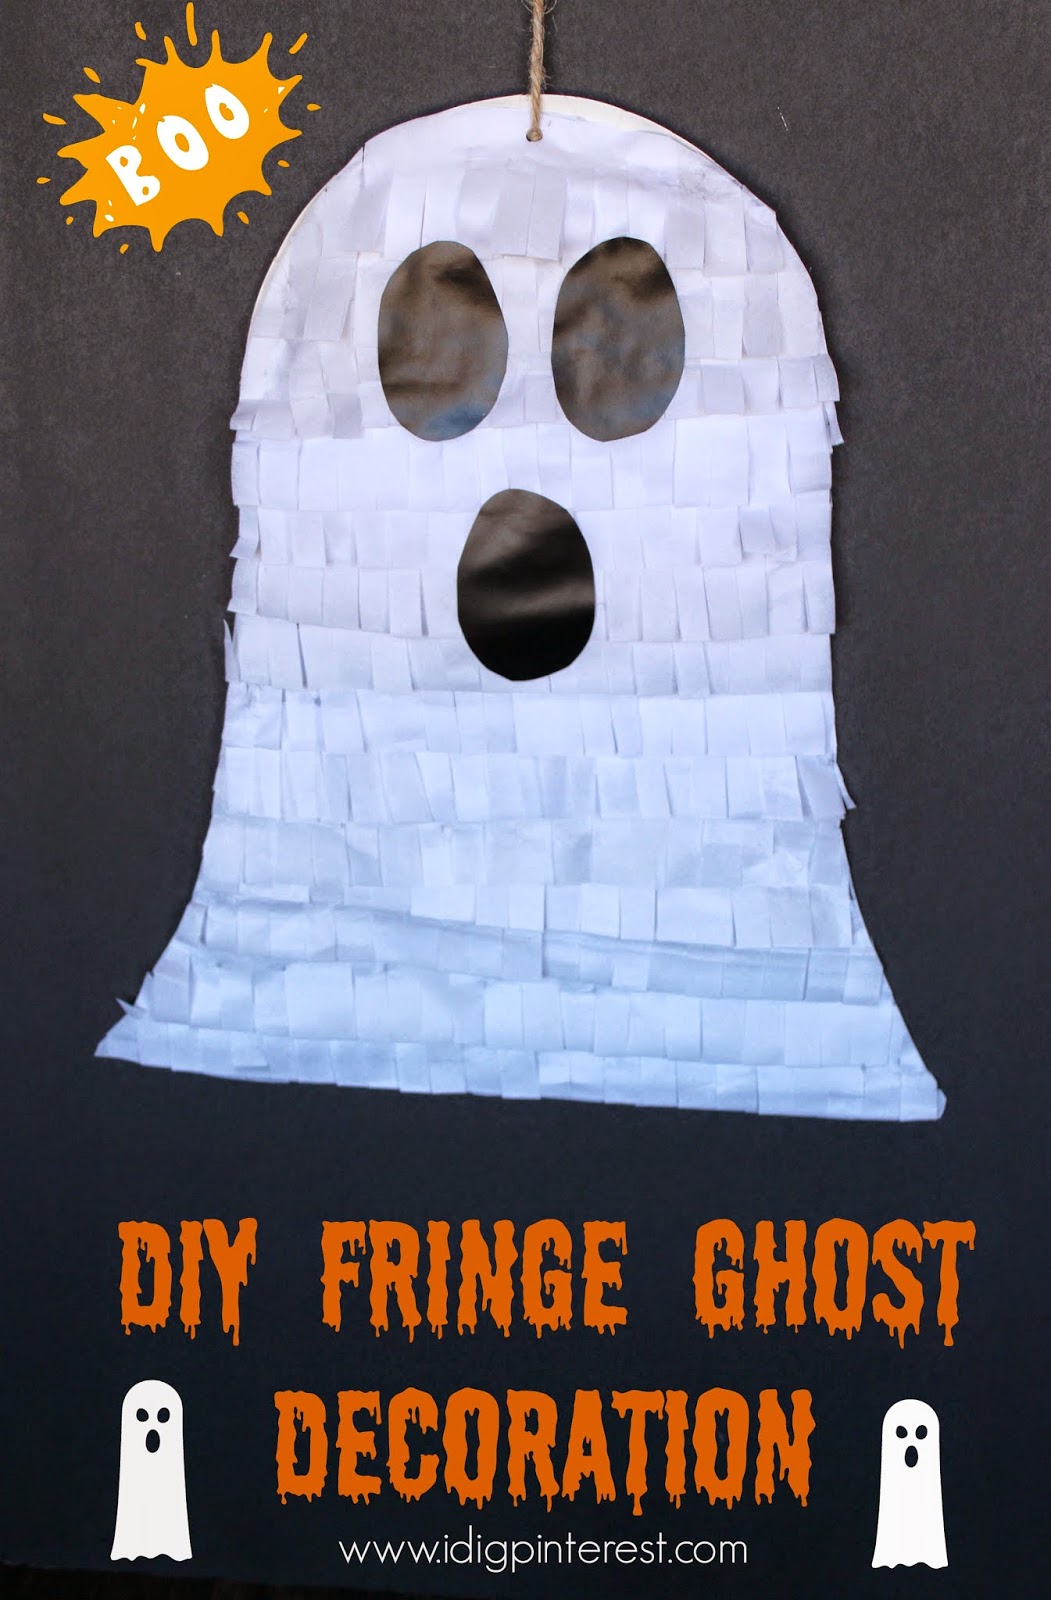
This cute ghost could hang outdoors (if covered from the elements, of course) or indoors! I can picture him under a porch awning,waiting to greet the little trick-or-treaters on Halloween night. 🙂
Fringe is all the rage these days, and I love it, so I chose to give our little guy some fun dimension with it! What do you think?

{SUPPLIES}
-Paper plates (this is optional, but will help when you draw the ghost shape)
-White tissue paper
-Elmer’s Glue
Black construction paper, Cardstock, or vinyl
-please disregard the black marker
-Scissors

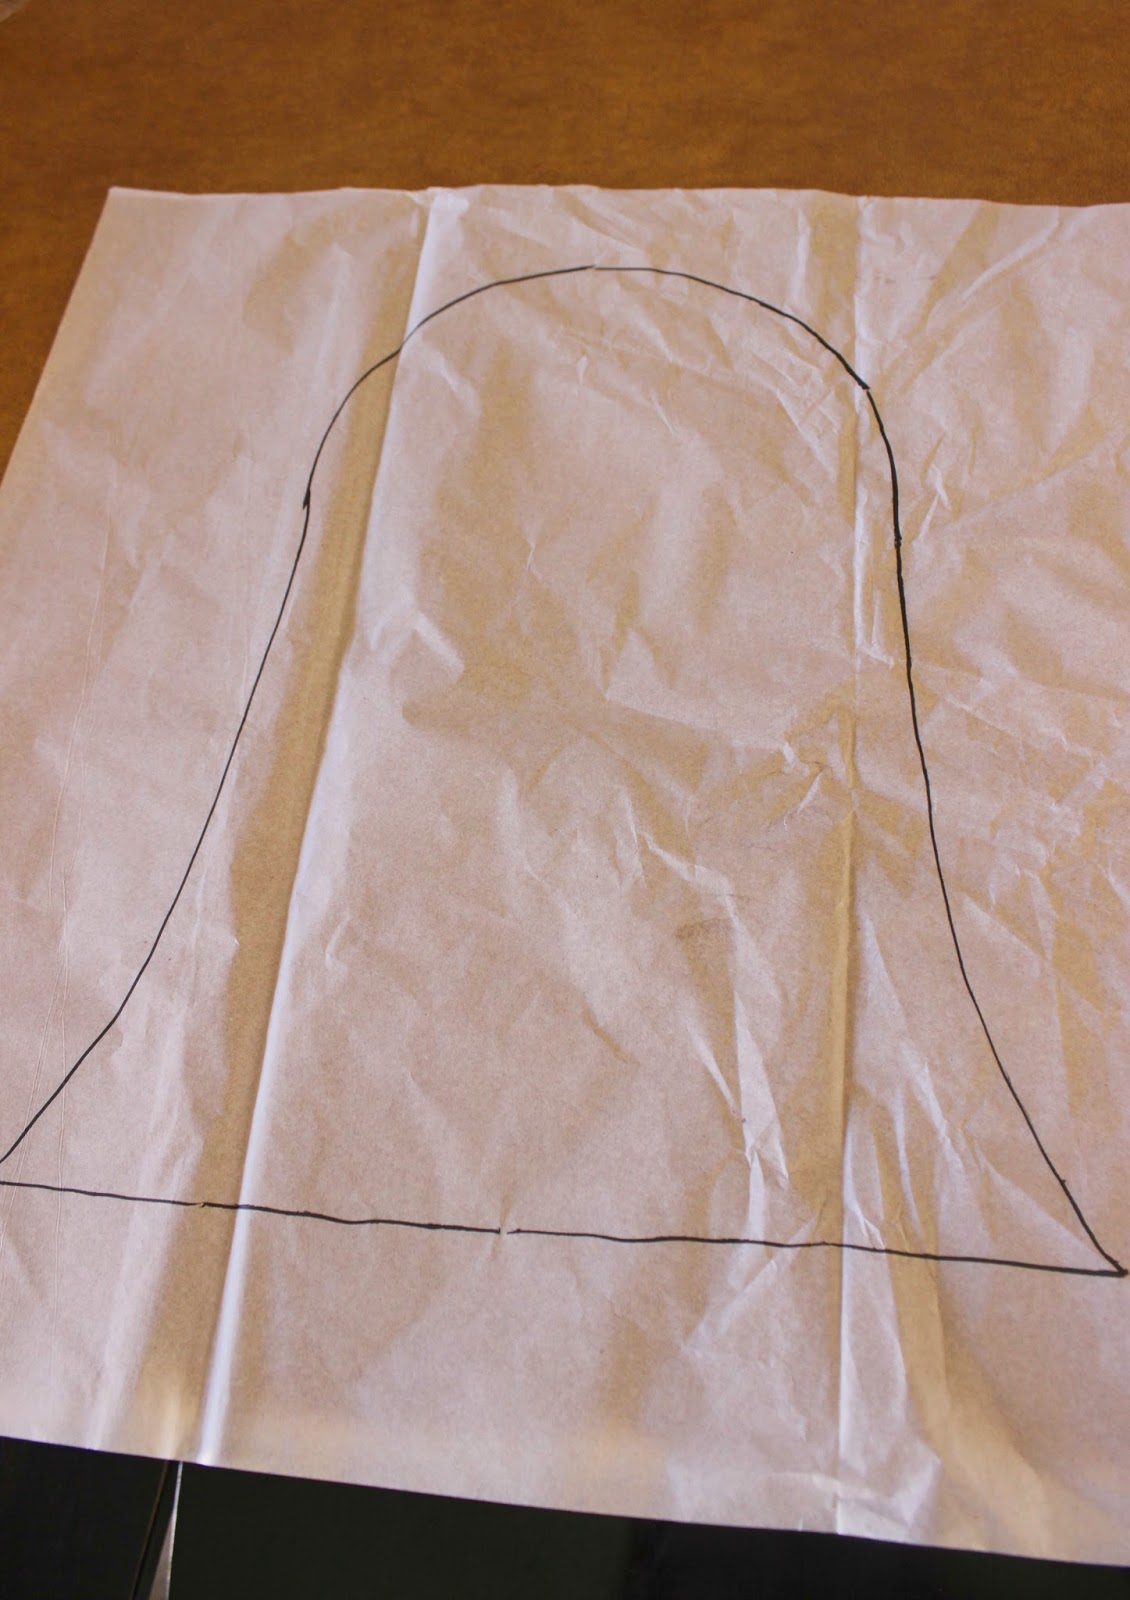
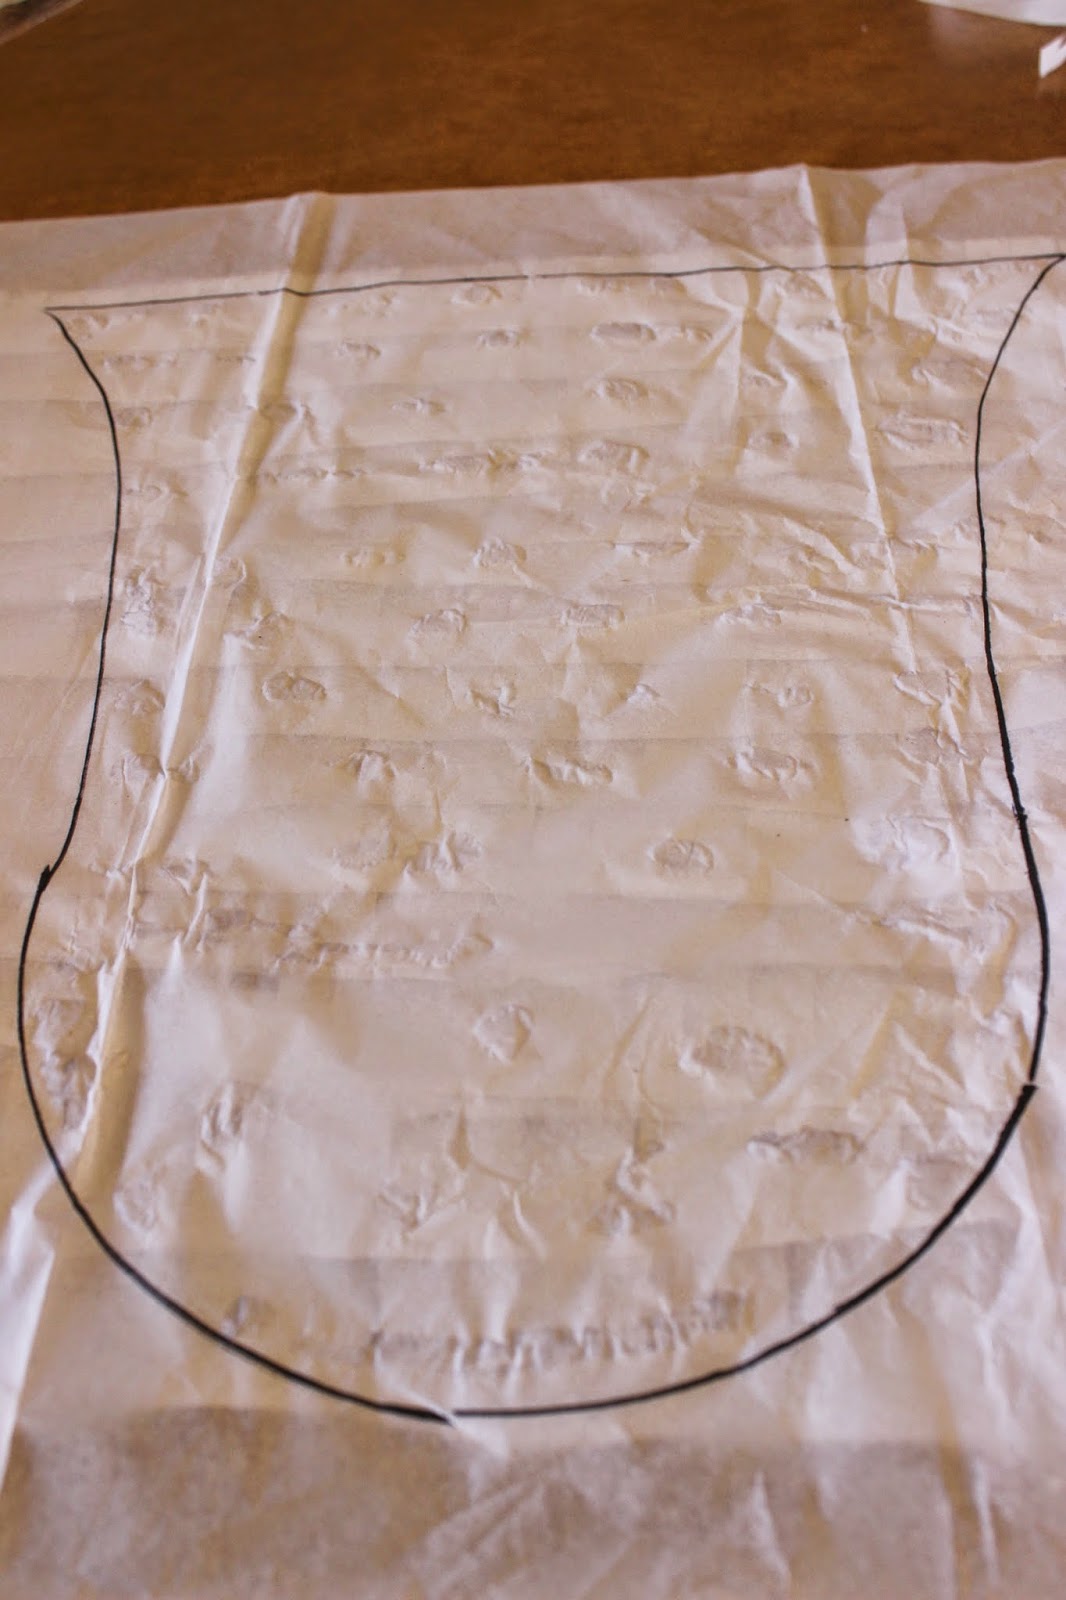
Begin by laying your paper plate out on a piece of white tissue paper, or, for better durability, a piece of white posterboard. I didn’t think it all the way through at first, so I used tissue paper and then backed it with something more sturdy afterwards. Draw a ghost shape, using the rounded edge of the paper plate on top for the head portion. Mine turned out to be basically a bell shape.
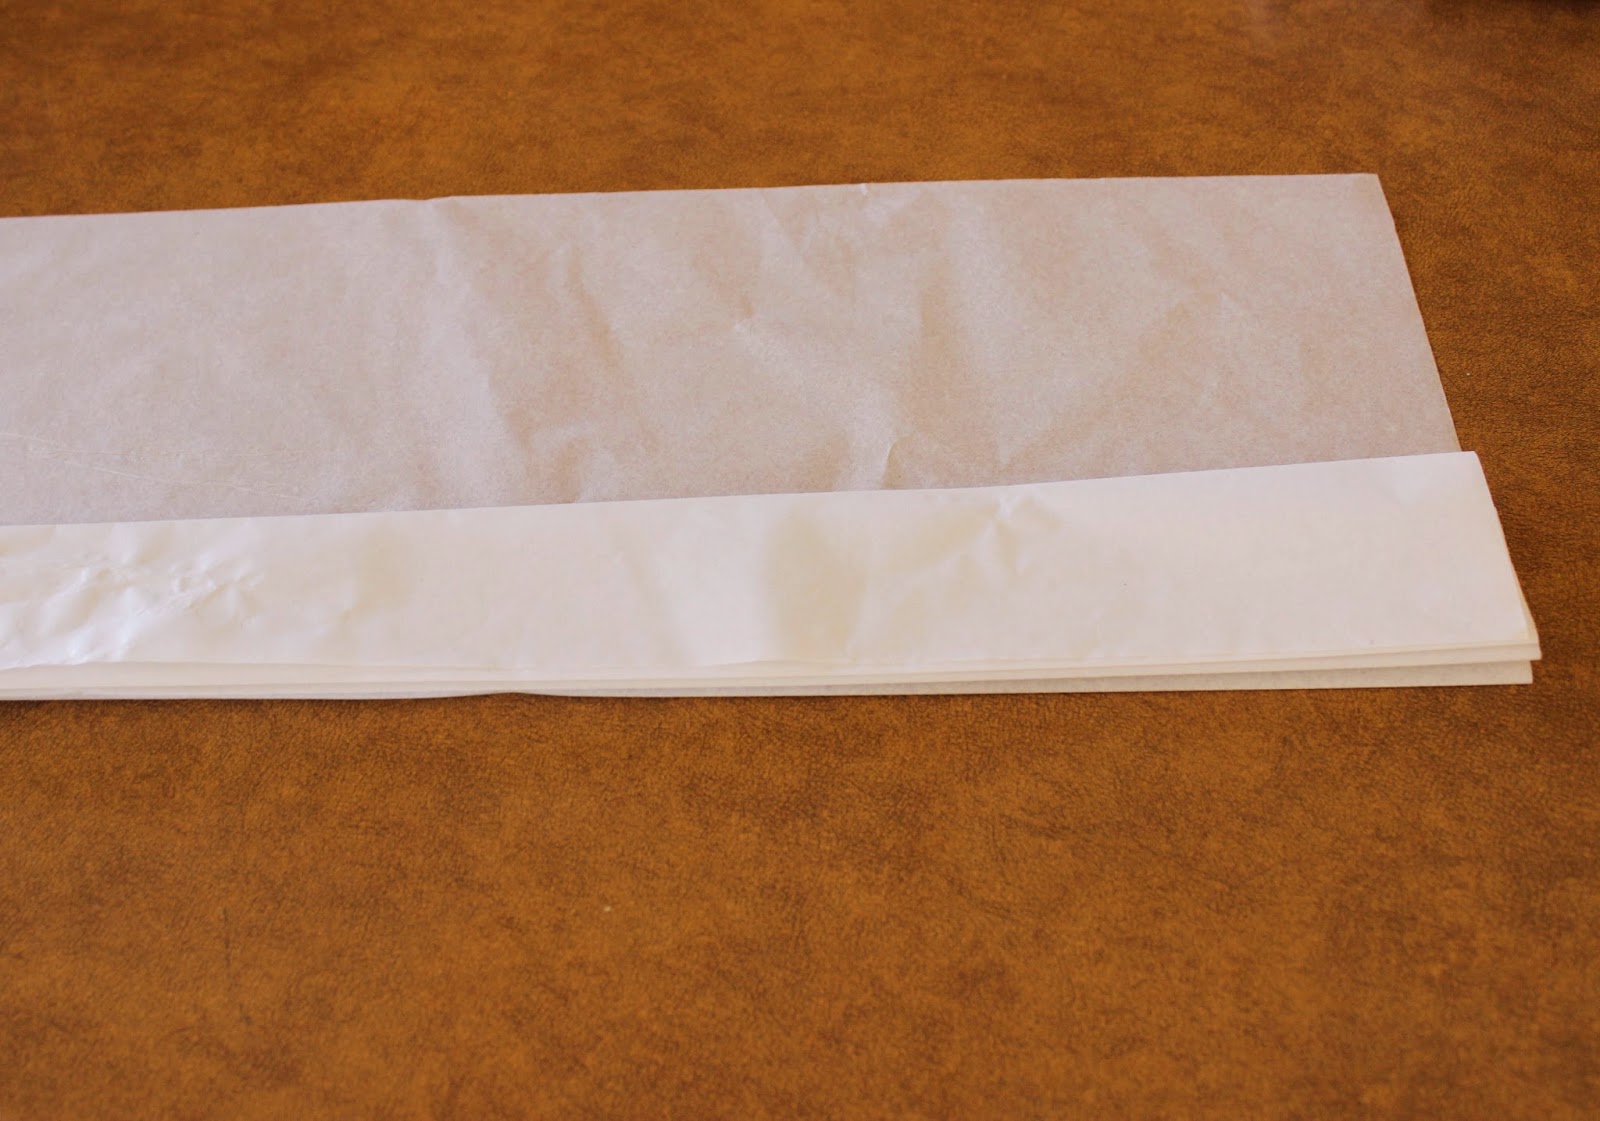
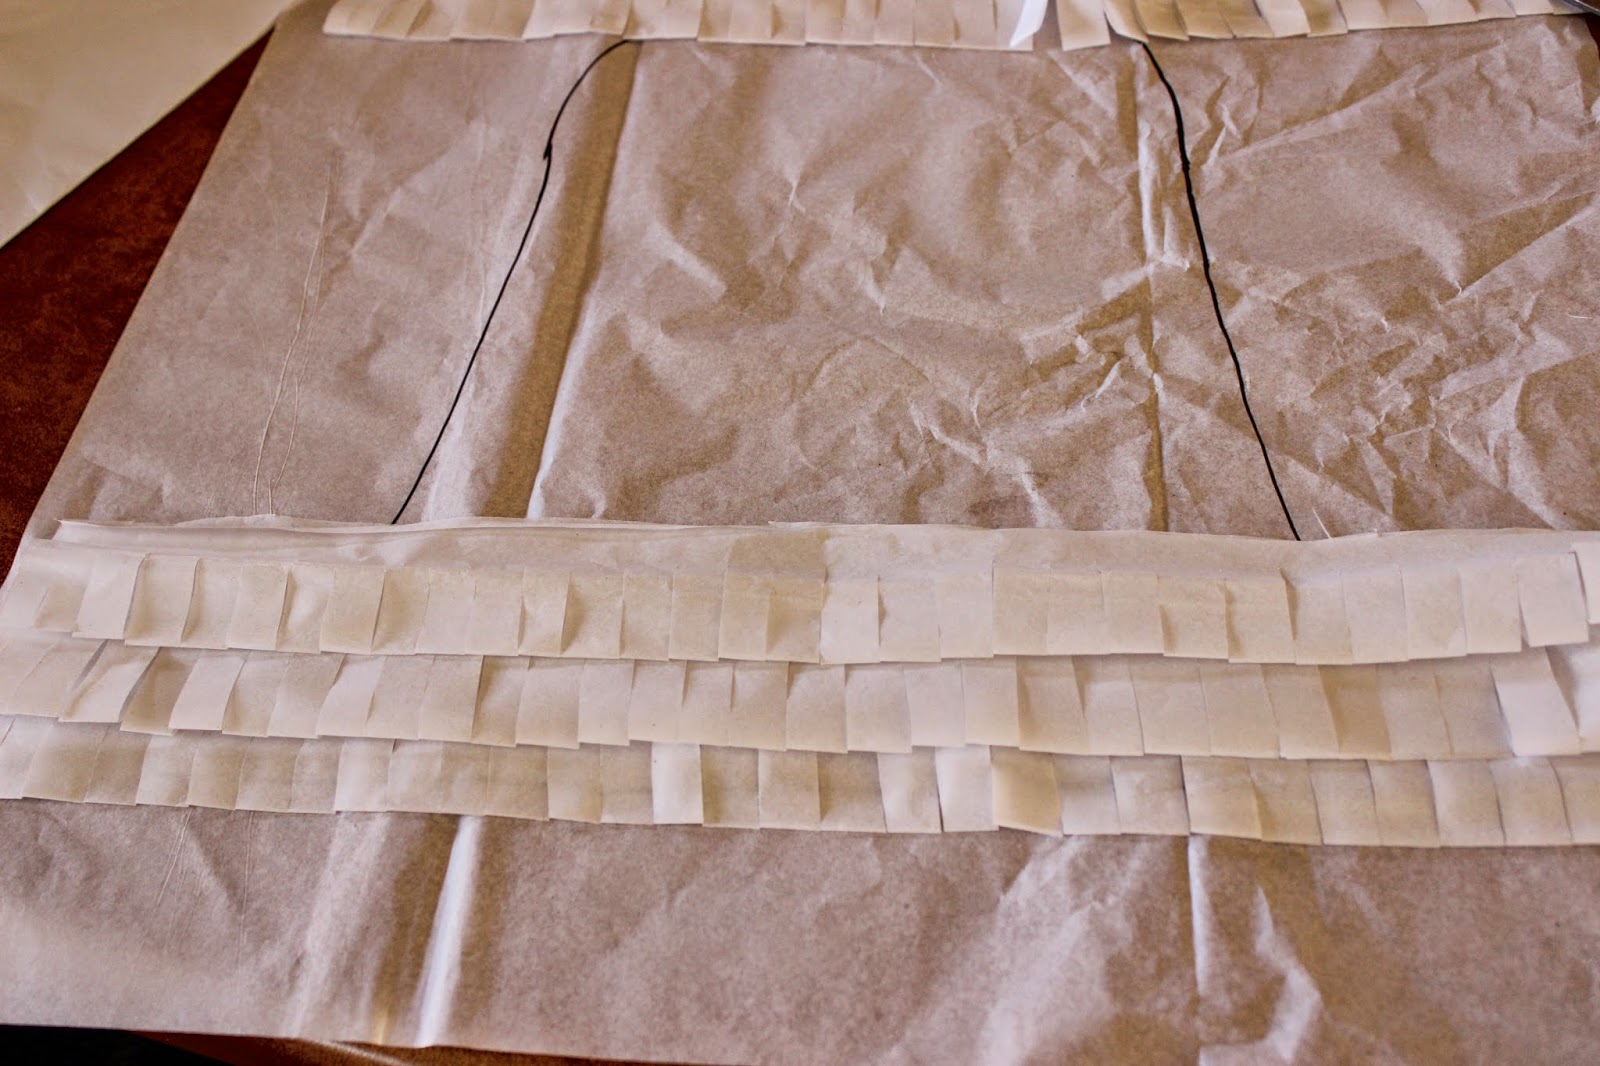
Begin by putting four pieces of tissue paper together and folding them accordion style, with folds about 2 1/2″ wide. Be sure to get the folds as even as possible.
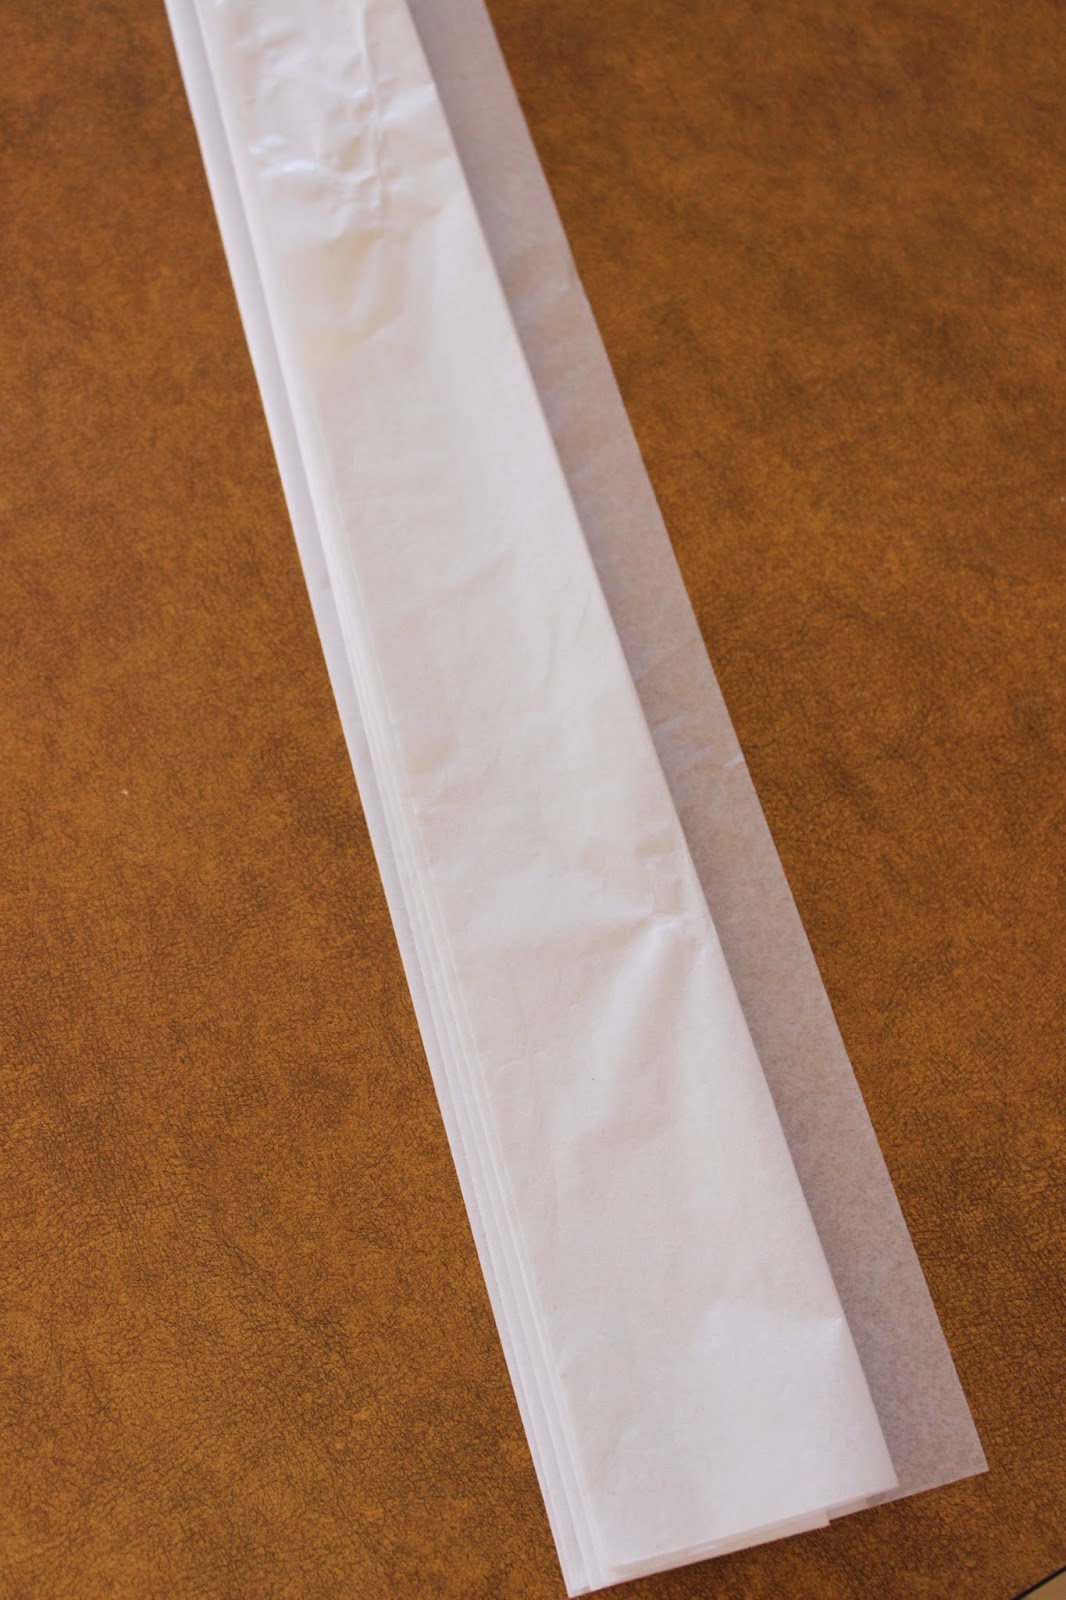
Now trim the excess on top.
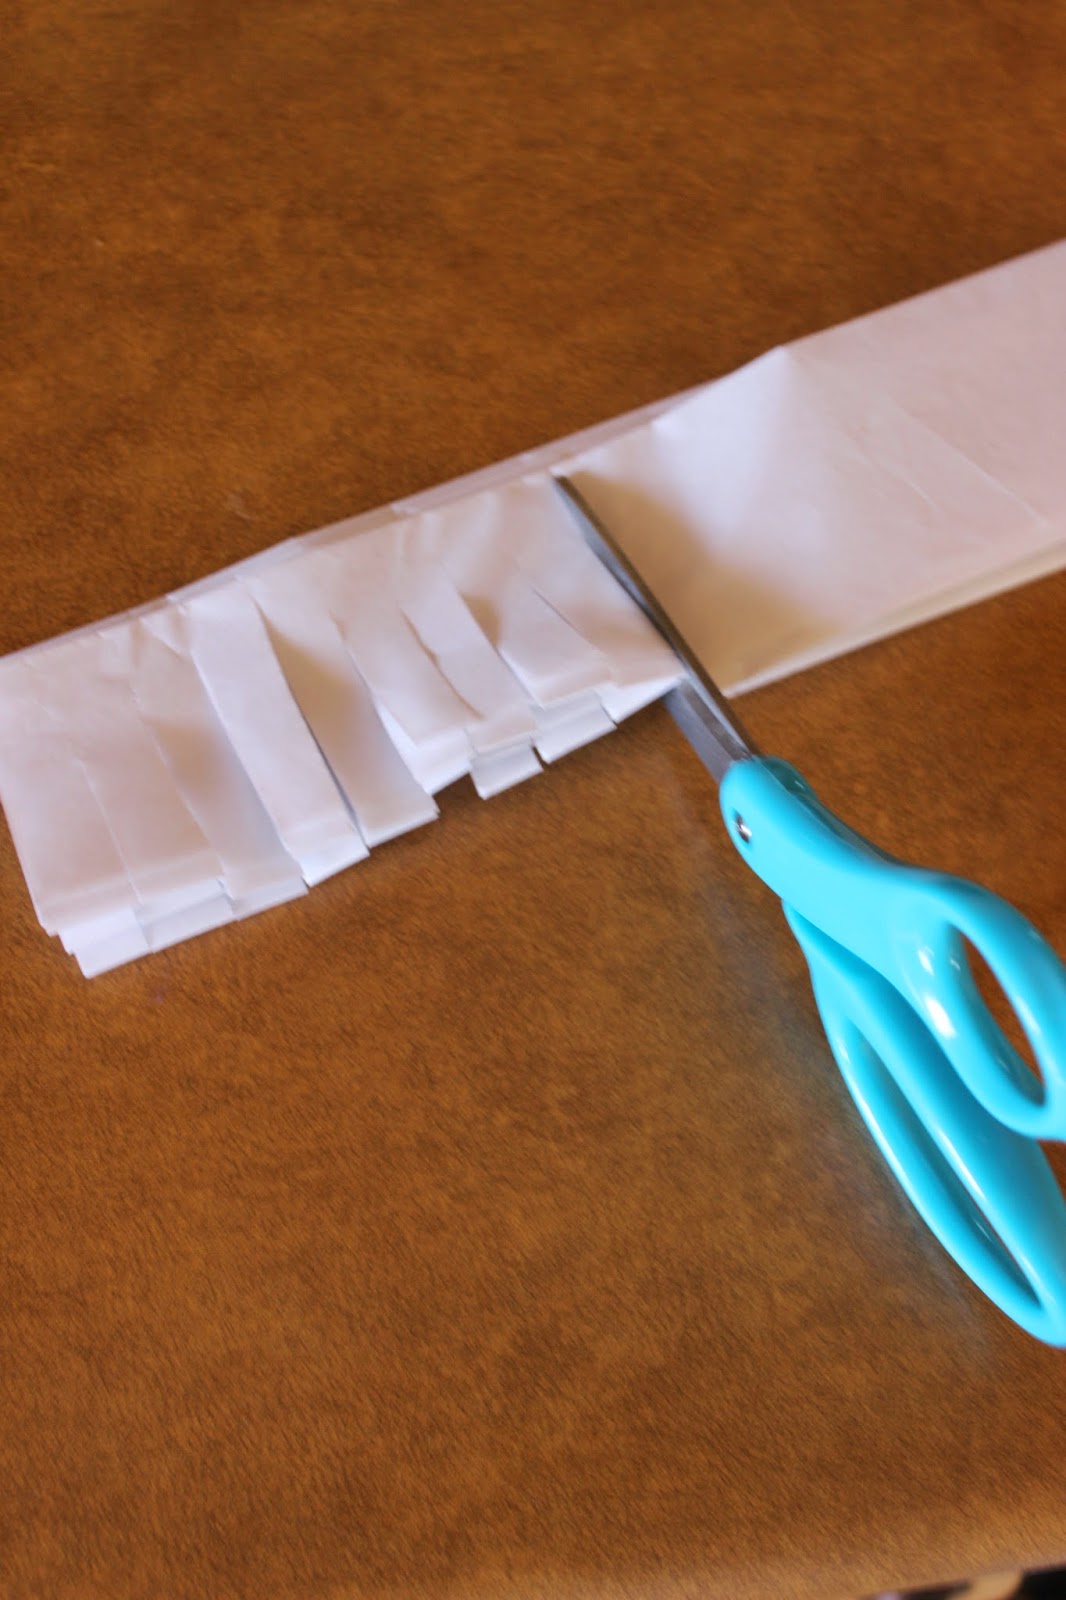
Make fringe on the strip by cutting up all the way across, within about 1/4″ of the top.

Now we’re going to separate the pieces by cutting across the top. Be sure not to cut too far down because you’ll need space for gluing, and we wouldn’t want to mess up that pretty fringe.
Now we’re going to begin gluing the fringe on.
Separate your fringe pieces (most pieces will be double layered, but that’s good). Starting at the bottom of your ghost, lay them out how you like them, going all the way up.
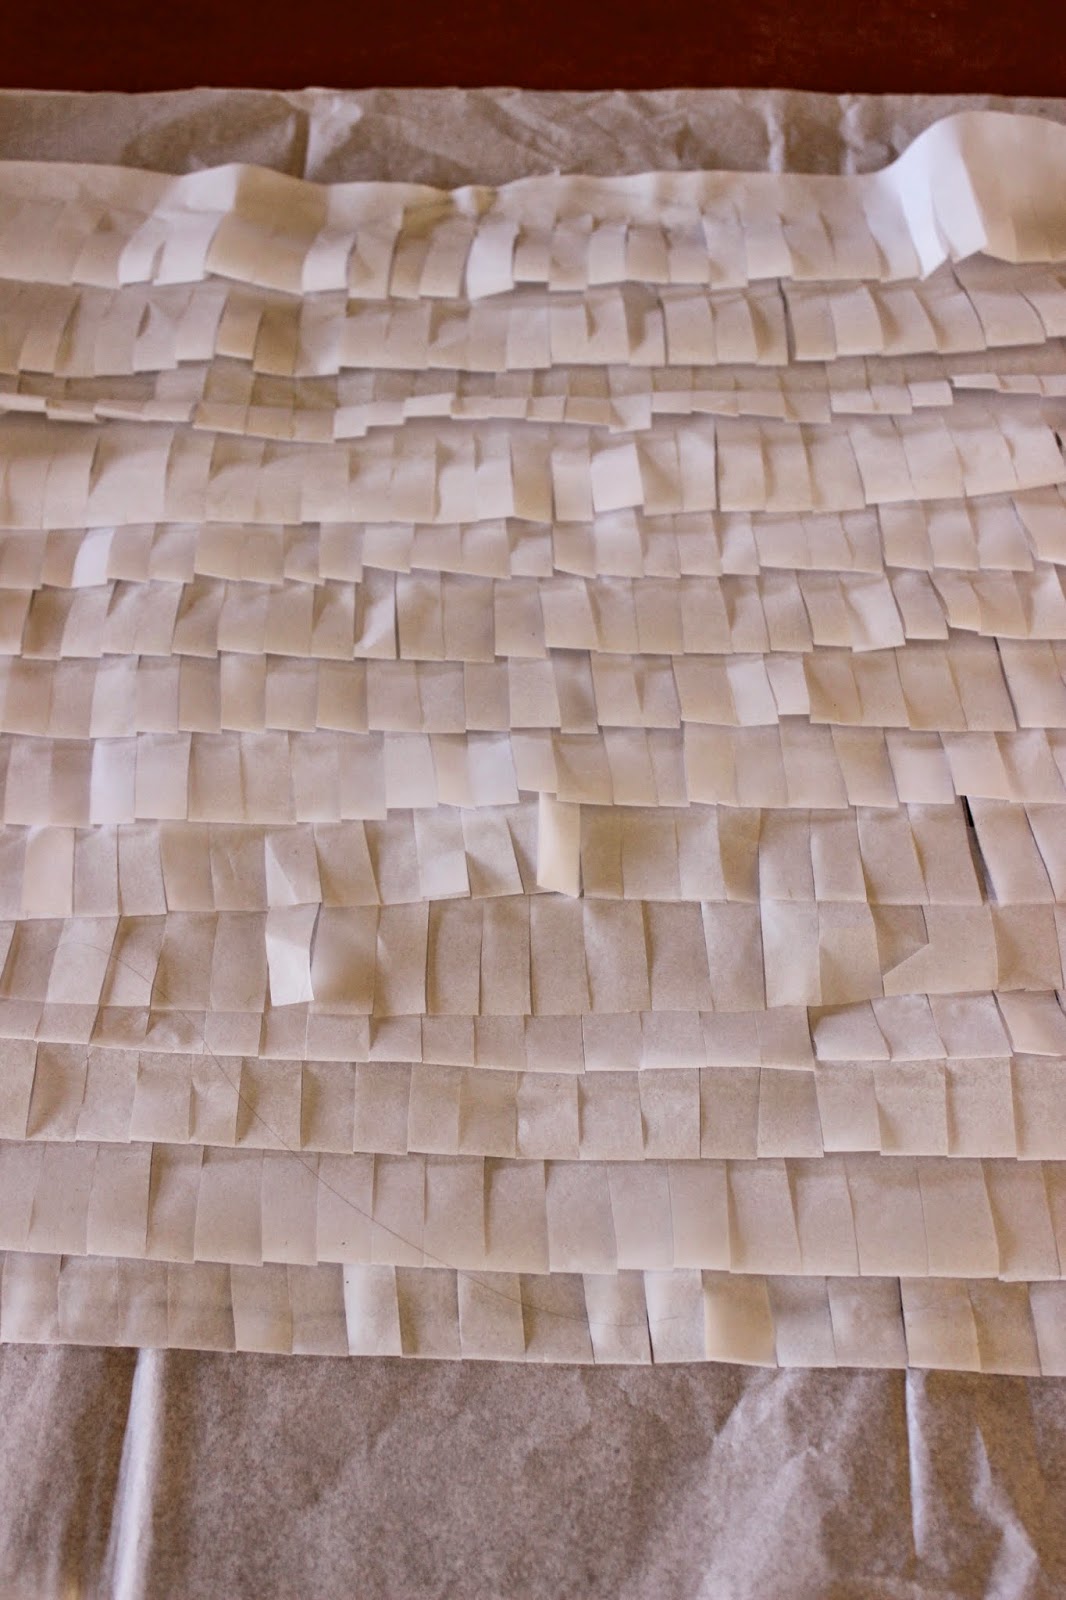
Your ghost should be fully covered at this point. You’ll want to end so your last strip of fringe has some room to be glued to the backing without destroying the fringe look.
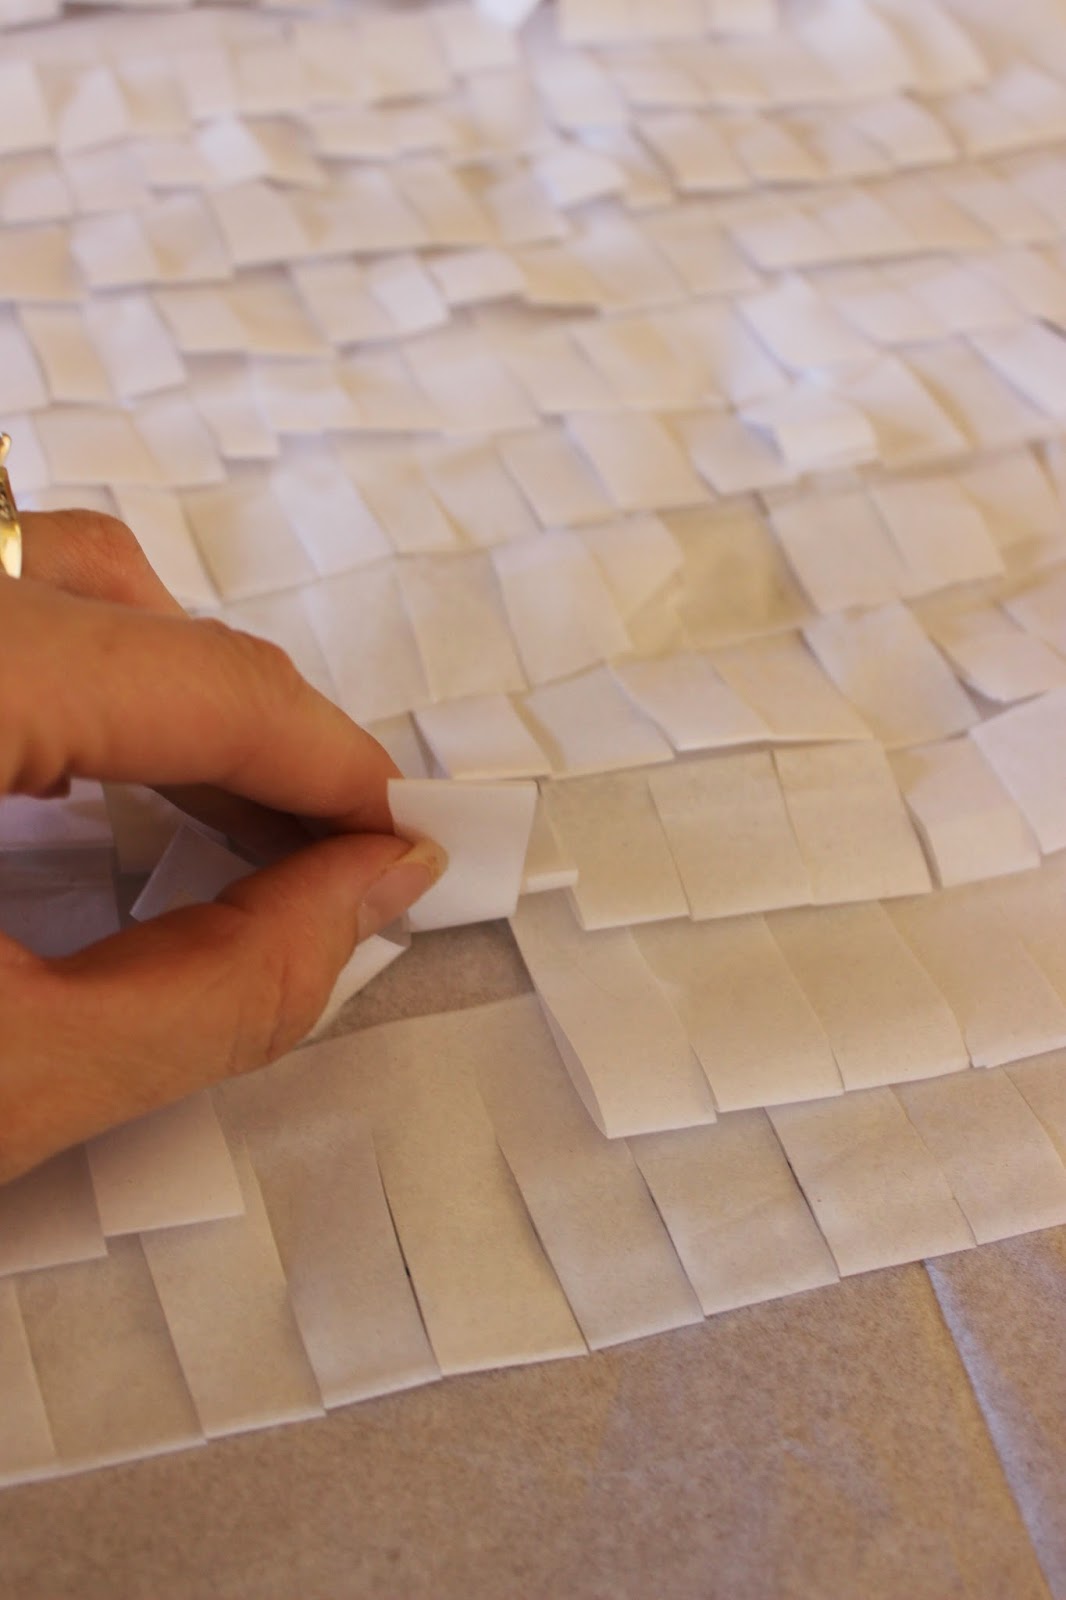
Now carefully glue the fringe to the back by lifting pieces and putting a few dots of glue underneath at the top. You want your fringe to look free-hanging for dimension, so be sure to glue right up top and not on the actual fringe. This may seem tedious, but it really is quick because you can glue here and there. Be sure to glue well around the edges of your ghost, though.
Once you’re done gluing, flip the ghost over and cut him out.
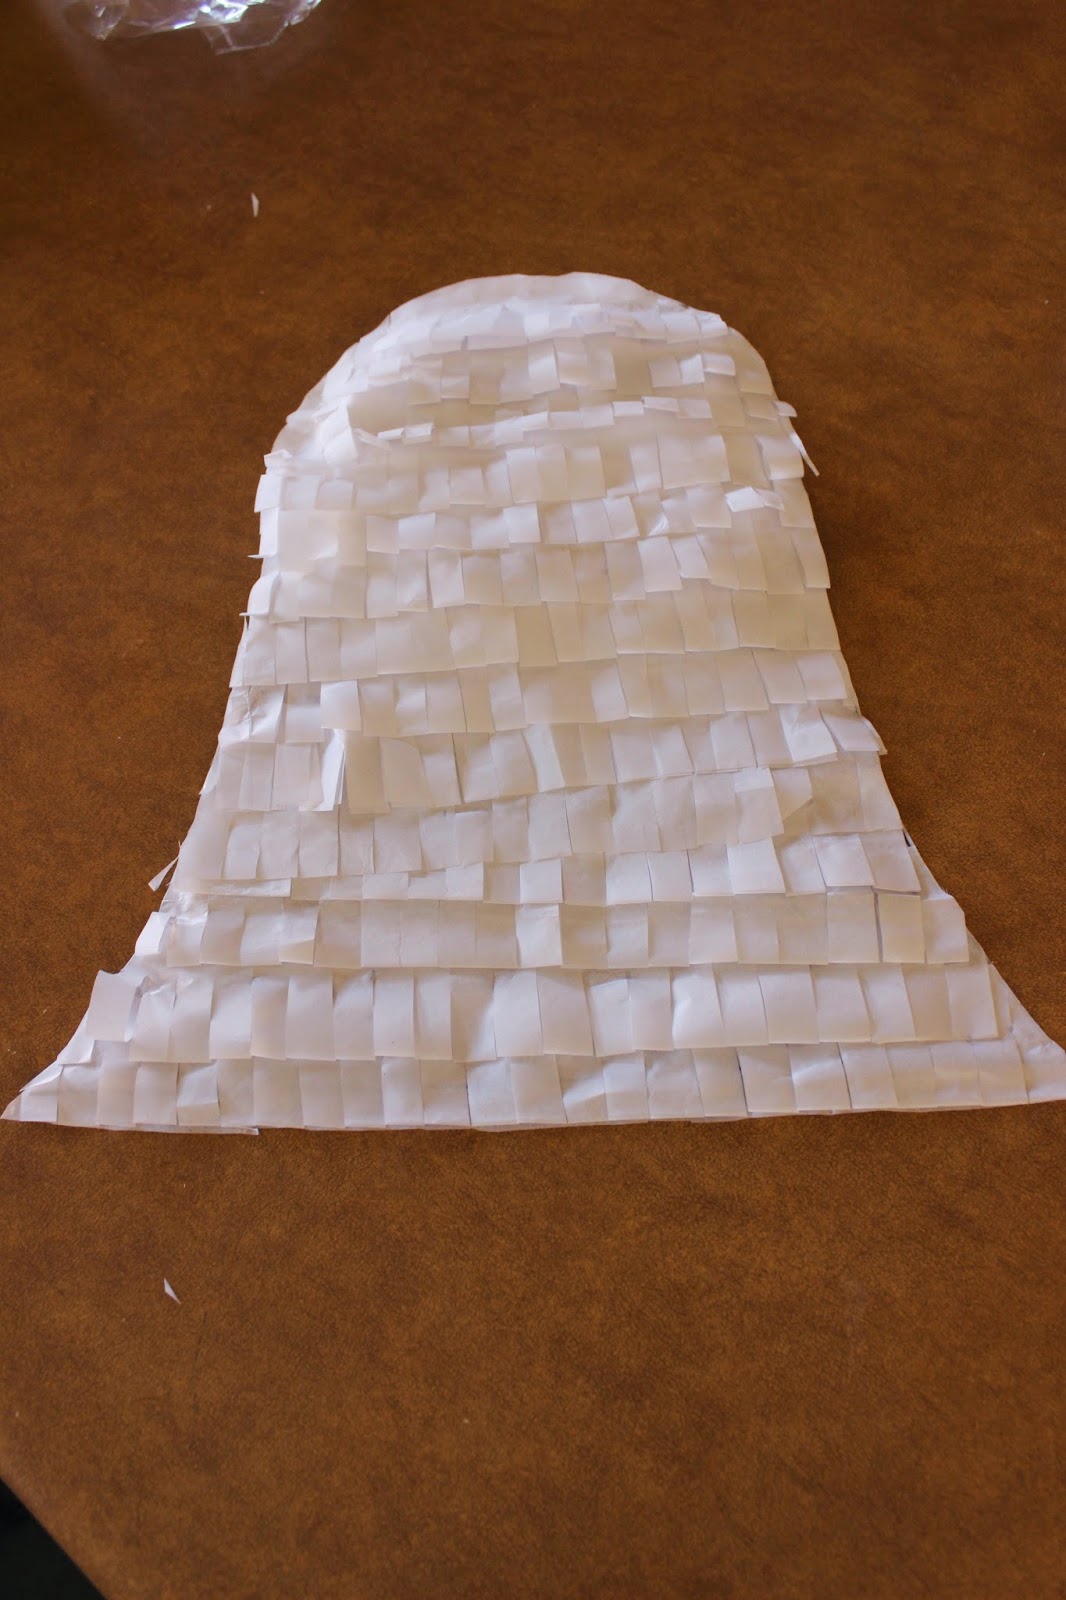
He should look like this. Now add the eyes by cutting ovals out of your black paper or vinyl. I used adhesive-backed vinyl because it was really handy to be able to stick it directly to the ghost and not have to glue, but paper works too.
Now punch a hole in the top and hang the cute and spooky ghost! I’m really loving the black and white Halloween color scheme this year, so I’m running with it!
I’m thinking I’ll make a few more of these and hang them from the chandeliers on my tall ceilings.
Happy creating!


come see me at http://shopannies.blogspot.com