• Skip to primary navigation
  • Skip to main content
  • Skip to primary sidebar
  • Skip to footer
  • Home
  • About Me
  • Advertise
  • Contact

I Dig Pinterest

Creative "Pin"-spiration

  • Bloglovin
  • Email
  • Facebook
  • Google+
  • Instagram
  • Pinterest
  • RSS
  • Twitter
  • Recipes
  • Crafts
  • Parties
  • Printables
  • Home Improvement
  • Shop My Style

May 16, 2013

DIY Road Trip Pillowcase

The summer traveling season is almost upon us…the time when we get to visit friends and relatives and not worry about the kids having to miss school for it.

My kids always look forward to seeing their grandparents from both sides and getting lots of swimming, swinging, and just general play-time in.

But they do not look forward to the long drive it takes to get to grandma’s house.  The amazing portable dvd player makes traveling SO much easier, but I decided after last year’s trip that they needed a little something more to keep them occupied.  8+ hours is a very long time (even for adults, but especially for little ones)!

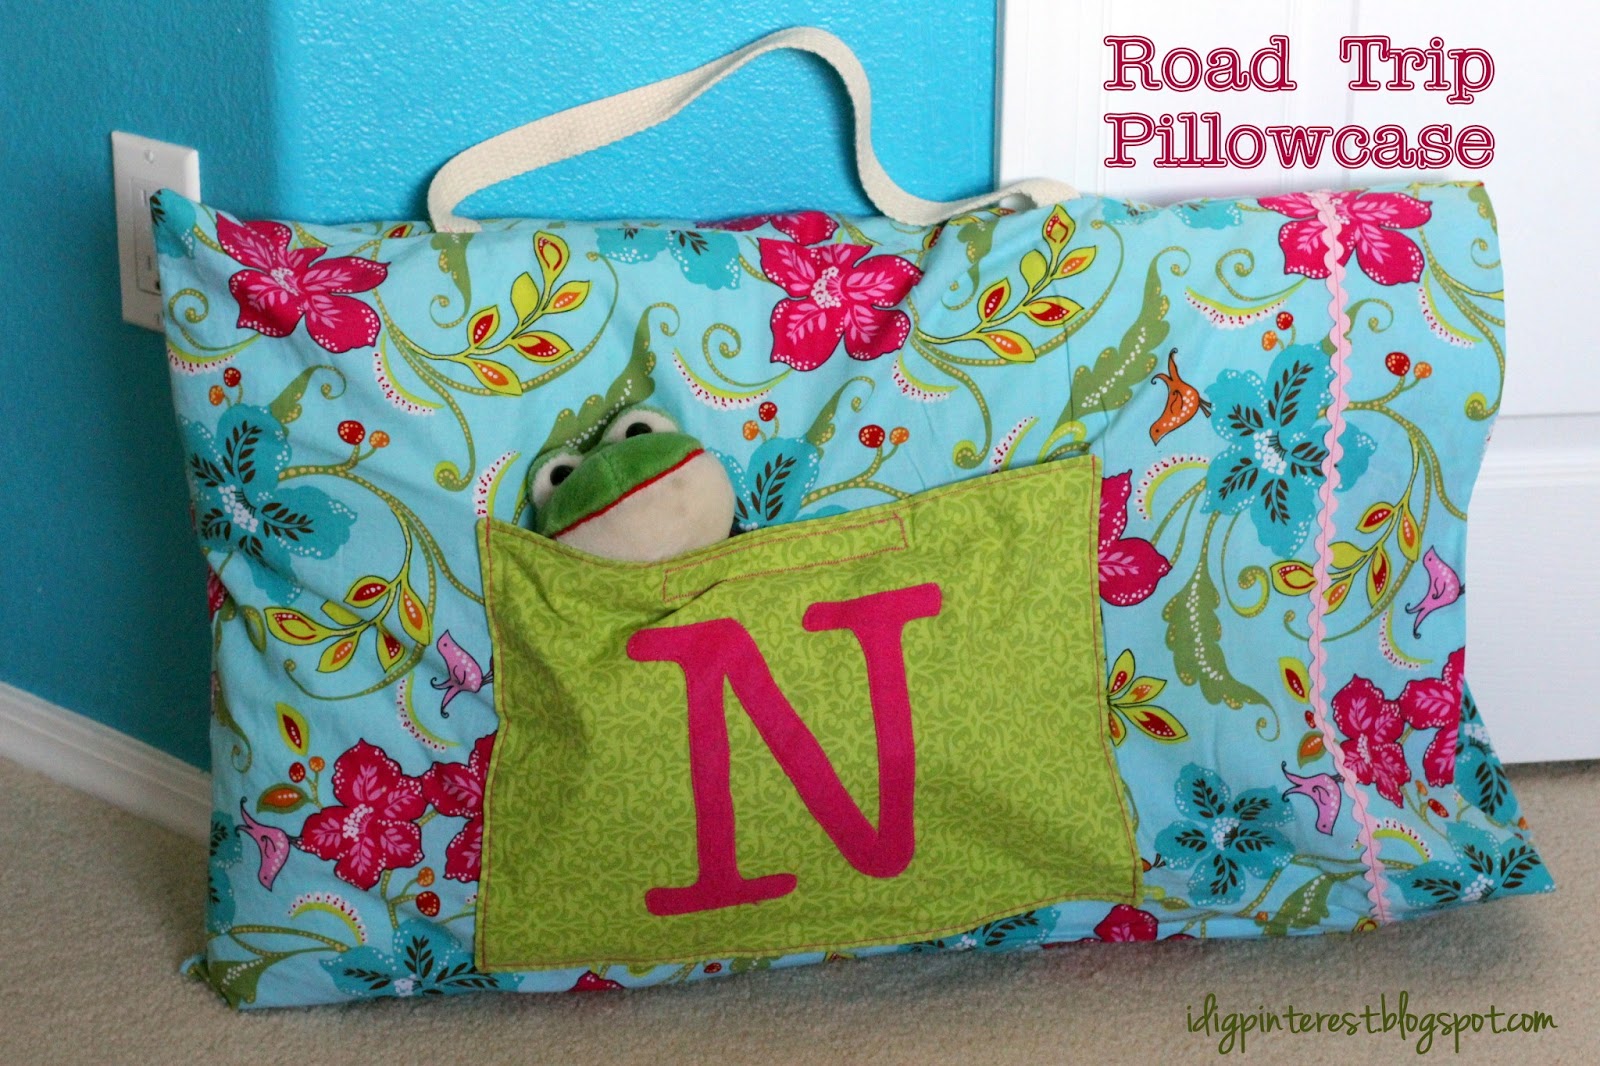
So I made the Road Trip Pillowcase.  I found the cute idea at Amazing Mae.

I took my daughter to the fabric store and let her choose the fabric.  She has great taste. 🙂  I love how summer-y the colors and patterns are.

Before hitting the road, we stuff the pocket with snacks, coloring and other books, crayons, small stuffed animals, mini games, and the tablet.  And when they’re tired, they can lean it up against the window and take a snooze.  What more could a child need?  🙂


They are super simple to make!  We all know that my sewing skills are very limited, after all.
{MATERIALS}
 
1 yard of fabric (42″ wide)
22 inches of cotton webbing (this is the stuff used for the strap)
2 – 16×12 pieces of fabric for the pocket
3″ piece of Velro
42″ of rick rack or ribbon
1 piece of craft felt (for the initial on front)
Wonder Under (you won’t need this if you attach the initial my way as stated below)
Template for initial (you can make it in a Word document)
Matching Thread
Find a very thorough set of directions, with illustrations HERE.  I honestly can’t explain it any better.  I followed them to a T.
The only part that I did differently was for the initial.  I cut out a big letter on plain paper with my Silhouette.  Then I traced it onto felt and cut it out.  Looking back, I probably could have just cut the felt letter out on my Silhouette and skipped the paper step.  Oh well.If you don’t have a Silhouette, you can just print a big letter from a Word Document and cut it out by hand.  It’s not too difficult at all.

Next, I centered the letter on the pocket, pinned it in place, then did a small zig-zag stitch around the very outer edge.
Isn’t it so fun?
Now I need to get busy making one for my son before we travel.
How do you keep your kids occupied for long road trips?Other great ideas for road trips:

Simple Travel Neck Pillow

Monster Busy Bags


Linked up at http://www.sumossweetstuff.com/ and Raising Memories

Filed Under: Sewing Projects, Uncategorized

Reader Interactions

Comments

  1. Diana - FreeStyleMama says

    May 16, 2013 at 12:59 pm

    Adorable idea!!
  2. Nancy says

    May 16, 2013 at 4:27 pm

    This turned out absolutely darling!! I love it!!!
  3. Jenn says

    May 17, 2013 at 3:00 am

    So cute! I will definitely have to try this, even as a non-crafty momma ;) Visiting from Family Fun Friday!
  4. Glamorous Mommy says

    May 18, 2013 at 3:47 pm

    This is absolutely ADORABLE!!! Thank you so much for sharing at this weeks Mom Connection!

    Fotini
  5. Leslie @ Violet Imperfection says

    May 19, 2013 at 5:19 pm

    That is adorable and a great idea.

    Thank you for linking up to Raising Imperfection!
    Make sure to check back on Friday to see if you were featured.
    Leslie
    www.violetimperfection.com
  6. Raising Reagan says

    May 19, 2013 at 6:58 pm

    I've seen these before and they are such a great idea. I should make some for the houseboat!

    Thank you for linking to Raising Imperfection.
    Please come back Friday to see if you were featured. :)

    ¤´¨)
    ¸.•*´
    (¸¤ Lanaya | xoxo
    www.raising-reagan.com
  7. Sarah Winchell says

    May 19, 2013 at 11:36 pm

    What Fun! I'm always looking for cute ideas for presents. I have a ton of fabric! I found you at One Sharendipity Place.
    Sarah
    I Dream of First Grade
  8. amy mayen says

    May 20, 2013 at 5:20 am

    This is adorable! Your daughter does have great taste! Thanks for the link to the tutorial :)
  9. Monica Pruett says

    May 21, 2013 at 9:35 pm

    I love this! Pinned it. Thanks for linking up at Family Fun Friday. Sincerely,
    Monica
    http://happyandblessedhome.com

Primary Sidebar

Hi! I'm Christine, and I'm addicted to Pinterest! I love sharing creative "pin"-spiration by way of delicious recipes, fun crafts, party ideas, and DIY projects. I hope you'll stop by often!

Follow by email…

Popular Posts

  • Chicken Noodle Bake
  • Chicken Fajita Casserole
  • Hamburger Corn Casserole
  • Creamy Summer Berry Salad
  • Built-In Linen Cabinets Update
  • Skillet Taco Pasta

Footer

Mom It Forward: Blogger Network
Privacy Policy

Copyright © 2022 I Dig Pinterest · Implemented by WPopt

MENU
  • Home
  • About Me
  • Advertise
  • Contact
  • Recipes
  • Crafts
  • Parties
  • Printables
  • Privacy Policy