This shop has been compensated by Collective Bias, Inc. and its advertiser. All opinions are mine alone. #CreateWithCommand #CollectiveBias
Bring a festive touch to the walls with this Shadow Box Trick-or-Treat collage! And don’t worry about damaging the pretty paint job for a seasonal decor statement because we’re going to hang it all with Command™ Brand products!

I have to admit that Halloween crafts are my favorite, especially when it comes to making DIY home decor. I have so many knick knacks displayed around the house on shelves and such right now, but my walls were looking a little forlorn. So I brought a little bit of spooky to them with these fun-filled shadow boxes that, together with some glittery wooden “OR” letters, spell out Trick-or-Treat! My kiddos are getting so anxious to don their costumes and head out in search of candy on the night of October 31st. I love taking them door-to-door in our old neighborhood in town, since we don’t really have a “community” of houses near our new home in the mountains. They always return with buckets filled to the brim with goodies. We’ve already got regulations in place to hopefully prevent them from eating it all in one sitting. 🙂
My oldest son’s going as the Mad Hatter. My oldest daughter will be sporting a peacock get-up. Daughter number two will be Rainbow Dash (from My Little Pony), and we’re going to dress my baby to look like a little adorable puppy dog, because that is his favorite animal sound. 🙂
We’ve got some fun activities planned before the month’s over. We like to celebrate this holiday to the max! So we’ll be hitting up the pumpkin patch in the coming weekend and then we’ll attend the kids’ school fall festival soon. Ahhh…I just love this time of year!
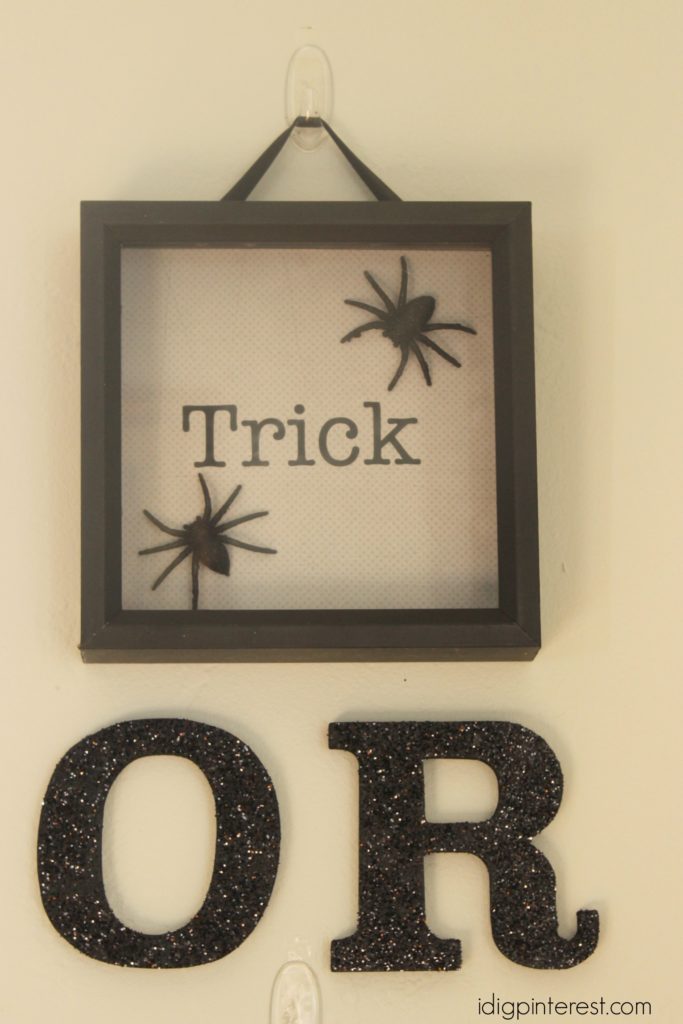

So, in honor of our family’s most favorite Halloween tradition, I made this “Trick-or-Treat” wall collage! I filled one box with sparkly fake spiders and the next with candy corns, because I think they’re about the cutest treat out there! 🙂 This may look like a more involved project, but it really did come together in no time at all. And hanging it was no sweat at all thanks to Command™ Brand Indoor products.
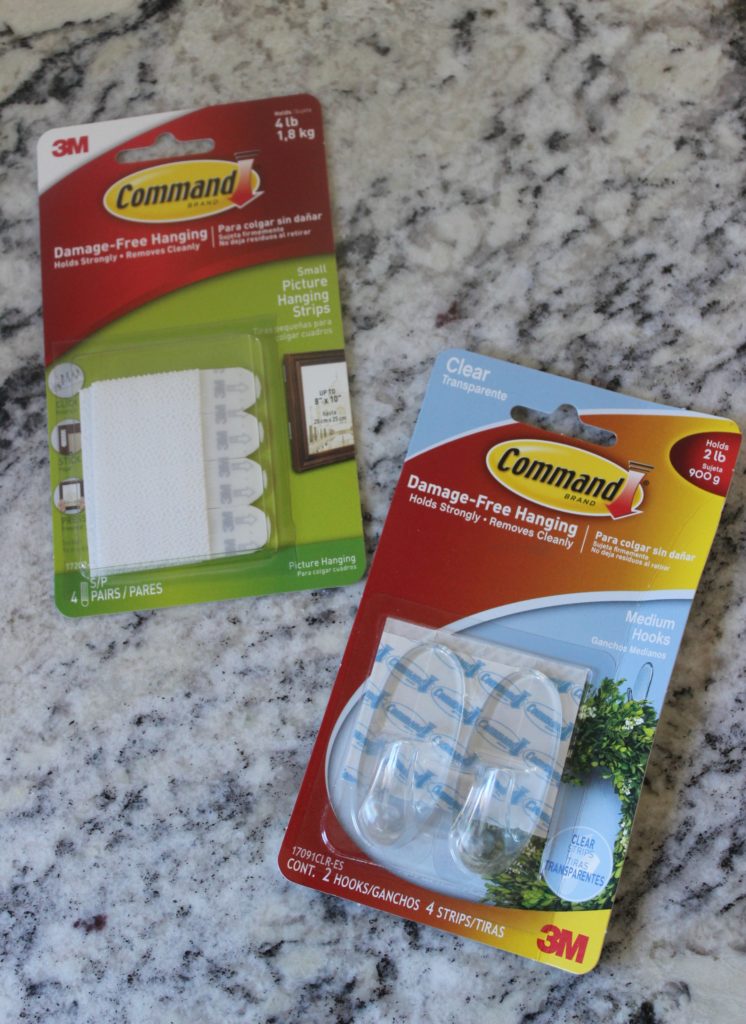
The weight limit on my clear Command hooks was 2 lbs, which was just right for my light shadow boxes. And the 4 lb. limit on the strips was more than enough for my wooden letters. Be sure to check the packaging for approved weight limits and surfaces before using.
I love that the Command strips and hooks are sturdy yet still temporary, so I can just remove the wall hanging and the evidence easily when Halloween’s over. Command™ Brand products remove cleanly with no sticky residue, marks, or holes left behind, making them the perfect tool for adding holiday decor to the home! I completely trusted them to keep my nice new dining room paint job looking top notch.
I really like how Command™ Clear Hooks are clear so my cute decor really shines without the focus being on how it’s hung.
Plus, I can move the Command hooks if I need to relocate the shadow boxes or take them down after the month’s end, and then hang them again next time using Command™ Clear Refill Strips. I was seriously amazed at how simple it was to hang these boxes and wooden letters! It literally took a minute! Here’s a quick how-to on using the products.

Command™ Brand products can easily be located at Target near the photo frames and hanging materials.
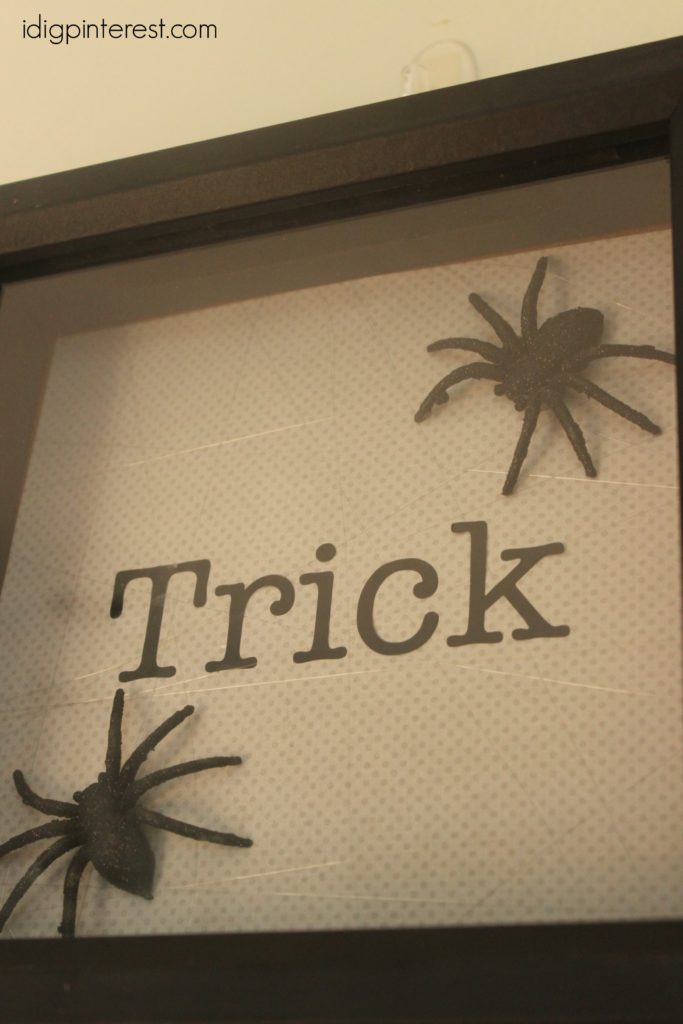
I added some subtle spiderwebs to the “Trick” box. They’re really only visible when the light shines on it a certain way or if you look at it from just the right angle. It’s a fun surprise on the eyes. 🙂
Here’s how to make today’s craft:
Supplies
black acrylic paint, sponge brush
black glitter
wooden O and R letters
two 8×8″ shadow boxes
two fake glittery black spiders
craft cutting machine and black adhesive vinyl
patterned scrapbook paper
candy corn
black ribbon and a hand staple gun
Water-based glue sealer
Fishing line
Command™ Clear Hooks and Strips
Hot Glue Gun

Paint the wooden letters black, allow them to dry, then give them a coat of water-based glue sealer. Sprinkle with glitter and tap to remove excess. Remove the slide-in portion of your shadow box and cover it with your patterned paper. I used double stick tape to hold it in place, but water-based glue sealer will work too. It doesn’t need to go all the way to the edges because a little rim of them won’t show. Wrap your fishing line around your shadow box insert, so it resembles a spider web, taping on the back to hold in place. Hot glue your fake spiders close to opposite corners.
 Use a craft cutter to cut out “Trick”, “Treat” and silhouettes of trick-or-treaters. My words were about 5 inches by 1 1/2 inches tall and I used the “American Typewriter” font. My trick-or-treater design measures 5 inches by 3″ tall. Apply the designs to the patterned paper. Fill one shadow box with candy corns so they’ll sit just below the trick-or-treaters. Replace the trick-or-treaters back insert and staple some ribbon to the back of the box for hanging. Replace the insert for the spider shadow box. Apply your Command™ Clear Hooks and Strips according to the directions on the packages. I used the Command strips for the wooden letters and the clear Command hooks for the shadow boxes.
Hang the boxes and letters and that’s it! Now stand back and admire. 🙂

I’m kind of obsessed with this new decor set and I know I’ll look forward to putting it up each year!
I hope you are enjoying this beautiful fall season and that you have a blast trick-or-treating with the kiddos!
Do you decorate your home for Halloween? I’d love to hear what your favorite decor pieces are in the comments section!


Comments