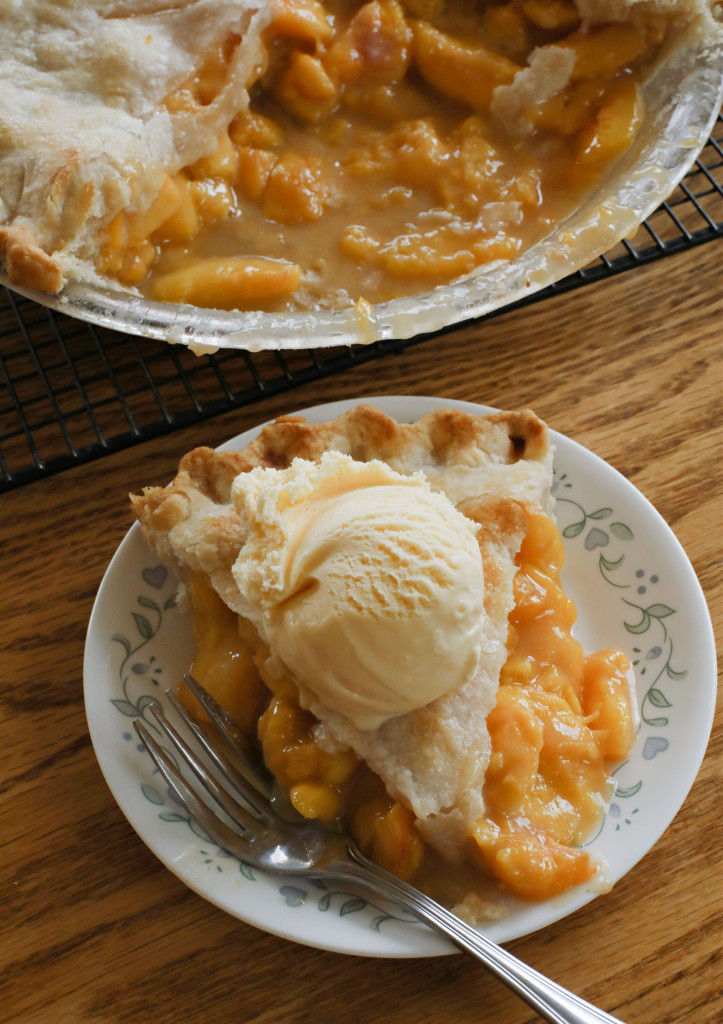
When the end of summer arrives and the peaches are ripe and ready, put together this Perfect Peach Pie! With a flaky crust and a sweet, slightly cinnamon-spiced peach filling, you’ll be licking your lips in delight!
We moved to another state this summer and one of the things we’re loving about our new home is that we have fruit trees on our property! We are so lucky to have an apricot, a pear and a peach tree growing right next to the home we are building. The pears will be ripe a little later, but for now, we have peaches that are just begging to be eaten before they fall off the tree!
Whenever I pass by the tree, I get bombarded by the most incredible yummy, sweet scent! Today, I couldn’t help but pick a bucketful-some to just enjoy and some to put into a fresh, delicious peach pie! The peaches were small this year because I didn’t arrive in time to my new home to thin them. I’ll be sure to do that next year, so we can have large, juicy peaches! Even though they’re small this time around, they are loaded with delicious flavor and taste so amazing in this pie!
I love all things peach! I grew up enjoying homemade peach syrup on my waffles with whipped cream. Now, every peach season I get the chance, I make Dutch Peach Pie Bars, Peach Crisp Bars, and Peach Cobbler. I’m always sad to see the summer end and the peaches go away. But, fall is amazing in its own way!

To make this pie, first prepare the crust, which is just a few simple ingredients: flour, shortening, salt and ice water. Don’t shy away from using shortening! It makes the crust so flaky-delicious! I promise you won’t regret it! Then, you’ll prepare the filling by stirring together your fresh, sliced peaches and a mixture of sugar, flour and cinnamon.
A few tips for making perfect peach pie:
Make sure to use ice water when making the crust. This will prevent the shortening from melting.
Peaches are very juicy, so to prevent them from making the crust soggy, add the peach slices to a colander in the sink while you’re removing the skin and slicing them, so the excess juices can drain.
Brush the crust with a little milk before baking and sprinkle it with granulated sugar for a perfectly golden crust! Don’t let the milk pool or puddle on the crust or it will be soggy.
Let the pie cool for about two hours before cutting into it, or the crust will fall apart.
Serve warm with vanilla ice cream and you will think you’ve died and gone to heaven!

Don’t be intimidated by making homemade pie crusts. It may take a little practice, but you’ll get it! Here’s a photo tutorial, along with instructions for making the perfect pie crust!
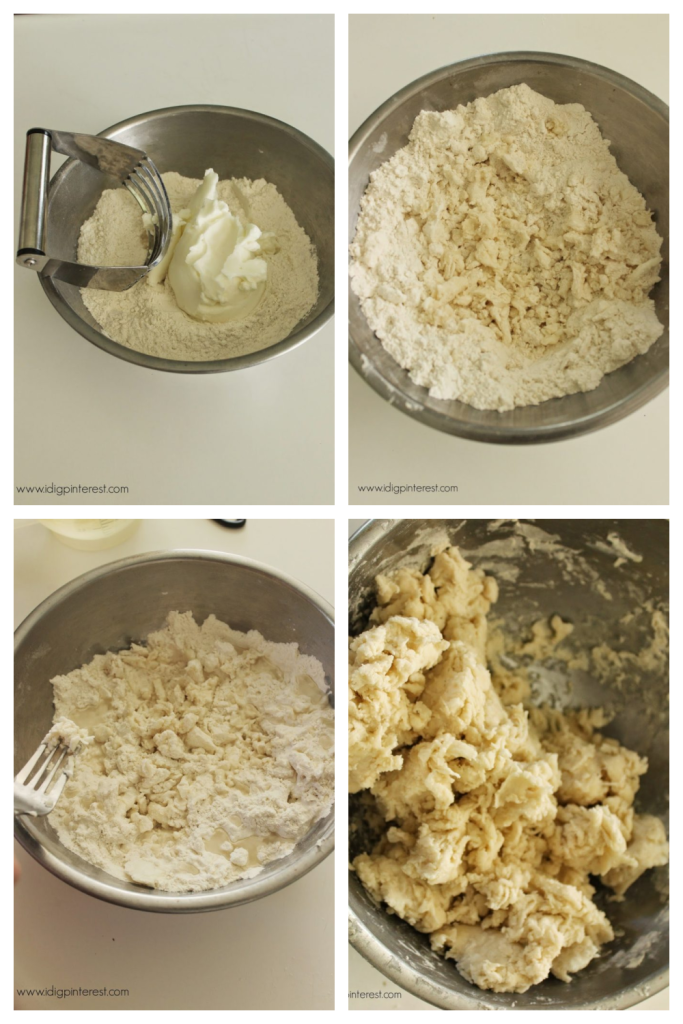
Stir flour and salt together. Add shortening on top.
Cut in shortening with a pastry blender or two knives until the mixture forms pea-sized pieces.
Add 3 Tbsp. ice water (ice water prevents the shortening from melting) and work into mixture with a fork, pushing aside the moistened portions.
Sprinkle ice water, 1 Tbsp. at a time on dry areas, and continue working moistened parts to the side until all the dough is moist. Be sure not to add too much water.
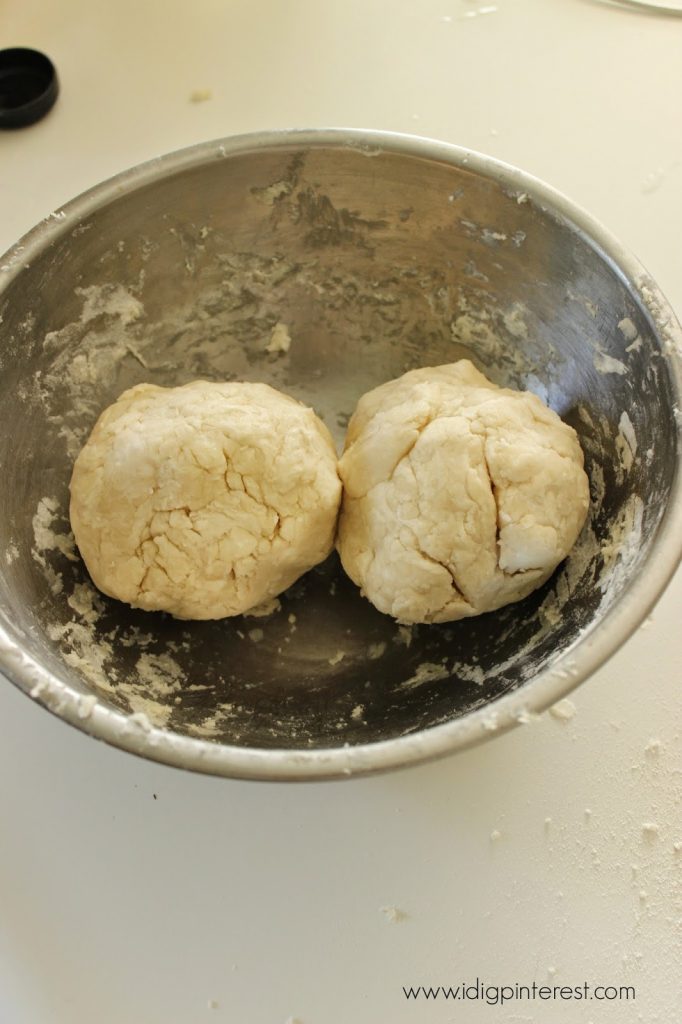
Divide dough into two equal portions and form into balls. You can use a scale for this or just eyeball it like we did.
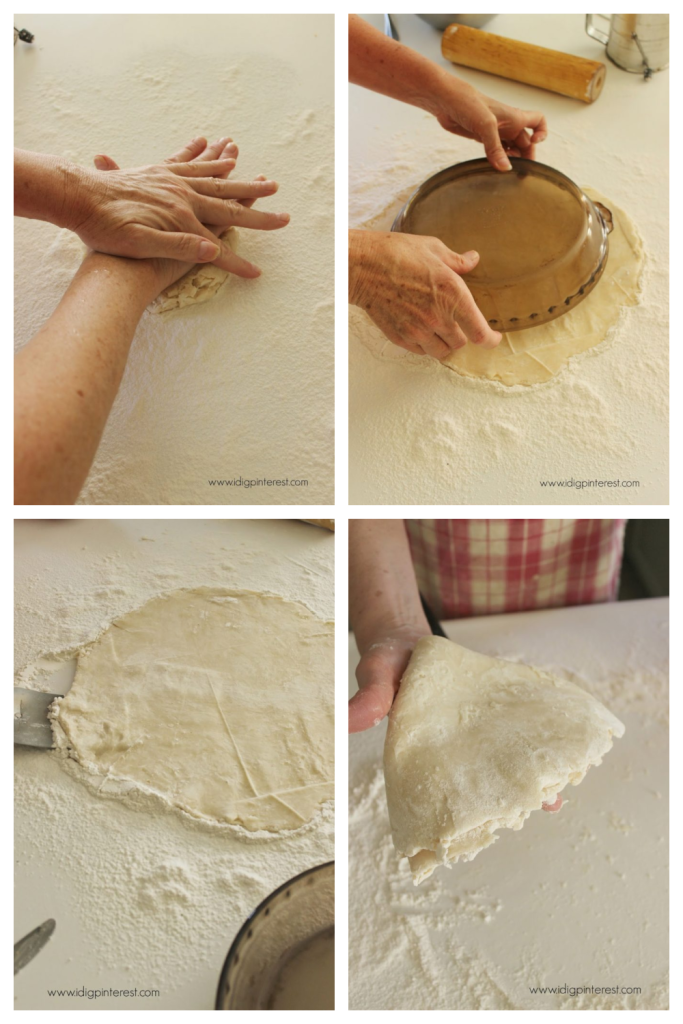
Press dough ball with the palm of your hand to flatten a bit.
Roll out on floured surface until about 2″ wider than your pie plate.
Scrape dough underneath with a metal spatula for a clean release from the countertop.
Fold dough in fourths to transfer easily to the pie plate.

Align dough so it overhangs by about 2″, then unfold.
Trim dough so it hangs over the pie plate by about 1″. If some areas are scant, grab a piece of trimmed dough and use a few dabs of ice water to “glue” it to the area.
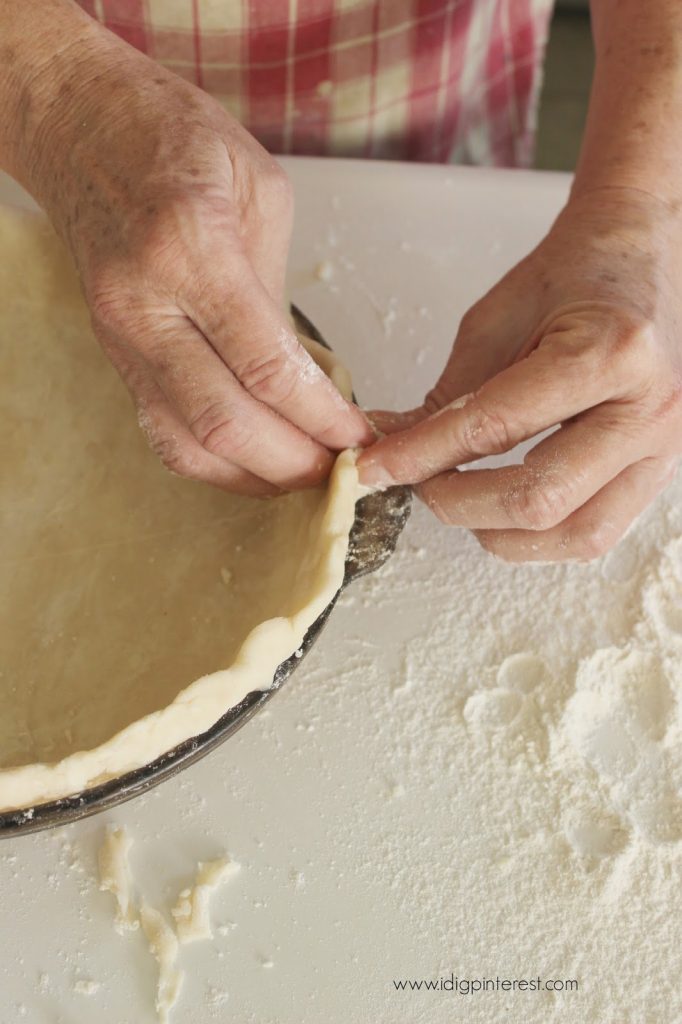
The photo above is for a single pie crust, but the technique is the same for a top and bottom crust. After you put the bottom crust in, don’t flute it, just tuck the crust back onto itself inside the pie plate.
Then add the filling, then roll the top crust out using the technique shown above. Next, add the top crust to the pie using the technique shown above and unfold it. Then make sure it overhangs by a little bit and tuck the top crust under the bottom crust inside the pie plate and flute it using the technique shown above and described below.
Flute the edges using two of your fingers as support on one hand and your index finger on the other hand to press the dough between your fingers. Be sure to press down so the dough will be right up against the pie plate. This will prevent shrinking.
Cut four slits in the top of the crust with a sharp knife to allow ventilation. Brush the top crust with a little milk (don’t let it pool or puddle), then sprinkle the crust with granulated sugar.
Christine of I Dig Pinterest, adapted from the Betty Crocker Cookbook
Yields Makes one 9" pie

Ingredients
- Two pie crusts (recipe above in this blog post)
- Filling:
- 5 c. sliced fresh peaches (heaping a little)
- 1 c. sugar
- 1/3 c. all-purpose flour
- 1/4 tsp. ground cinnamon
- 1/8 tsp. salt
Instructions
- Heat oven to 400 degrees Fahrenheit.
- Prepare the pie crusts, as instructed in blog post above.
- Mix sugar, flour, cinnamon and salt.
- Pour mixture over peaches and carefully stir in, so as not to break up or mash the peaches.
- Pour into pastry-lined pie plate.
- Cover with top crust, cut four slits with a sharp knife.
- Seal and flute the crust (photos above in blog post).
- Brush lightly and carefully with milk (don't let it puddle or pool anywhere on the crust)
- Sprinkle the crust with granulated sugar
- Bake until crust is golden brown and juice begins to bubble through the slits in the crust. About 35-40 minutes. Set the timer for 30 minutes and check it. Then add more time as necessary, a few minutes at a time. Don't let the crust get too brown!
- Allow the pie to cool on a cooling rack for two hours before slicing, or the crust will break apart.
- Serve with vanilla ice cream, if desired.
Notes
*Tip: put the sliced peaches in a colander in the sink while you're skinning and slicing them to remove excess juices. Read blog post for additional tips.

Enjoy!
For all other pie recipes go HERE. And for all other dessert recipes, go HERE.
 Save Recipe

