• Skip to primary navigation
  • Skip to main content
  • Skip to primary sidebar
  • Skip to footer
  • Home
  • About Me
  • Advertise
  • Contact

I Dig Pinterest

Creative "Pin"-spiration

  • Bloglovin
  • Email
  • Facebook
  • Instagram
  • Pinterest
  • RSS
  • Twitter
  • Recipes
  • Crafts
  • Parties
  • Printables
  • Home Improvement
  • Shop My Style

October 11, 2013

DIY Halloween Photo Collage Wall

Right now my house is one big bubble of Halloween excitement that’s about to burst, and we’ve still got a while to go before the spooky day!  Are your kiddos feeling it too?  Mine are literally bouncing off walls.  🙂 I think my kids have finally decided what they’ll dress up as, although that could change tomorrow.
I mentioned last week that my Halloween decor is all up, but I wanted to add one more thing this year to “ice the cake”.   As I’ve said many times before, I love plastering my house with photos of my family.  So I decided to swap out my everyday photo collage in my entryway and replace it with a super fun and festive Halloween Photo Collage Wall.
What do you think?
Nations Photo Lab played a huge part in this fun Halloween project.  My family has always ordered all our photo prints and enlargements, canvases, etc. through them because they’re amazing!  Their prices are fantastic and we’ve received nothing but quality results from them.   Their ROES software can take some getting used to, but is well worth the effort when the great products arrive at your door.  Their operators on “live chat” are always so helpful, also, if there are ever any questions.
I was intrigued by the metal prints, metallic photo prints and linen textured photo prints on their site. So I reached out to them and they kindly allowed me to give them a go.  This was a surprisingly simple project and I absolutely LOVE how it turned out!  The variety of photo shapes, materials and sizes give the collage wall a huge appeal.
I used a combination of Command Strips and nails to display the photos.  Command Strips are wonderful if you have nice paint that they will attach to.  I however, do not. 🙂  So I used the strips on the smaller, lighter items and then nails for the two framed photos.
So are you “dying” to make your own now (hehe, pardon my cheesy Halloween pun)?  It’s easy!  Let’s take it step-by-step.


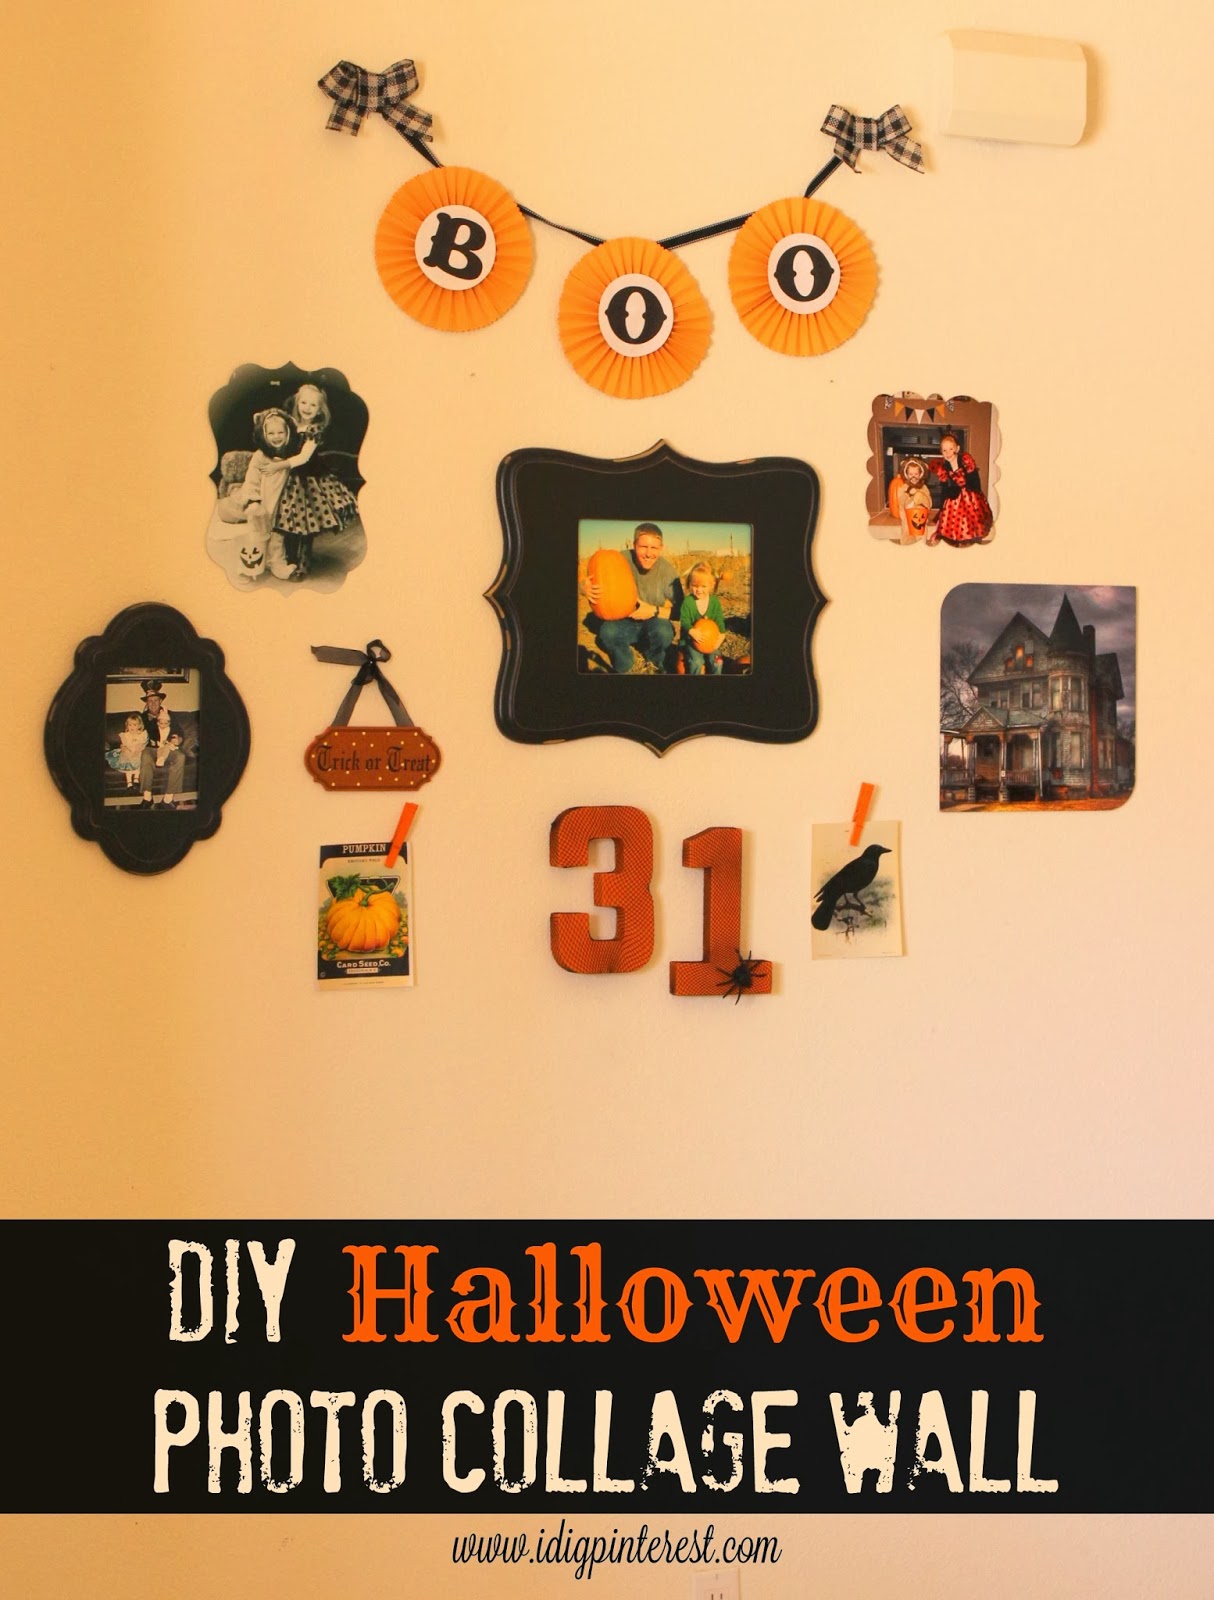
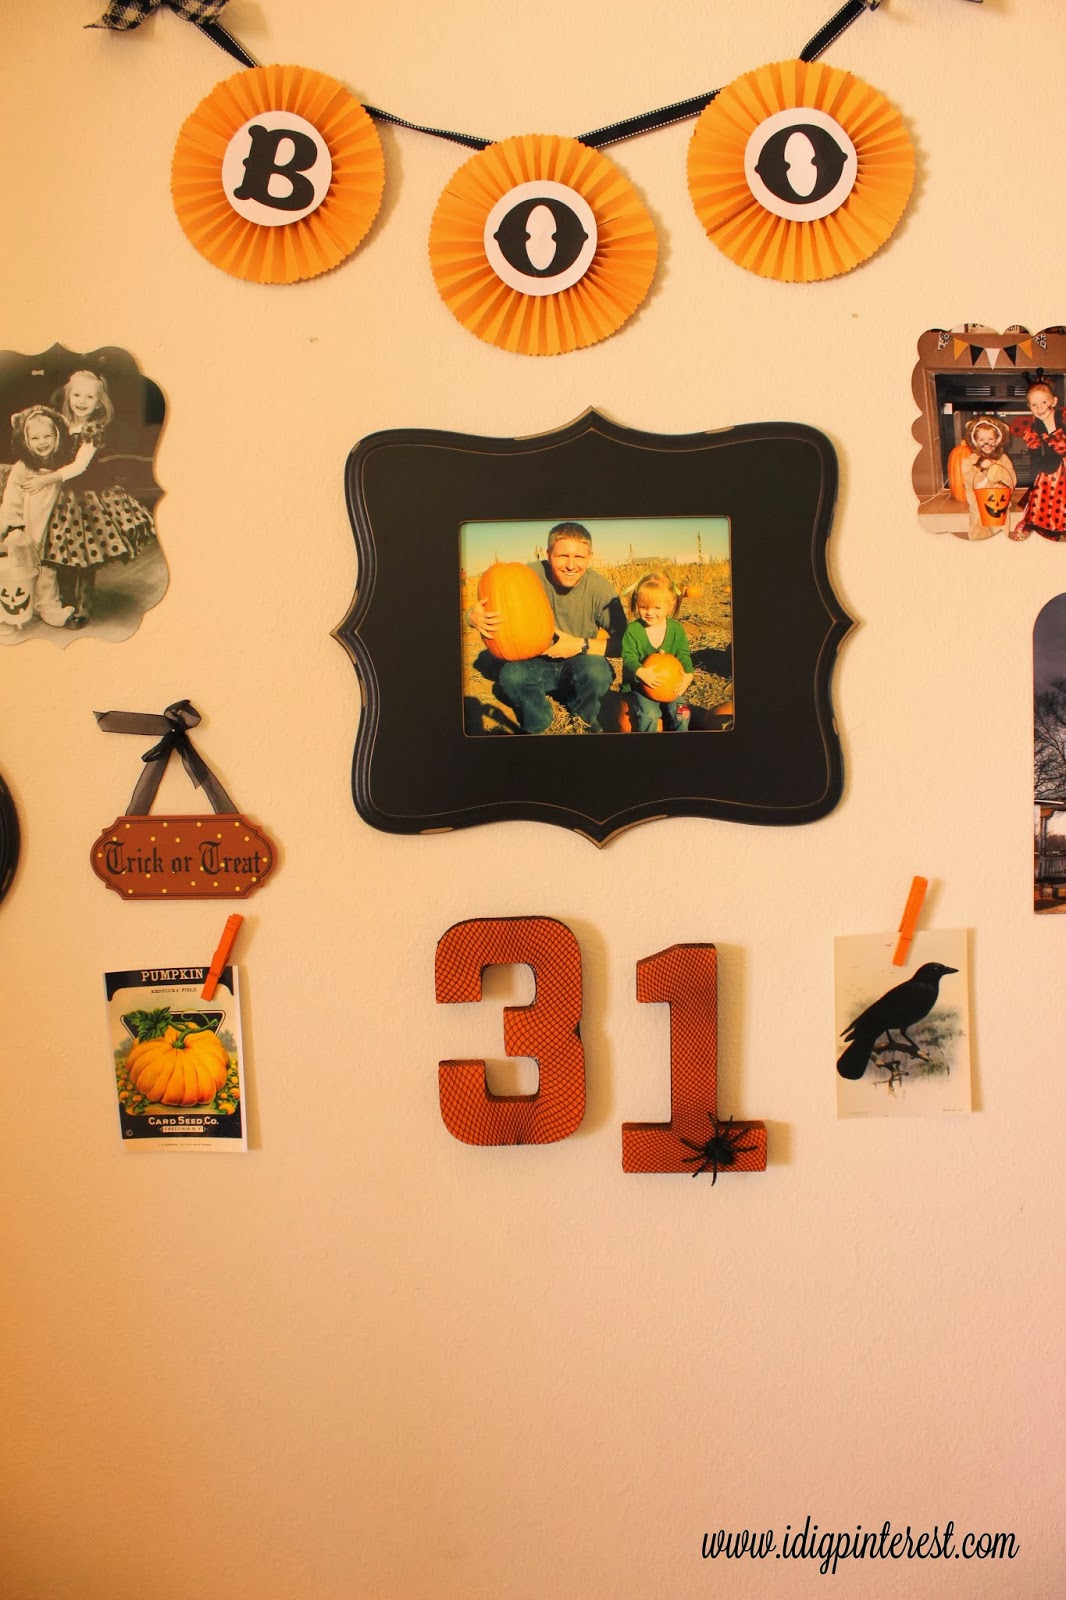
For any photo collage wall, it’s best to have the largest frame or photo be your center focal point, unless you’re going for an off-balanced look.

For my center point, I ordered an 8×10 metallic photo print from a few years back of my husband and daughter at the pumpkin patch and chose a black ornate sweet frame to show it off.  I just love the distressed look!  The “Sweet Frames” from Nations Photo Lab are heavy duty, quality frames.  I was having trouble getting my Command Strips to stick to our cheapy paint and a frame fell off the wall onto the tile.  To my complete astonishment, it was unscathed!

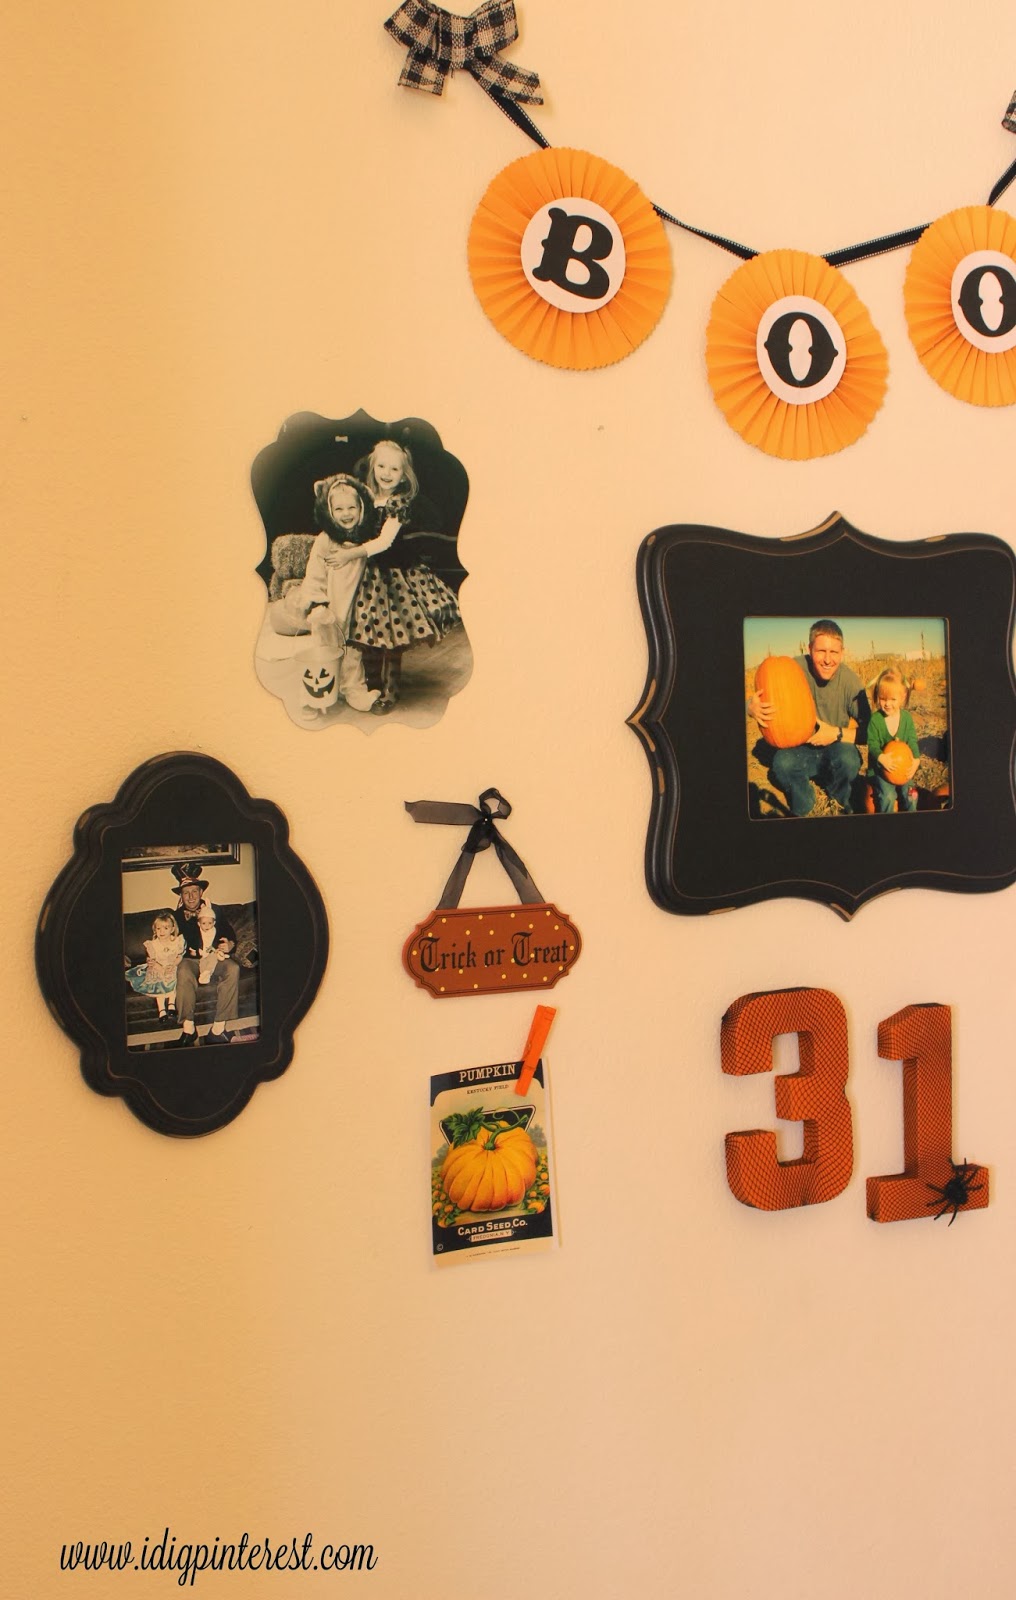
The “BOO” banner consists of 3 Cardstock medallions that I made last year.  (Find a simple tutorial on how to make decorative paper medallions HERE.) Then I made the letters in a word document, print, cut a circle around, then glued to the centers of the medallions. I glued each medallion to a segment of black ribbon and pinned to the wall with burlap bows to cover the ends.

 Nations Photo Lab‘s metal prints are one-of-a-kind, incredible-looking.  I found a cute black and white photo of my kids in costume from last year and had it printed on metal in a fun shape (as seen on top).  Yes-the photo is actually printed on metal…so cool!

We had an Alice in Wonderland family costume theme a few years ago, and I was sure to snap a picture of the kids with their dad, the “Mad Hatter”.  I edited the photo in Pic Monkey to give it an antique look, ordered a metallic print of it, and displayed the photo in a cloud-shaped “sweet frame”.

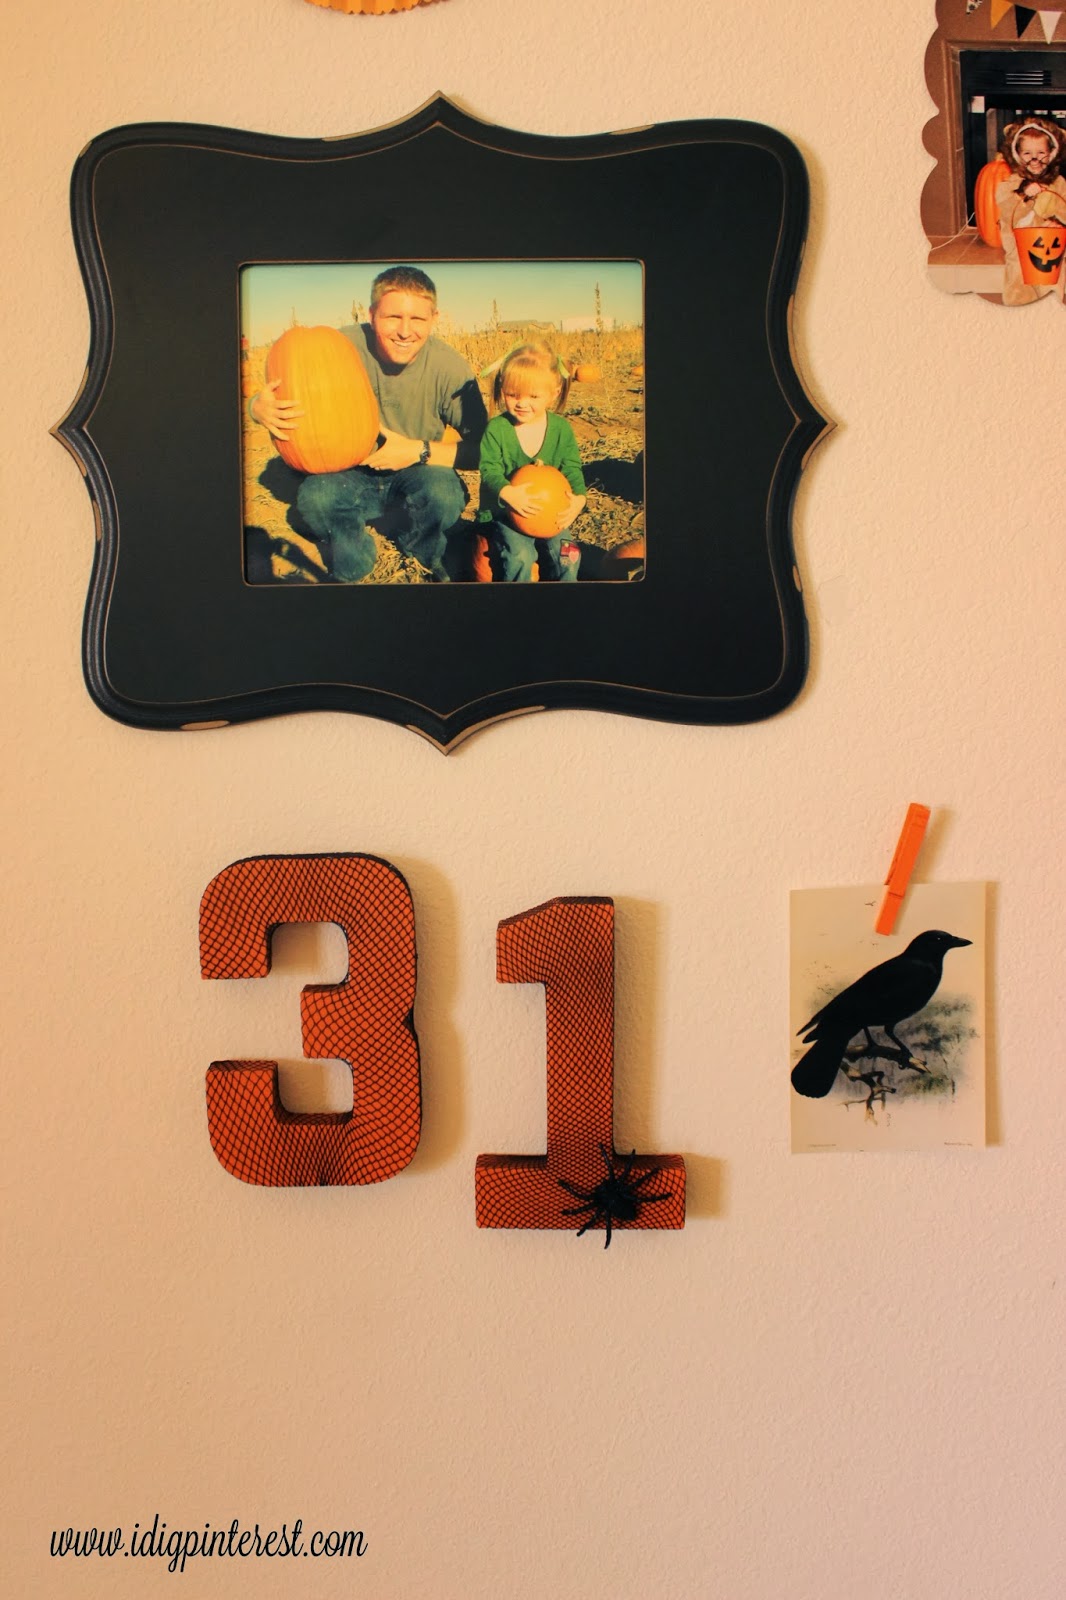
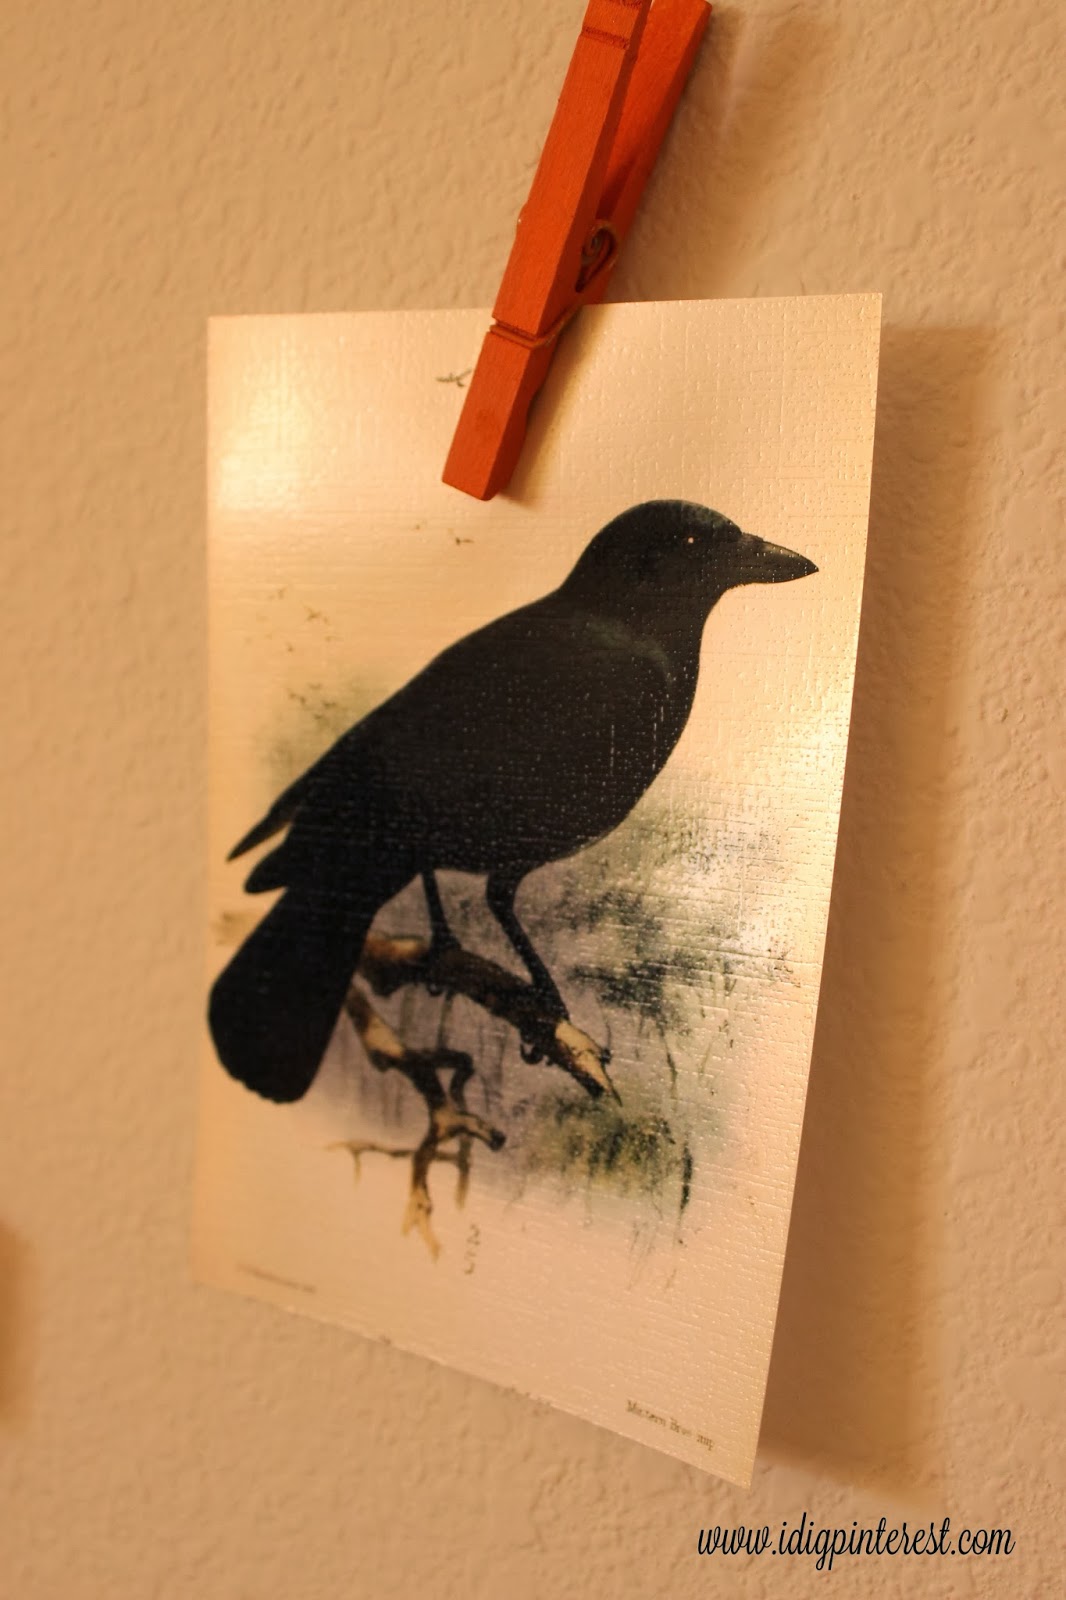
The crow photo was a free image that I found online, had printed in linen texture, and then displayed with a painted wooden clothespin that I attached to the wall with a Command Strip.

You can see the linen texture detail in this photo.


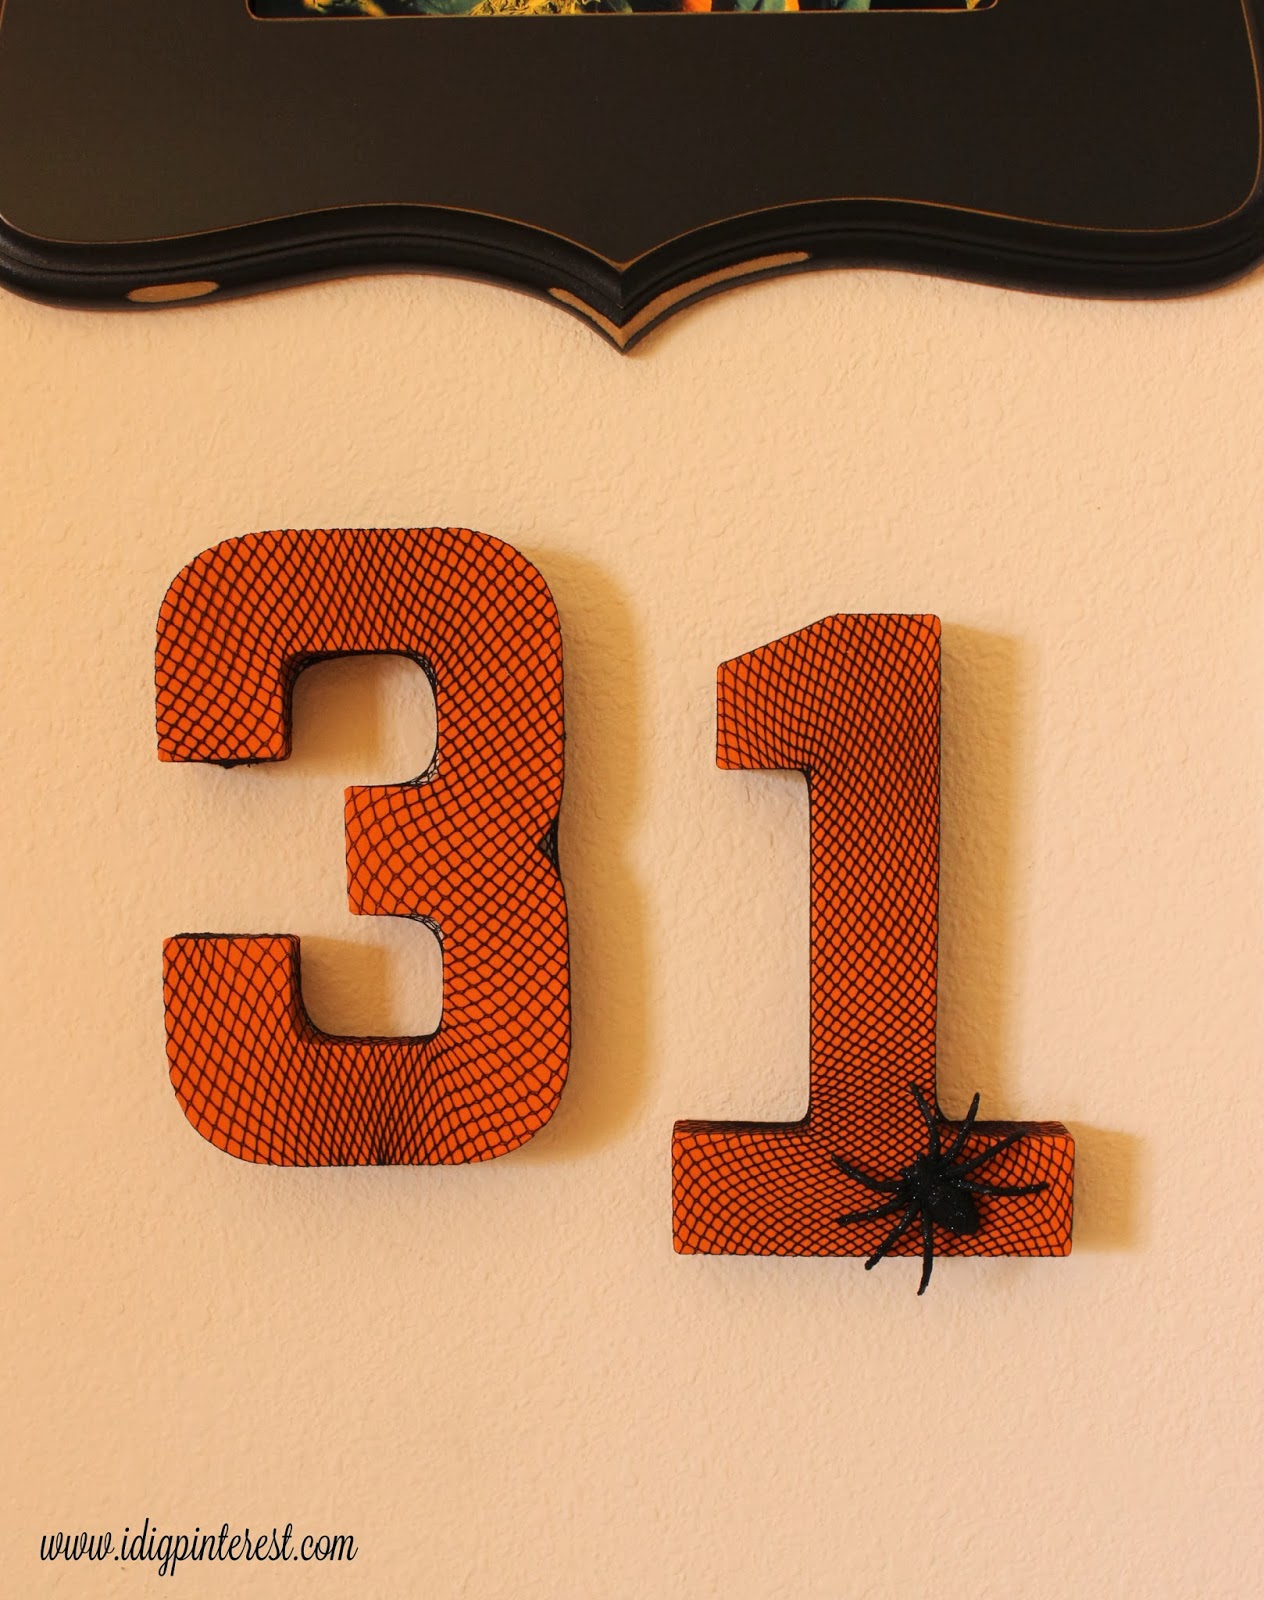
I love that the number of any special date/holiday can become a fun decor piece.  I purchased the decoupage numbers at Hobby Lobby, painted them with “Spiced Pumpkin” craft paint from Americana.  After they were completely dry, I grabbed a pair of old netted tights, cut them to size, simply wrapped them tightly around the numbers and hot glued in the back. To finish it off, I hot glued on a sparkly plastic spider that I found at Walmart.

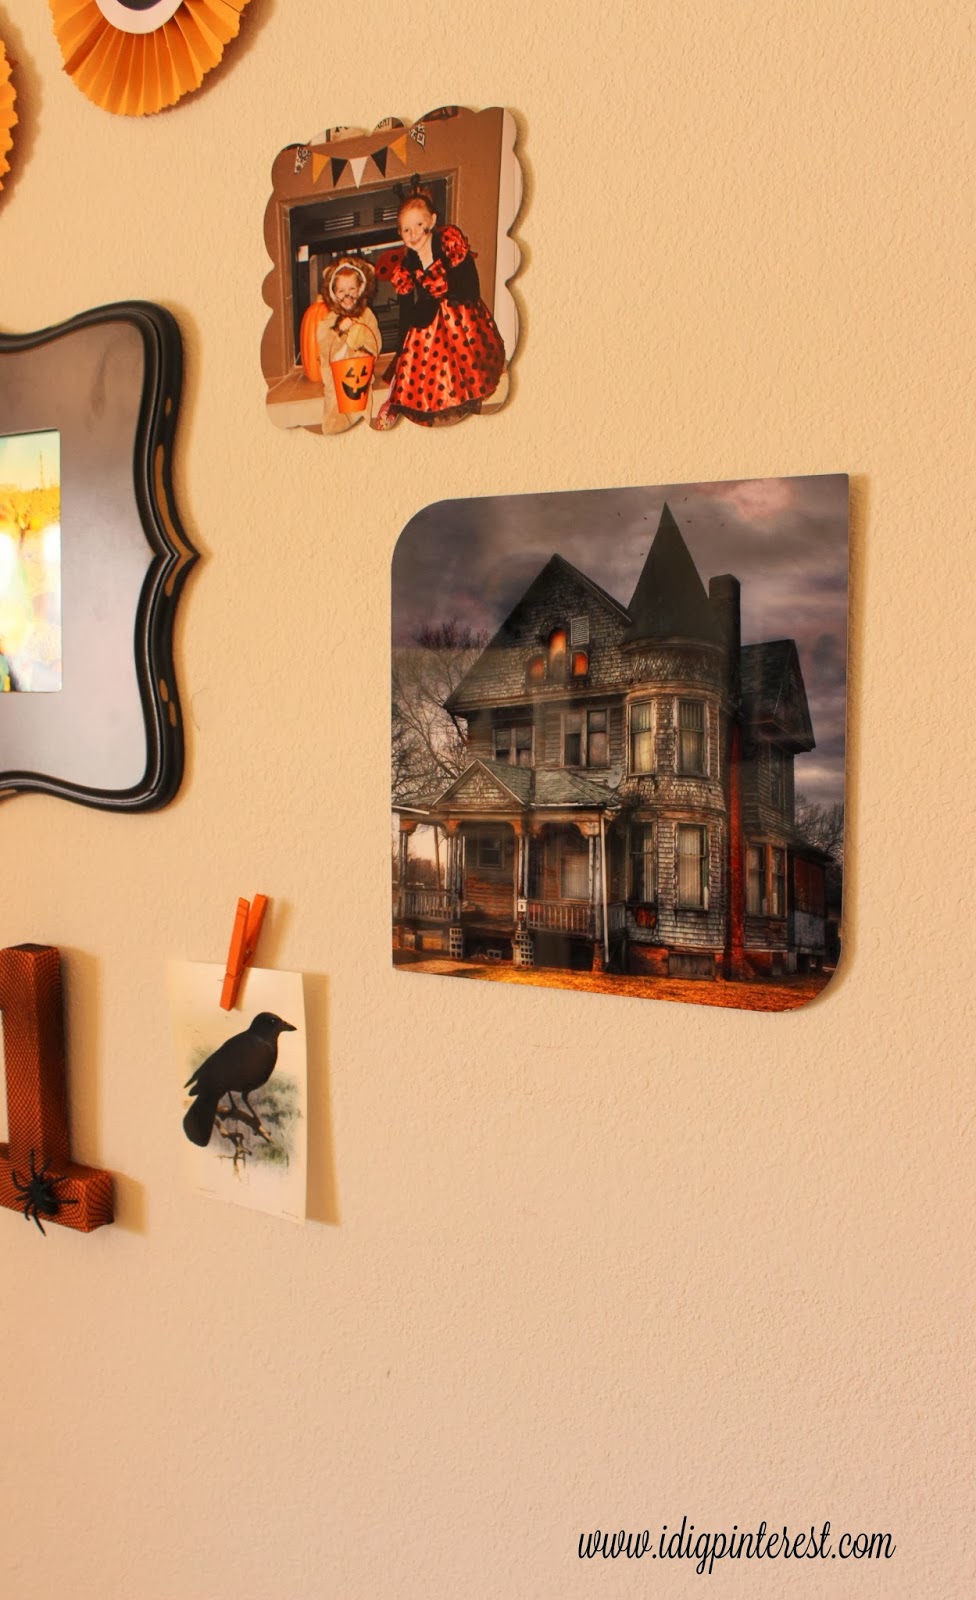
The haunted house is one of my most favorite elements in this collage.  It’s a perfectly spooky addition.  I want to take a tour, don’t you? I found the free image online (it’s a real house, by the way!) and had it printed on metal in a fun shape (there are four great shape options).

The colored photo of my kids in costume on top is, once again, printed on metal.

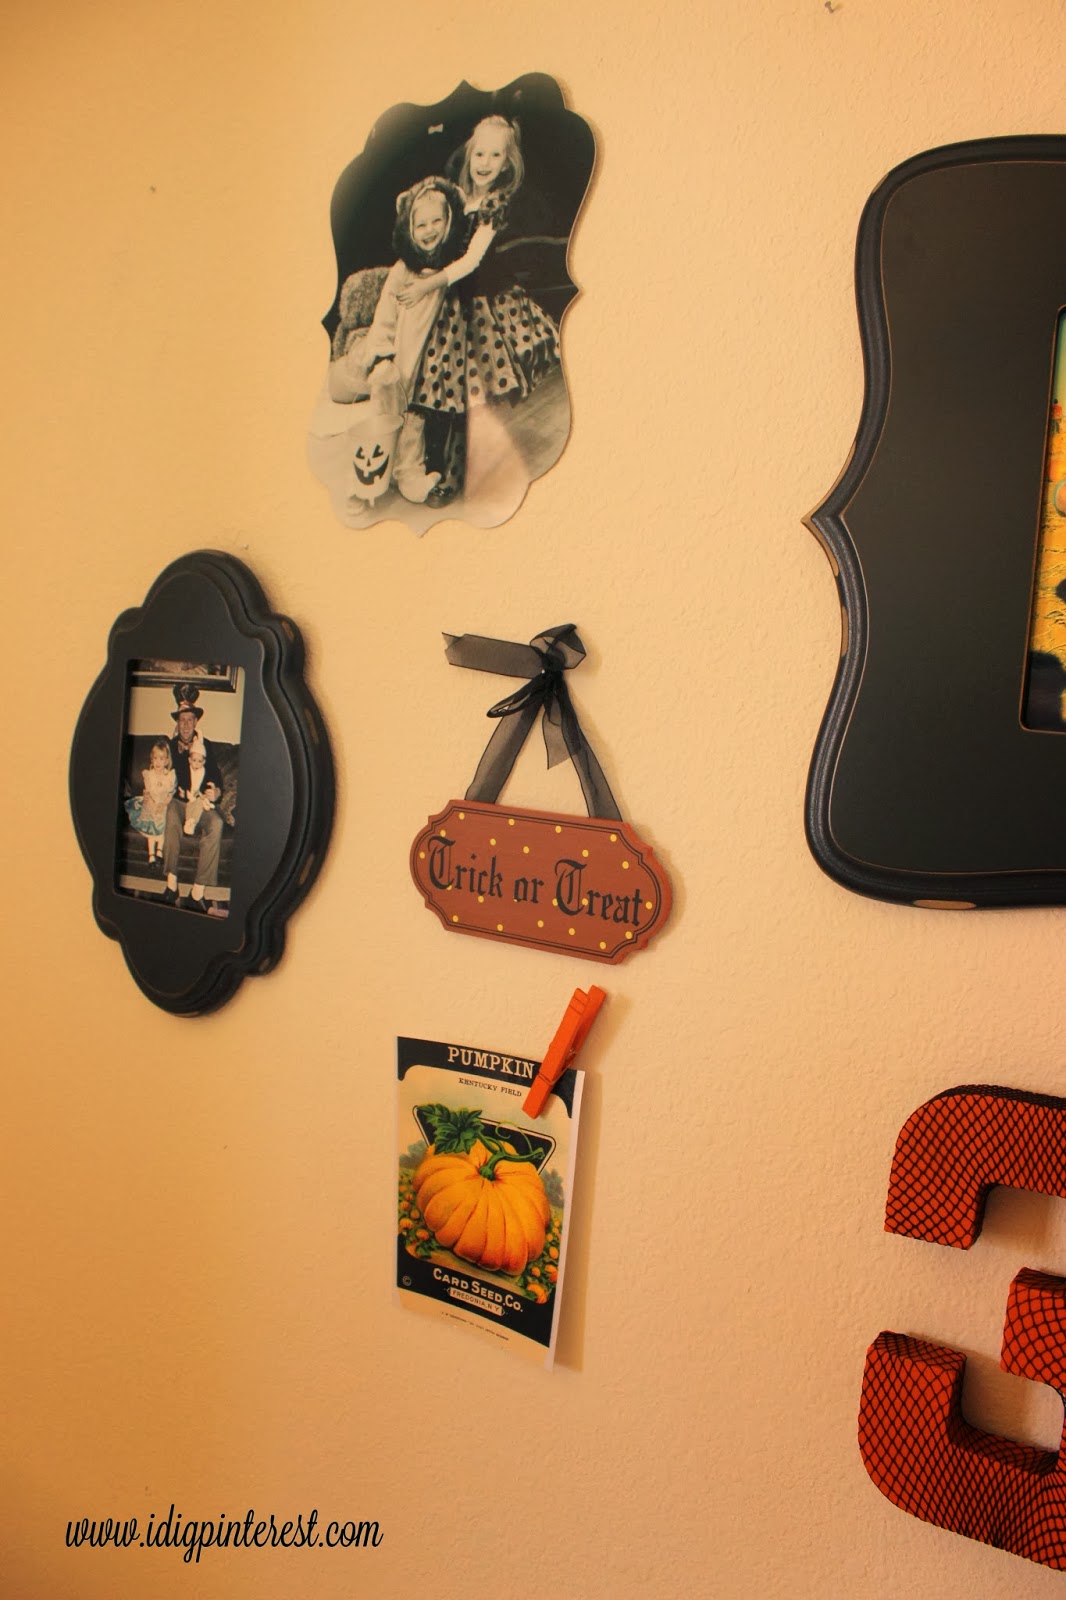
The mini trick-or-treat plaque was a gift and the “Pumpkin Card Seed Co.” sign was a free image that I found online and had printed with linen texture.

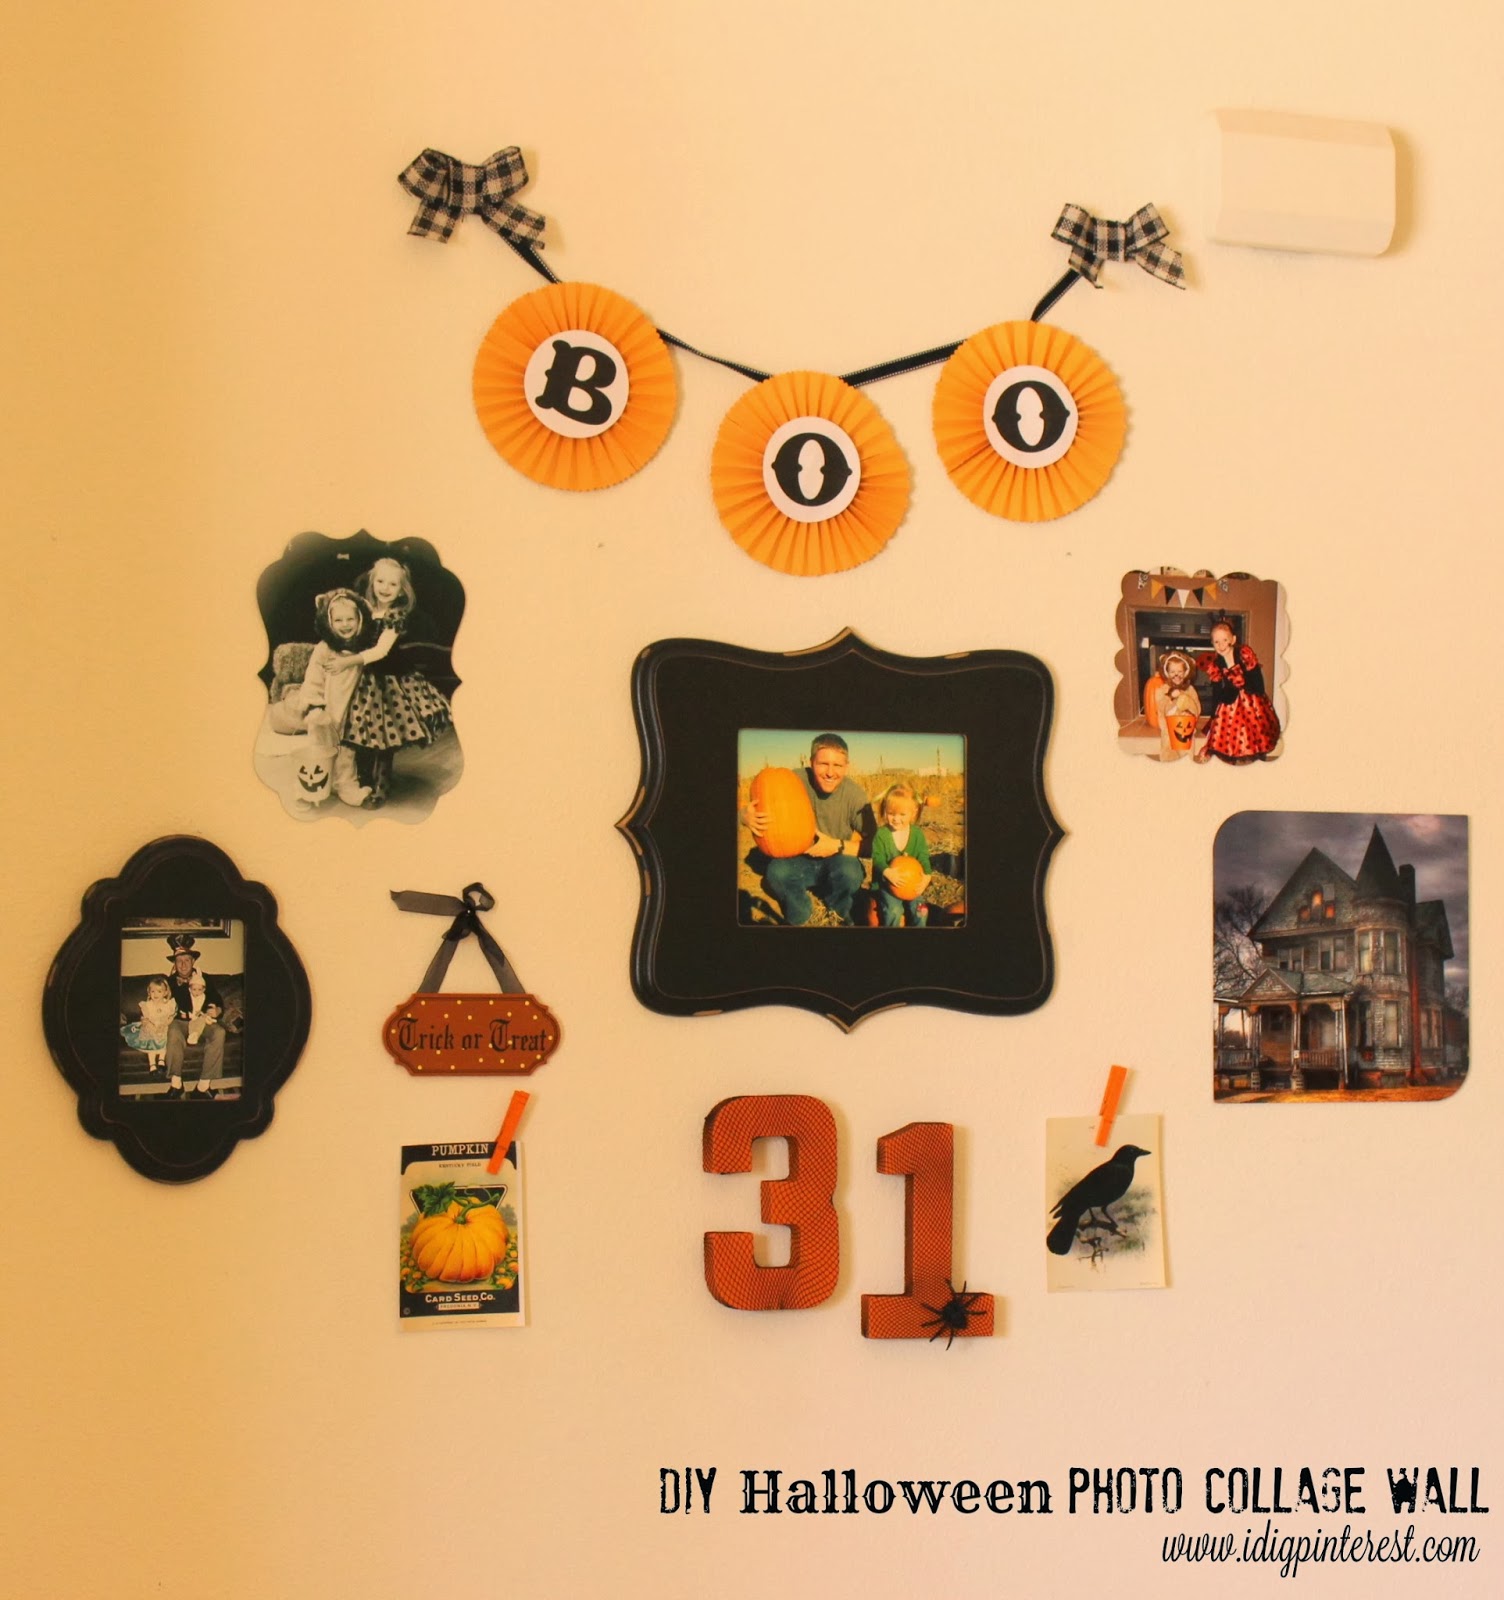
To assemble, I first laid all the elements out on the floor how I liked them in a section as large as I would have on my wall.  Then I put each piece up, beginning in the center and working outwards.  Easy peasy!  I chose to arrange the pieces in a kind of scattered, asymmetrical look around the center pumpkin photo for more of a Halloween feel.

I think that covers it all!  Whether it involves a collage wall, personalized calendar, memory album, or simply a framed family picture, Nations Photo Lab can help with your next project plans!

Enter code “DIGPRINTS” at checkout for 30% off all prints (including the amazing metal prints as shown above) through November 1, 2013!  Use the code as many times as you like!  The code must be used through the ROES software in order for it to apply correctly.

Disclosure:  This is not a sponsored post, but I did receive free product from Nations Photo Lab for review purposes.  As always, all opinions are 100 % my own.

post signature

Filed Under: Halloween Extravaganza, Nations Photo Lab, Promotions, Uncategorized

Reader Interactions

Comments

  1. Chad and Catherine says

    October 11, 2013 at 7:02 pm

    I didn't know they did metal and linen prints. Those are awesome! I love your collage wall; it is so cute!
  2. Jean Poylini says

    October 19, 2013 at 11:30 am

    Your post it's very interesting and very creative, thanks for hosting. Does any of you have ever heard about www.elcoplanet.com or maybe use their web hosting service ? Because I nee web hosting for my page. Thanks

Primary Sidebar

Hi! I'm Christine, and I'm addicted to Pinterest! I love sharing creative "pin"-spiration by way of delicious recipes, fun crafts, party ideas, and DIY projects. I hope you'll stop by often!

Follow by email…

Popular Posts

  • Chicken Noodle Bake
  • Hamburger Corn Casserole
  • The Best Apple Pie
  • Halloween Oreo Brownie Bars
  • Chicken Fajita Casserole
  • Sweet Onion & Sausage Stromboli: A Simple Meal Solution

Footer

Mom It Forward: Blogger Network
Privacy Policy

Copyright © 2023 I Dig Pinterest · Implemented by WPopt

MENU
  • Home
  • About Me
  • Advertise
  • Contact
  • Recipes
  • Crafts
  • Parties
  • Printables
  • Privacy Policy